


🔧 Upgrade your washer’s heartbeat — DIY like a pro, save big, and silence the spin cycle!
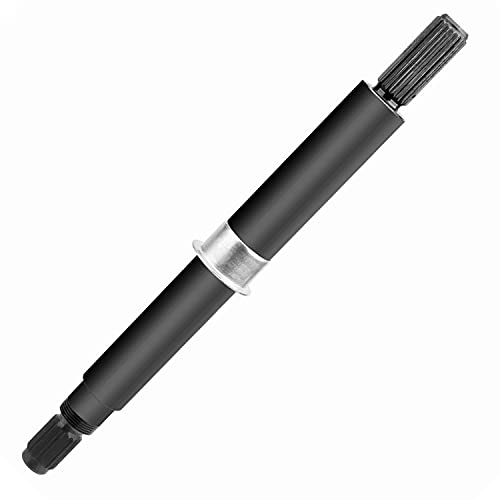
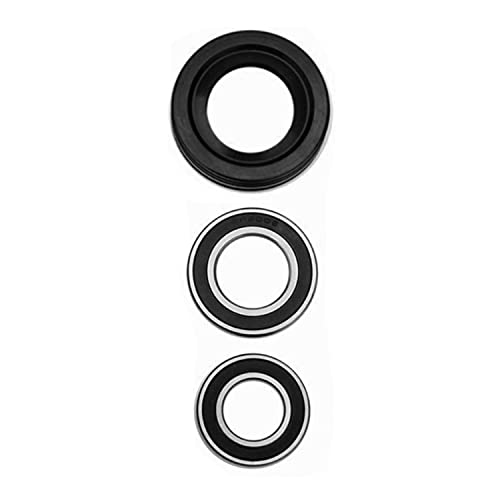
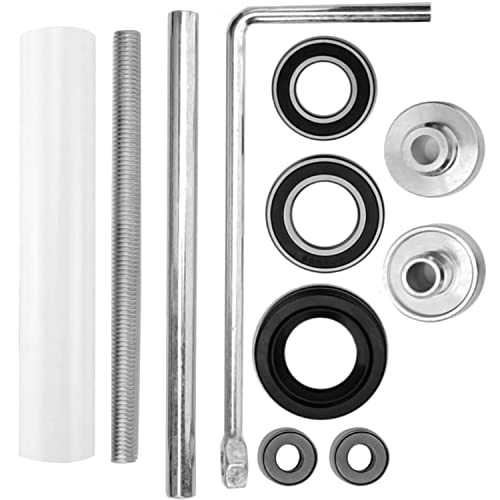
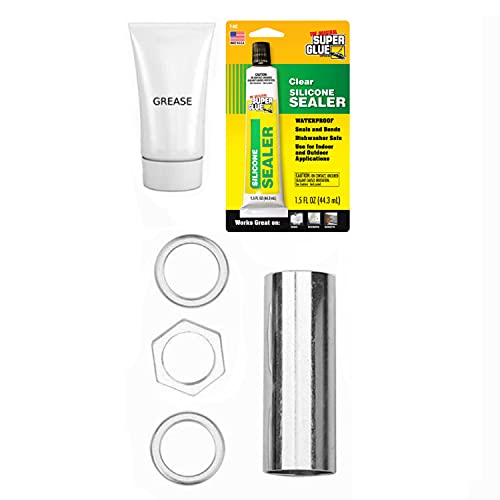
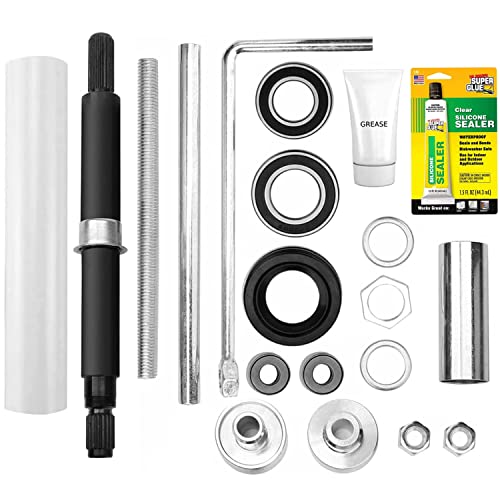
The OCTOPUS 19-piece Washer Bearings, Shaft & Tool Kit is a robust, precision-engineered replacement set compatible with most front-load washers. Featuring double-sided rubber wall bearings with metal spacers and a perfectly sized 13.45" shaft, this kit is designed to outlast original parts. Backed by a 30-day money-back guarantee and 90-day warranty, it empowers savvy homeowners to extend their washer’s life with confidence and professional-grade durability.


| ASIN | B07RGY33TN |
| Batteries Included? | No |
| Batteries Required? | No |
| Best Sellers Rank | #157,255 in Tools & Home Improvement ( See Top 100 in Tools & Home Improvement ) #2,835 in Dryer Replacement Parts |
| Customer Reviews | 3.9 3.9 out of 5 stars (541) |
| Date First Available | May 8, 2019 |
| Item Weight | 8.67 pounds |
| Item model number | 639072219982 |
| Manufacturer | OCTOPUS |
| Package Dimensions | 14.37 x 4.61 x 4.49 inches |
| Part Number | 639072219982 |
J**F
Good install instructions, working great so far
Link to instructions was spot-on. Factory bearing lasted 15 years, been noisy for way too long, probably a year or so. Finally got to the point it wouldn't finish the spin cycle. Decided it was time. Didnt have the jack/wood handy and the shaft was pretty stuck in there. Lifted with a helper and beat it down with a hammer. Hopefully this out lasts the rest of the machine. Took about 2 hours with multiple trips to the garage for tools since i didn't take the time to read the video description (hint)
B**E
Excellent Kit
This worked exactly like it was supposed to. Saved us from purchasing a new washer. Ours was leaking from the middle of the rotor. I am a 40 year old woman and installed this on my own while my husband was at work. The only reason I gave it a 4-star on easy to install is because of how many times you have to lay the machine down and then stand it back up. The instructions and the YouTube video (link shared in product description) are great. The only thing they were unclear on was which way the spring in the rubber washer should go; up towards the washer lid or down toward the floor. I installed it pointing down towards the floor based on a few searches. If I had to do this again I would probably strap the washer to a two wheel dolly and use it to lay it down and then stand it back up. Since you have to open and close the lid each time, I would strap it from the side and lay it down on the dolly from the side. It was bit challenging to get low enough to remove the rotor and swing the hammer to knock out the shaft. I used my husband's rolling mechanics chair to organize the tools needed and keep me from sitting on the floor. The machine runs perfectly and quieter than before without any leaks!
M**D
No Thrust Bearing Included, and it WILL Cost you Time & Effort
Apologies for being lengthy here, but you need to know this before you consider buying this kit: From what I see of other kits like this and the you,tube videos on this repair, this one does not include a thrust bearing for the press tool assembly. Even though a thrust bearing is shown on the instructions in the press tool diagram (see attached photo), it is actually substituted with a fender washer, and I am not talking about the bottom bearing washer that goes above the bottom bearing between it and the spacer tube of the repair parts. It is just plain dumb to think that a washer can function as a thrust bearing would in this situation. And what was also included in this kit is something I didn't see in other kits or videos as well: A top "thrust nut" (as they call it) and as seen in the diagram in the instructions, which in this case would actually function as a lock nut. So here is what happened when I fitted the press tool in to press the bearings in place: Firmly tighten the top lock nut (thrust nut as they call it again) down onto the press tool arm, tilt the machine back, tighten the bottom press nut, and certainly the bottom nut would tighten on the all-thread shaft of the tool because of the substituted "thrust" washer, which would cause the all-thread shaft to turn (no surprise) and in turn would then loosen up the top lock nut which would no longer would be pressing the bearings in place. Bring the machine back down, firmly tighten the top lock nut, tilt the machine back against the wall again and begin to tighten the bottom press nut. Repeat. I was finally able to get the press tool assembly to tighten marginally, but not as much as it should have been. Of course, had the bottom fender washer been an actual thrust bearing, the bottom press nut would not have been able to tighten up so quickly on the all-thread shaft but would continue to thread along and pull the top & bottom bearings into seated position. Much frustration ensued, with thoughts of cutting a wood block to place inside the tub to assist the press tool arm and keep the top lock nut in place with some vise grips, but had no materials and no one else around to hold onto the top lock nut. Should I get the welder out and weld the top press arm and lock nut into place on the all-thread? Believe me, I thought about it, but wayyyy too much work on top of all this crap. When it came time to install the replacement machine shaft, it would not go in far enough to expose the threads on the bottom where you install the bottom shaft retaining nut, because the top bearing was obviously not seated far enough down. Removed the shaft, went through the same press tool process a number of times and still could not get the top bearing fully seated (the top bearing has to travel farther down than the bottom bearing has to travel upwards). This back and forth resulted in consuming a lot of time with more and more frustration. In the end I had to pound sharply on the new shaft (using a block of wood and a 5-pound hammer) to get it to fully seat and expose the bottom threads of the shaft for the retainer nut to be installed. I was worried that I was going to damage the top bearing and/or the shaft or anything else with all the pounding...and this is most definitely NOT the way to get a bearing seated, to say the least. If I ever have to make this repair on our washing machine again, I will purchase one of the other kits that indeed has a thrust bearing actually included in the kit and not just shown in some random diagram. Four Stars docked for causing this debacle with what seems to be an attempt to get out cheap by the seller/manufacturer. I'd give it less if I could.
B**R
Good price but only for the DIY inclined
Not the easiest job. The kit comes with everything you need. The bearing press tool had a fitment issue on the bottom bearing for me. The tool didn’t fit into the ID of the bearing, so I had to grind down the metal until it fit. Also, the drive shaft was a tight fit in the bottom bearing as well. I had to hammer it into place. Other than that everything worked great! After this kit and a new thrust washer and hub, I have no more SD error and the tub doesn’t leak. Overall happy.
D**R
Great Product! Great Price!
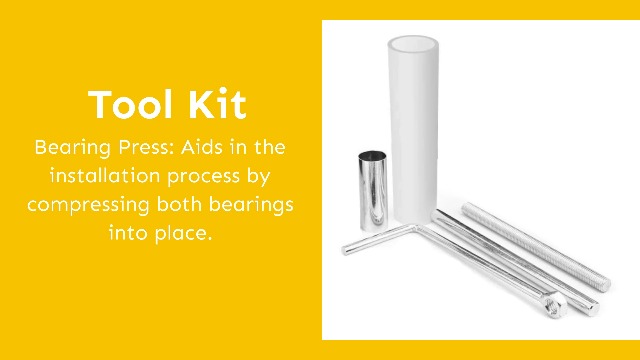
Great product and great price point. YouTube instructions easy to follow and including the bearing press tool in the kit ( which sold separately can be costly) plus the strong bearing punch out tool gives this 5 stars.
T**C
Worked Great on Whirlpool Cabrio Top Load Washer Model WTW7600XW0
Had my Cabrio start to make tons of noise, airplane level, and noticed some rust on the bearing rod so I did some research and realized it might be time to change out the entire bearing rod, seals and bearings so I ordered this kit. It was me vs. some nasty rust so after taking forever to get the outer tub with a Jeep jack I was able to access the bearing rod/bearings and they were a mess. Removed them and followed the step by step video instructions recommended by AppliancePartsPro on You Tube using a great video titled: "How To: Whirlpool/Maytag Bearing & Tub Seal Kit Bearing Installation Tool W10435302 & W10447783" and did the job. At first, I heard a squealing as it ran the first time so I was concerned but after the first wash it stopped and my wife has run about 6 loads with no issues so far, hopefully that will continue and I can get another 2-3 years out of this bad boy. I was happy with the quality of the parts and the tool is great, very useful when installing the bearings/rings/washer. This parts set had the best reviews and here is one more.
A**R
Shaft did not work for my Maytag Bravos XL.
I have a Maytag Bravos XL. The shaft did not fit like the original, so I had to reuse my old shaft. I wish I knew this ahead of time, and I could have spent less for the kit without the shaft included. Everything else in the kit worked great.
Trustpilot
Hace 1 mes
Hace 1 mes


