
⚡ Upgrade your workflow with the authentic switch that keeps your Dremel running like new!
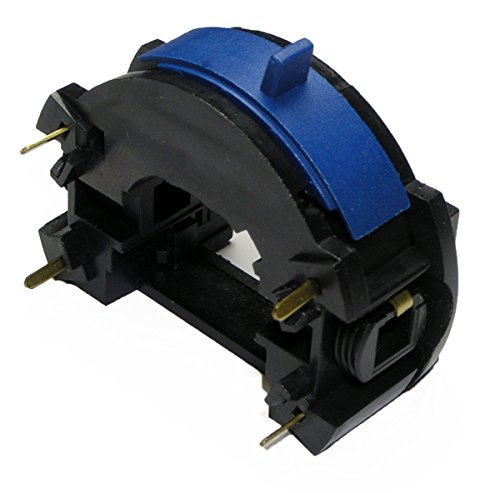
The Dremel 395 Multi-Tool Replacement Variable Speed On/Off Switch (#2610912780) is a genuine OEM part designed for seamless compatibility with Dremel and Skil 395 series tools. Compact and lightweight, it offers precise variable speed control and comes bulk packed for professional reliability. Installation is straightforward with reference to the owner’s manual, ensuring your multi-tool performs at peak efficiency.
| Manufacturer | Dremel |
| Part Number | 2610912780 |
| Item Weight | 2.08 ounces |
| Product Dimensions | 3.75 x 3.75 x 3.5 inches |
| Is Discontinued By Manufacturer | No |
| Color | Blue, Black |
| Style | Pencil |
| Item Package Quantity | 1 |
| Batteries Included? | No |
| Batteries Required? | No |
M**S
I have my 395-Type 5 back.
After almost 20 years my Dremel finally bit the dust. I decided to R&R the switch and the brush set. I purchased the components last October 18th, 2023, I believe. Today is October 9th, 2024. Nahhh. I’m not a procrastinator! I figured that I would do the replacement the next time I have to use my Dremel. Haha, I didn’t think that it would be an entire year before I needed to use it again but it was and I did and now I have my Dremel once again and it is working very well.I had read a bunch of the reviews of the 1-3 stars and I think that a lot of the reviews were not necessarily accurate in their entirety. There seems to be a lot of complaints and confusion concerning the wires not coming out or staying in the housing of the switch. I believe that a good chunk of these wire/housing reviews could have been eliminated by following a simple step of magic associated with this type of variable speed switch. It is NOT unusual to receive a new switch and think that it is not functioning correctly after the installation. It may not work 100% at first and with a tiny exercise you can improve your odds of success.I am a retired FE/SE electromechanical service technician of 45 years and I have had my fill of crappy replacement switches being flakey out of the package until another technician told me a little trick about these. Before installing the new switch you should “exercise” it. Huh? Say what?? Yeah, exercise the switch. To do that is simple. Just take it and run it up and down it’s operational slide. Go slow, go fast just don’t get stupid with it and end up breaking it before you can install it. Spend a couple minutes running the switch up and down and down and up, at least a couple dozen times or more. This exercise will help the internal mechanism to clean the contact surfaces that often get coated with a silicone oil that is present on the equipment in the manufacturing plant and when things are moving along quickly the silicone oils get warmed up and then starts being suspended in the air. As the silicone oils cool and become more dense the molecules will settle down and lay on surfaces that can cause a disruption of circuitry through lack of continuity. Moving the switch back and forth will help clean the contaminated contact surfaces. This will not be the sole answer to all switch problems but it will help in a good percentage of “infantile failures” when dealing with mass produced switches.The other big complaints were directed towards the black and white wires and either trying to remove them from the old switch housing or getting the wires to stay in the holes of the new switch housing. A lot of people may not know that there are 2 release mechanisms for removing the wires. Look at the area where you want to install the wires. Notice that there are 4 holes but only 2 wires. Notice that 2 holes are slightly bigger than the other 2. The smaller holes are where the wires actually go in. The other two holes are the release lock holes. If you have ever installed an AC wall plug outlet you will find the same type of release wire lock hole. By using a tiny screwdriver or Pin or tiny thumb tack or something similar, push it into the larger hole just above the smaller hole with the wire. Gently push the “whatever” you are using into the hole while gently tugging on the wire to remove it. It works great for this. Now for the wires that don’t want to stay in. Make SURE that the wire is in the smaller of the holes not in the unlocking holes. Sometimes during manufacturing the wire release mechanism gets stuck and will not allow the wire to slide into the area it needs to be in. If you have attempted to shove the wire in the hole a few times you probably have ended up softening the soldiered tip of the wire and causing it to become limp and unable to push through the locking plate inside the housing. When this happens try and pushing your “whatever” you came up with into the unlock (larger) hole and gently bounce it a couple times and then while holding a little pressure on it try now to slide your wire into the smaller hole and past the locking plate that you are now holding open with something that you got to do that with. Once the wire is pushed in then release the lock and test to see if the wire is now secured.. if you this fails then you can try one last trick. Take the switch back out and then slap the switch on its side with the butt of a screwdriver or slap the switch down on the workbench a few times to hopefully pop open the locking mechanism, stuck from manufacturing. Good luck and I hope that these 2 tricks will help you in replacing the switch in your Dremel.
G**G
It works like it used to.
The new speed switch restored the seven variable speed steps, ON/OFF and the speed reliability of the Dremel 395 Pro. It fit perfectly.
P**M
EXCELLENT! (Contains Lengthy Installation Guide)
My wife purchased me the Dremel MultiPro Model 395 Type 5 as a part of one of Dremel's package kits for Christmas of 1999. I have used it to death, replacing the contact brushes (very easy and inexpensive) once in 2008 and again just last week (May of 2015). However, my 5 speed switch was going out fast and last week I could only get this old tool to work on the lowest two speeds - if I pressed the palm of my hand on the switch. Not exactly a good thing...I bought new brushes and this switch and got them with free 2-day Prime shipping. Excellent!I just a moment ago went to install this switch. There are NO INSTRUCTIONS. If you do not know how to do this sort of thing then this might not be for you!I came back afterward to leave this review and decided to read the negative comments, which usually are really funny, due to their being so tragically uninformed.This item is a DIRECT FIT for my 395. It is not made by Dremel but by Bosch. It is well constructed but not as robust as the original red switch that came out of my 395. It was also easier to put back together incorrectly, whereas the Dremel part with the red switch was simpler and easier to reassemble without the slider contact piece getting knocked out of alignment. (More on that later.)I got this installed, reassembled the tool et voila! it was as good as new! If I had bothered to clean up the black, plastic body halves it would have ended up looking brand new, too. This is a great chance to clean up your Multi-Tool that could lead to an extended life. I would recommend you take some time to do this since installing the switch involves a partial teardown including removal of the entire inner works from both plastic shell halves.Here are my instructions for installation, in case you are one of those people who gives up easily where there is a lack of information at hand (as some of the earlier posters seem to be).Tools needed:1. A small, flat bladed screwdriver that fits into the two circular plugs on the sides that cover the brushes. (See those two little circles with what looks like a very small screwdriver slot? Those! Get a screwdriver that will fit those without mangling them.)2. Torx T-15 driver or keyNOTE: Please do not be an idiot. Unplug the Dremel tool first. Okay? And if you don't and you end up shocking the crap out of yourself, don't try to use my post here as some sort of excuse. I *TOLD* you to unplug it, dummy... ;-)Nice...The shell of my 395 has four Torx T-15 socket cap screws holding it together that must be removed. (This appears to be a universal size that Dremel has used for many years; my 1999 395 and my 2015 3000 tools both use them, same length, too. They are easily replaceable at an Ace Hardware or equivalent.) Further, there are two other lock-downs that must be removed prior to opening the Dremel tool's case. One is the screw-on flange up at the tip below the chuck and collet. It is simply a black, plastic ring that threads onto the case halves to keep them neatly together. (I think some attachments are attached via these threads, too.) Then there is the steel hanging loop. This is removed by pulling it free from its holes. It is held in place by tension, so try not to bend it during removal or you will have to bend it back.So, remove all four socket cap screws, the plastic ring and the wire loop.I got lucky and did this the right way the first time: open the case with the switch pointed at the ground and the tool horizontal. The detent button for locking the armature when you change heads has a small, semi-circular piece of spring steel that can fall out, and you need that functionality!Lastly, use your small screwdriver to unscrew the two plastic caps on either side of the Dremel tool. These will allow you to remove the brushes, which are actually metal blocks on long springs. remove the cap and dump the spring onto your workspace, X2...Use your screwdriver to gently pry the two halves of the case apart. They are held together by the cord end with the rubber plug insert that prevents the cord from being ripped loose from the tool. Insert your small flat head in that area and gently turn it to force the rubber out of its channel in the case.The case comes apart pretty easily once the rubber plug has come free of its channel.Pull the rubber plug from the channel on the other case half if it did not pull free when you pulled the top case half free from the switch-side of the case. Then you need to carefully pull the entire motor unit from the case. While holding it in your hand, remove the circular, black rubber dust boot from the rear by the switch. I believe this is a weight, like a harmonic balancer used on a car's engine. It keeps the tool from vibrating too much to use. But this post is not about that. Sorry.Gently, gently, gently pull the switch from the rear of the armature housing. Look at your replacement unit carefully. Look at the old one carefully. NOTE WHERE THE WIRES GO!!! If you botch this part your Man Card will be instantly revoked! You should set down the motor body so that you are holding only the switch with the power cord attached to it.The only difficult part is pulling the wires from the old switch. This involves snapping the rear cover off the OLD switch. Do NOT disassemble the NEW switch.Use your screwdriver to pry the back from the OLD switch that still has the wires in it. You should still be holding this in your hand unless you have taken a pee break or had a beer. If so, pick it back up.There are four tiny clips that hold this part in place. You cannot get all four of them from the other side as one is internal. Instead, place your screwdriver between the home of either of the contract brushes that you earlier removed, placing it on top of the plastic threads but beneath the snap-on cover that holds the wires. Twist it gently until one of the clips pops loose. This seems to work much better on the side with the WHITE wire. So pop one loose, then the other on that same side. Do the same on the other side of the switch. Work the cover off carefully. As you do this the clipped-in wires will come loose. The are held in place by a brass blade that acts as a barb once the wire is inserted. Remove the rear cover and it should come loose. If not, you can use your small screwdriver (or better yet, a needle pick) to depress the blade so that the wire falls free.Take a moment to look at these connections points. There are FOUR holes on the switch and you need to hook your two wires up to the correct ones or when you turn it on it will explode and kill you.Okay, that was a lie. Just make sure you put the white one where it goes and the black one where it goes. Seriously.You do this by pressing the soldered end of the wire into the socket. Once it is in all the way up to the insulation it should lock into place. One of mine make a barely audible click. I could feel something pop with the other one. Yours may not do this. Just tug on the wires to see that they have locked into place. When you tug on them the blade should firmly bite into the end of the wire if it did not do so when you inserted it into the socket.Now you need to take your newly wired switch and look at its four contact pins and their corresponding sockets on the armature housing. The pins are easily bent. They may come to you slightly bent. ALL FOUR MUST MAKE CONTACT PROPERLY or this will be a massive no-go for you. Note that the pins can fit in their metal socket (metal - hint, hint...) or on EITHER SIDE of the metal socket. They will insert, but will be bent a bit so that one corner of the switch will not press in all the way. Get a magnifying glass (if you are an old fart like me) and look at each of the four pins prior to pressing the switch home. If they all four are not installed correctly, do it again. Once all four are in their sockets the switch presses home easily, but there is no sound or feeling to indicate this. It just needs to be pushed all the way in.Congratulations! You have just (hopefully) rewired your Dremel. Now you have to reassemble it.[NOTE: Do NOT try to test your Dremel tool until after you have completely reassembled it. If you decide to do otherwise, please post video so the collective Internet can make fun of you. I am sure it will be spectacular.]Next, pick up the switch half of the casing and gently insert the entire motor, keeping the tool shaft and the switch end lined up carefully. Do not worry about the cord just yet. The semicircular spring clip for the detent lock button near the tip needs to be placed so that the open end is up. This is why it is better to install from the switch side of the case half; it would be weird doing this bit from the other one, I think. Anyway, when you get all the bits into their little areas and that spring clip is where it needs to be, take the rubber plug on the cord and insert it into its slot on the case half. Now route the white and black wires around the screw sockets in the case plastic so that they run to the outside of them.[It may not matter where these go, but that is where mine were when I opened the case, and I think if you route them to the inside you can pinch them when the two case halves are pressed together. Just look at everything carefully.]Once everything fits properly you *should* be able to press both halves back together fully without much tension except for the rubber plug at the rear of the housing. It was tight to remove, and should be tight to replace. I am sure it will comfortably reseat itself over time as the trapped air in the channel slowly escapes.Everything together now? It fits? Great! Now screw on the ring at the tip to keep that end from accidentally coming loose. With the tip together, test the detent lock button. Press it and rotate the head, just like when you need to change the arbor. If it locks you are good. If it does not lock like normal you need to pry the case apart and do this step again.Once you have gotten the thing back together with the ring locked down a bit more than finger tight and the lock button working, install the four Torx T-15 socket cap screws. This is a plastic tool case with brass screw inserts molded into it. If you go all King Kong on these they will break free and your attempt to save your old Demel tool will turn into the reason you had to buy a new Dremel tool. Tight, but not too tight.After all that is done, reinstall the wire hanging loop into its holes. Don't do this backwards, man. Think about it.Okay, now you need to drop a brush into its hole and screw on the plastic retainer cap. These brushes have to be oriented correctly. It can fit N/W or S/N, but not E/W or W/E; they are not square, but slightly rectangular. Look at them carefully and look at the hole. It should be pretty obvious. The cap screws on until just snug - no tighter. Do both sides.You are done. Plug it in to see if it works. All five speeds should be defined and stable with no racing or lagging once you set the speed.If this is the case you deserve to be patted on the back. I am not going to to that, but perhaps you have a friend or significant other who will. If not, just get yourself a cold one and kick back for awhile; you done good.Note that this switch seems to have much harsher clicks between speeds than the original ever did when it was new. The less robust parts and the much harder snapping from speed to speed makes me think this new version made by Bosch may wear out sooner than the original did. but hey, now you know where to find this part and you can even install it yourself. GREAT! Now, replace those ratty brushes if you have not done so yet. It isn't like you don't know how now, you big lug, you.
M**F
Easy upgrade for my old 2-speed Dremel 285
Worked as a charm as an upgrade of my old 2-speed Deremel 285. I converted it into a 9-speed tool in a few minutes using this variable speed switch. The switch came in a brown box, but seems to be an OEM product.
J**L
Low Speed setting is too slow
This one does not work well in the low setting, very slow with motor hum sounds. Other settings are ok.I found what fails in some Dremels, a metal strip on the little circuit board had an open circuit at the slowest position, likely from my main use at that position.
O**H
Easy to change out
My husband said it was easy to change out the parts and it works great.
P**L
Complete waste of money, but then maybe it's just me.
I got two of these for two different Dremel tools and either one of them worked. Just for context I have repaired many of the tools I use. I've installed new brushes, and other parts for my cordless and corded drills, and have repaired three chainsaws and brought them back to life. This was an attempt to bring two Dremel tools back to usefulness. You would think one of them would've worked. But not so much.Eventually I stopped trying to make them work it just went and bought new Dremel tools, which is what I should've done in the first place. The old tools lasted me for many years beyond what I think could be expected of them, and they got used pretty hard.
Trustpilot
Hace 1 semana
Hace 1 semana