

Full description not available
B**W
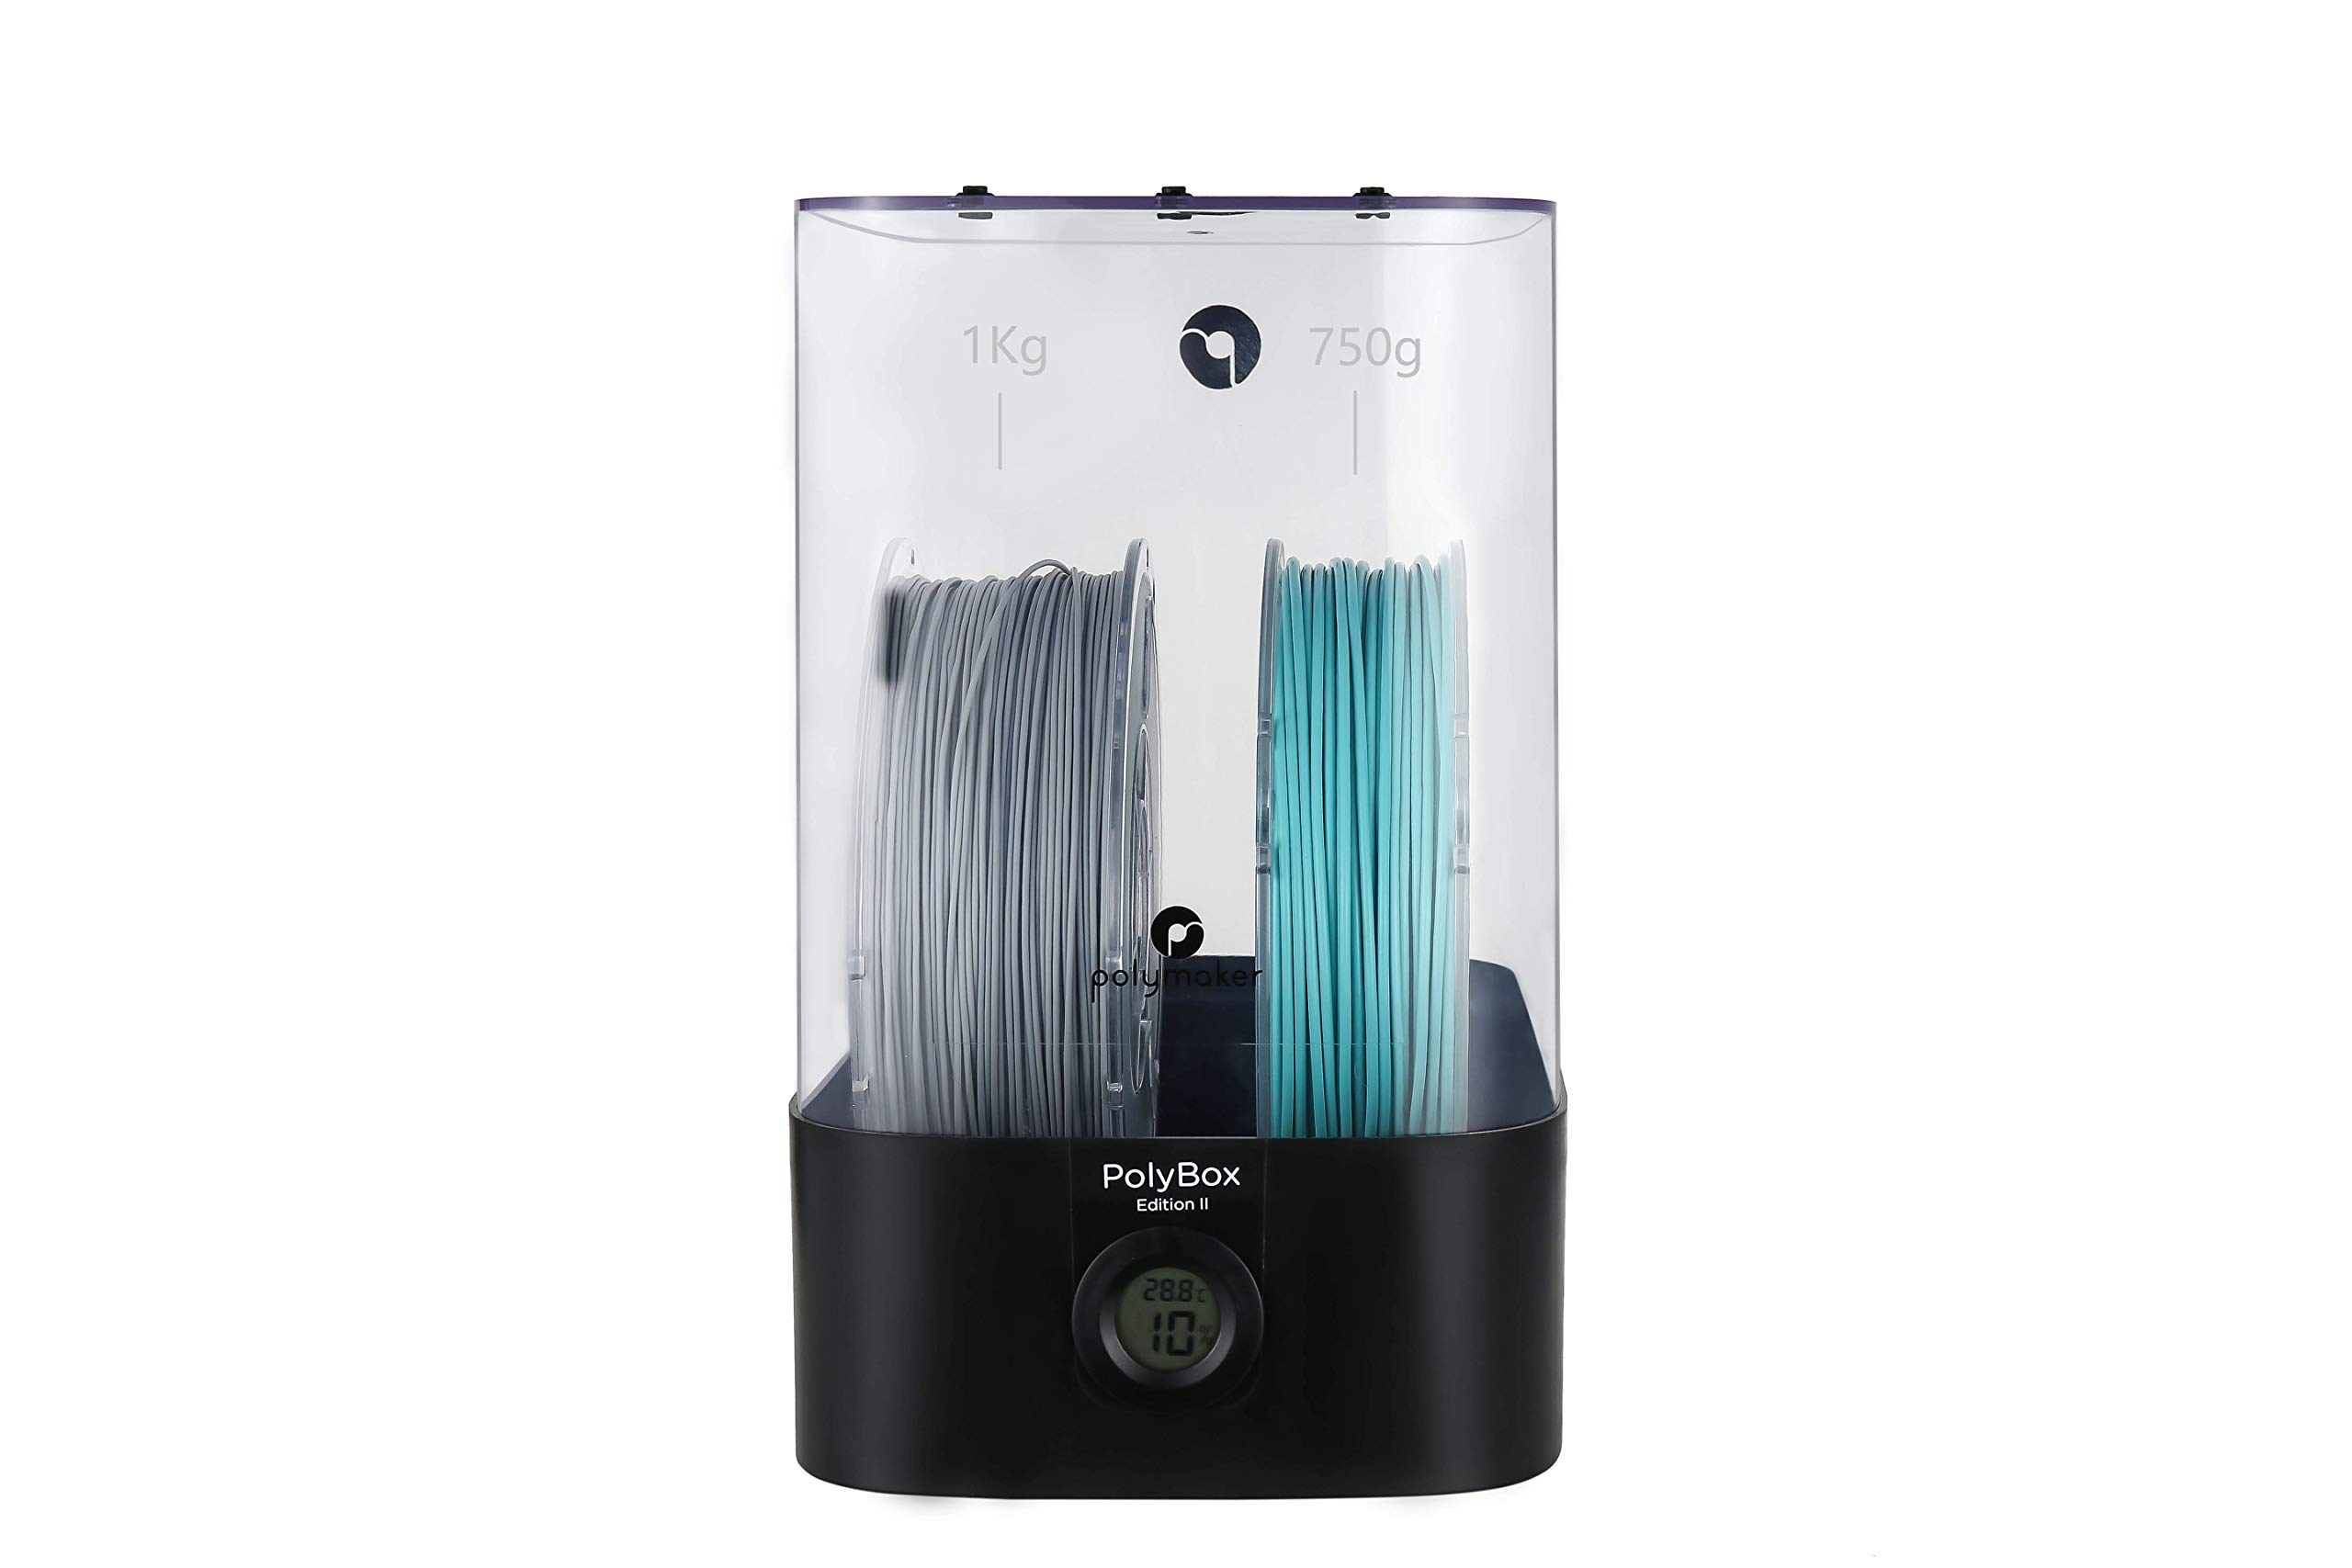
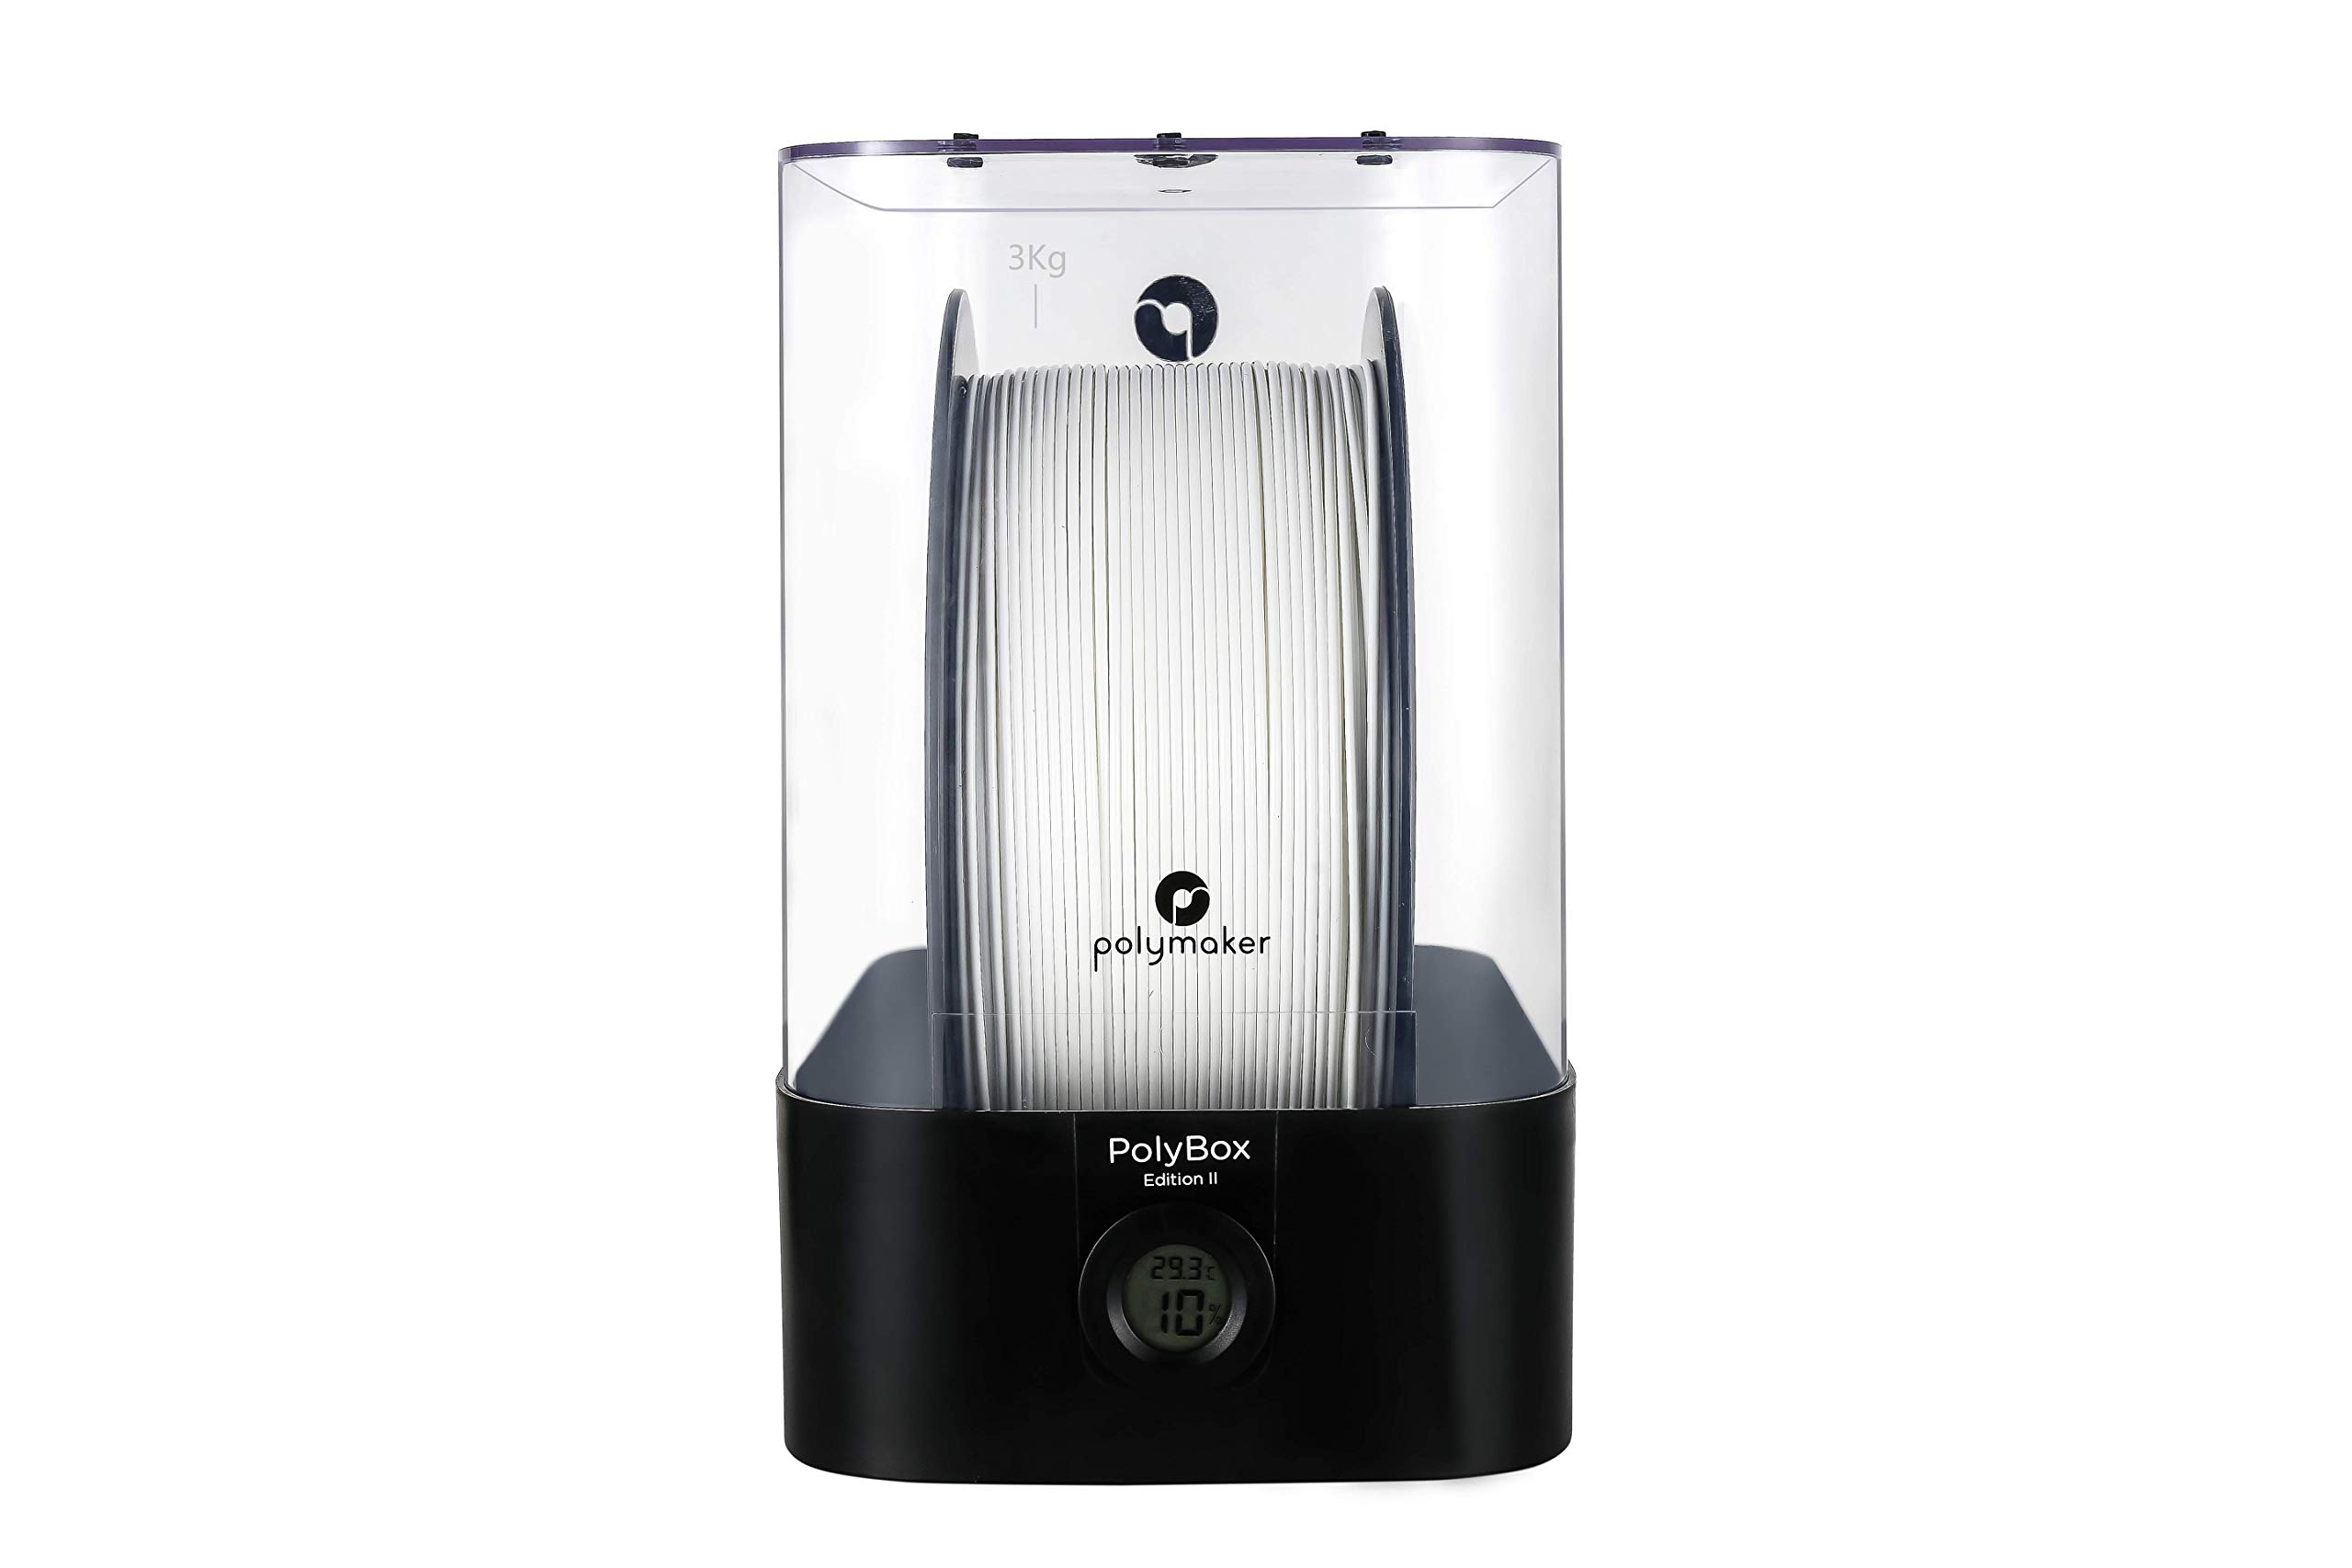
NIce Storage Box
Nice Product! I don't have to package my Filament at the end of a print. It stays nice and dry in the box. I like the box, but I would give it about 4 stars. Very nicely made product, but I had a couple of issues. 1. My desiccant packs were in a sealed pack, but not dry. The system didn't work right until I dried them in my oven for 6 hours. 2. Come on guys for 70 bucks include 2 real packs like the metal cased "dry pack" silica gel. Those crappy sacks just have to go. I modified the box just like "the 3d Printer guy" on YouTube. That way I can lift the cover off while my printer is running and not disturb the print. This won't work for everybody, but works well for my application. The gel pack covers are a nice touch, but they get in the way. If you want to change the gel packs, you need to move your filament rolls out of the way. Too inconvenient for me. I ditched those right away. All in all it is a great box, well made, and the bearing surfaces work very smoothly.Update 8/13/18: I have been using the box for a while. The Silica gel packs that come with the unit work much better than the metal ones i suggested. I ordered more so I can dry some and have some for backup.
R**I
Far too overpriced for what it is.
Way overpriced for what it is. It should honestly have a heating element to dehydrate instead of using silicate gel packets (which were not dry upon opening). The design is decent but as another person mentioned, it really should have the holes in the base so the lid could be removed while in use. I'm on the fence about returning it as there aren't really any other options on the market right now besides the Polymaker Polybox. And the alternative of making my own from a food dehydrator doesn't really thrill me. If the unit was more like $49.99 it would be easier to accept, but $69.99 is just way too much for a nice container.
P**R
Good but needs some small tweaks
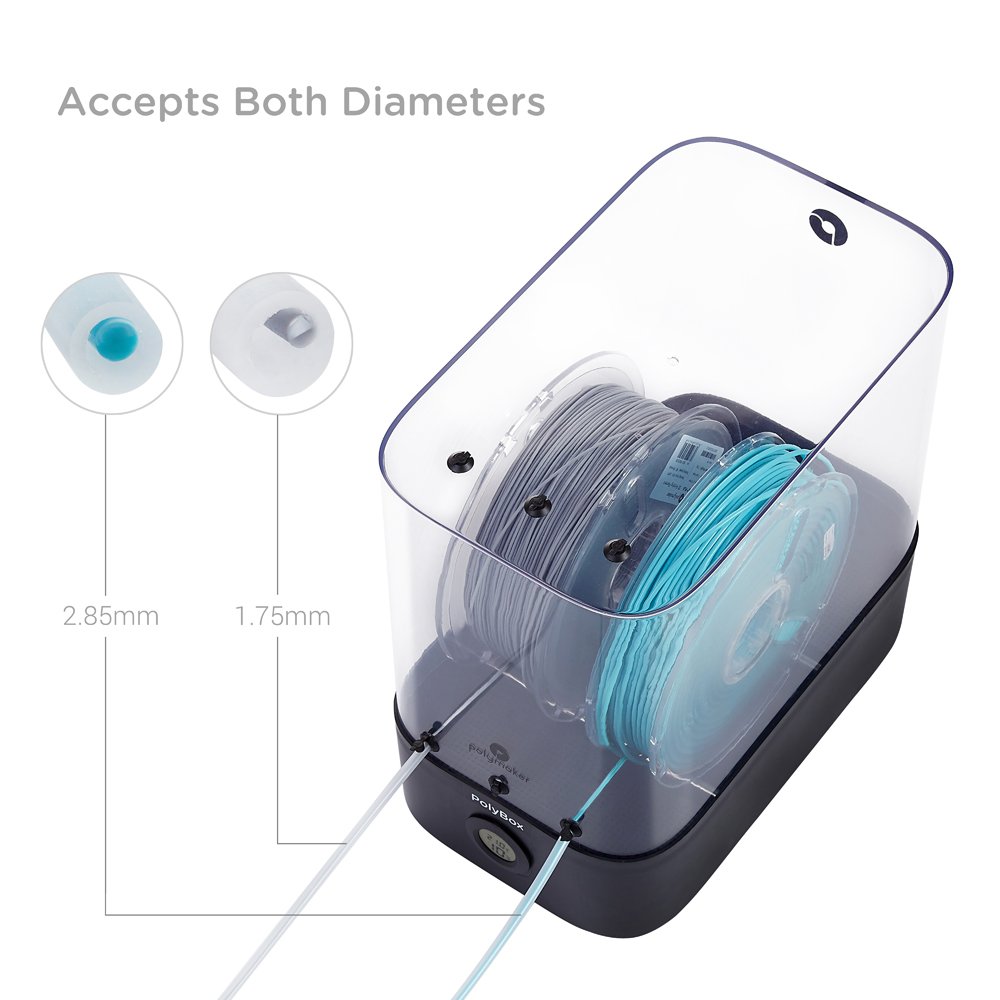
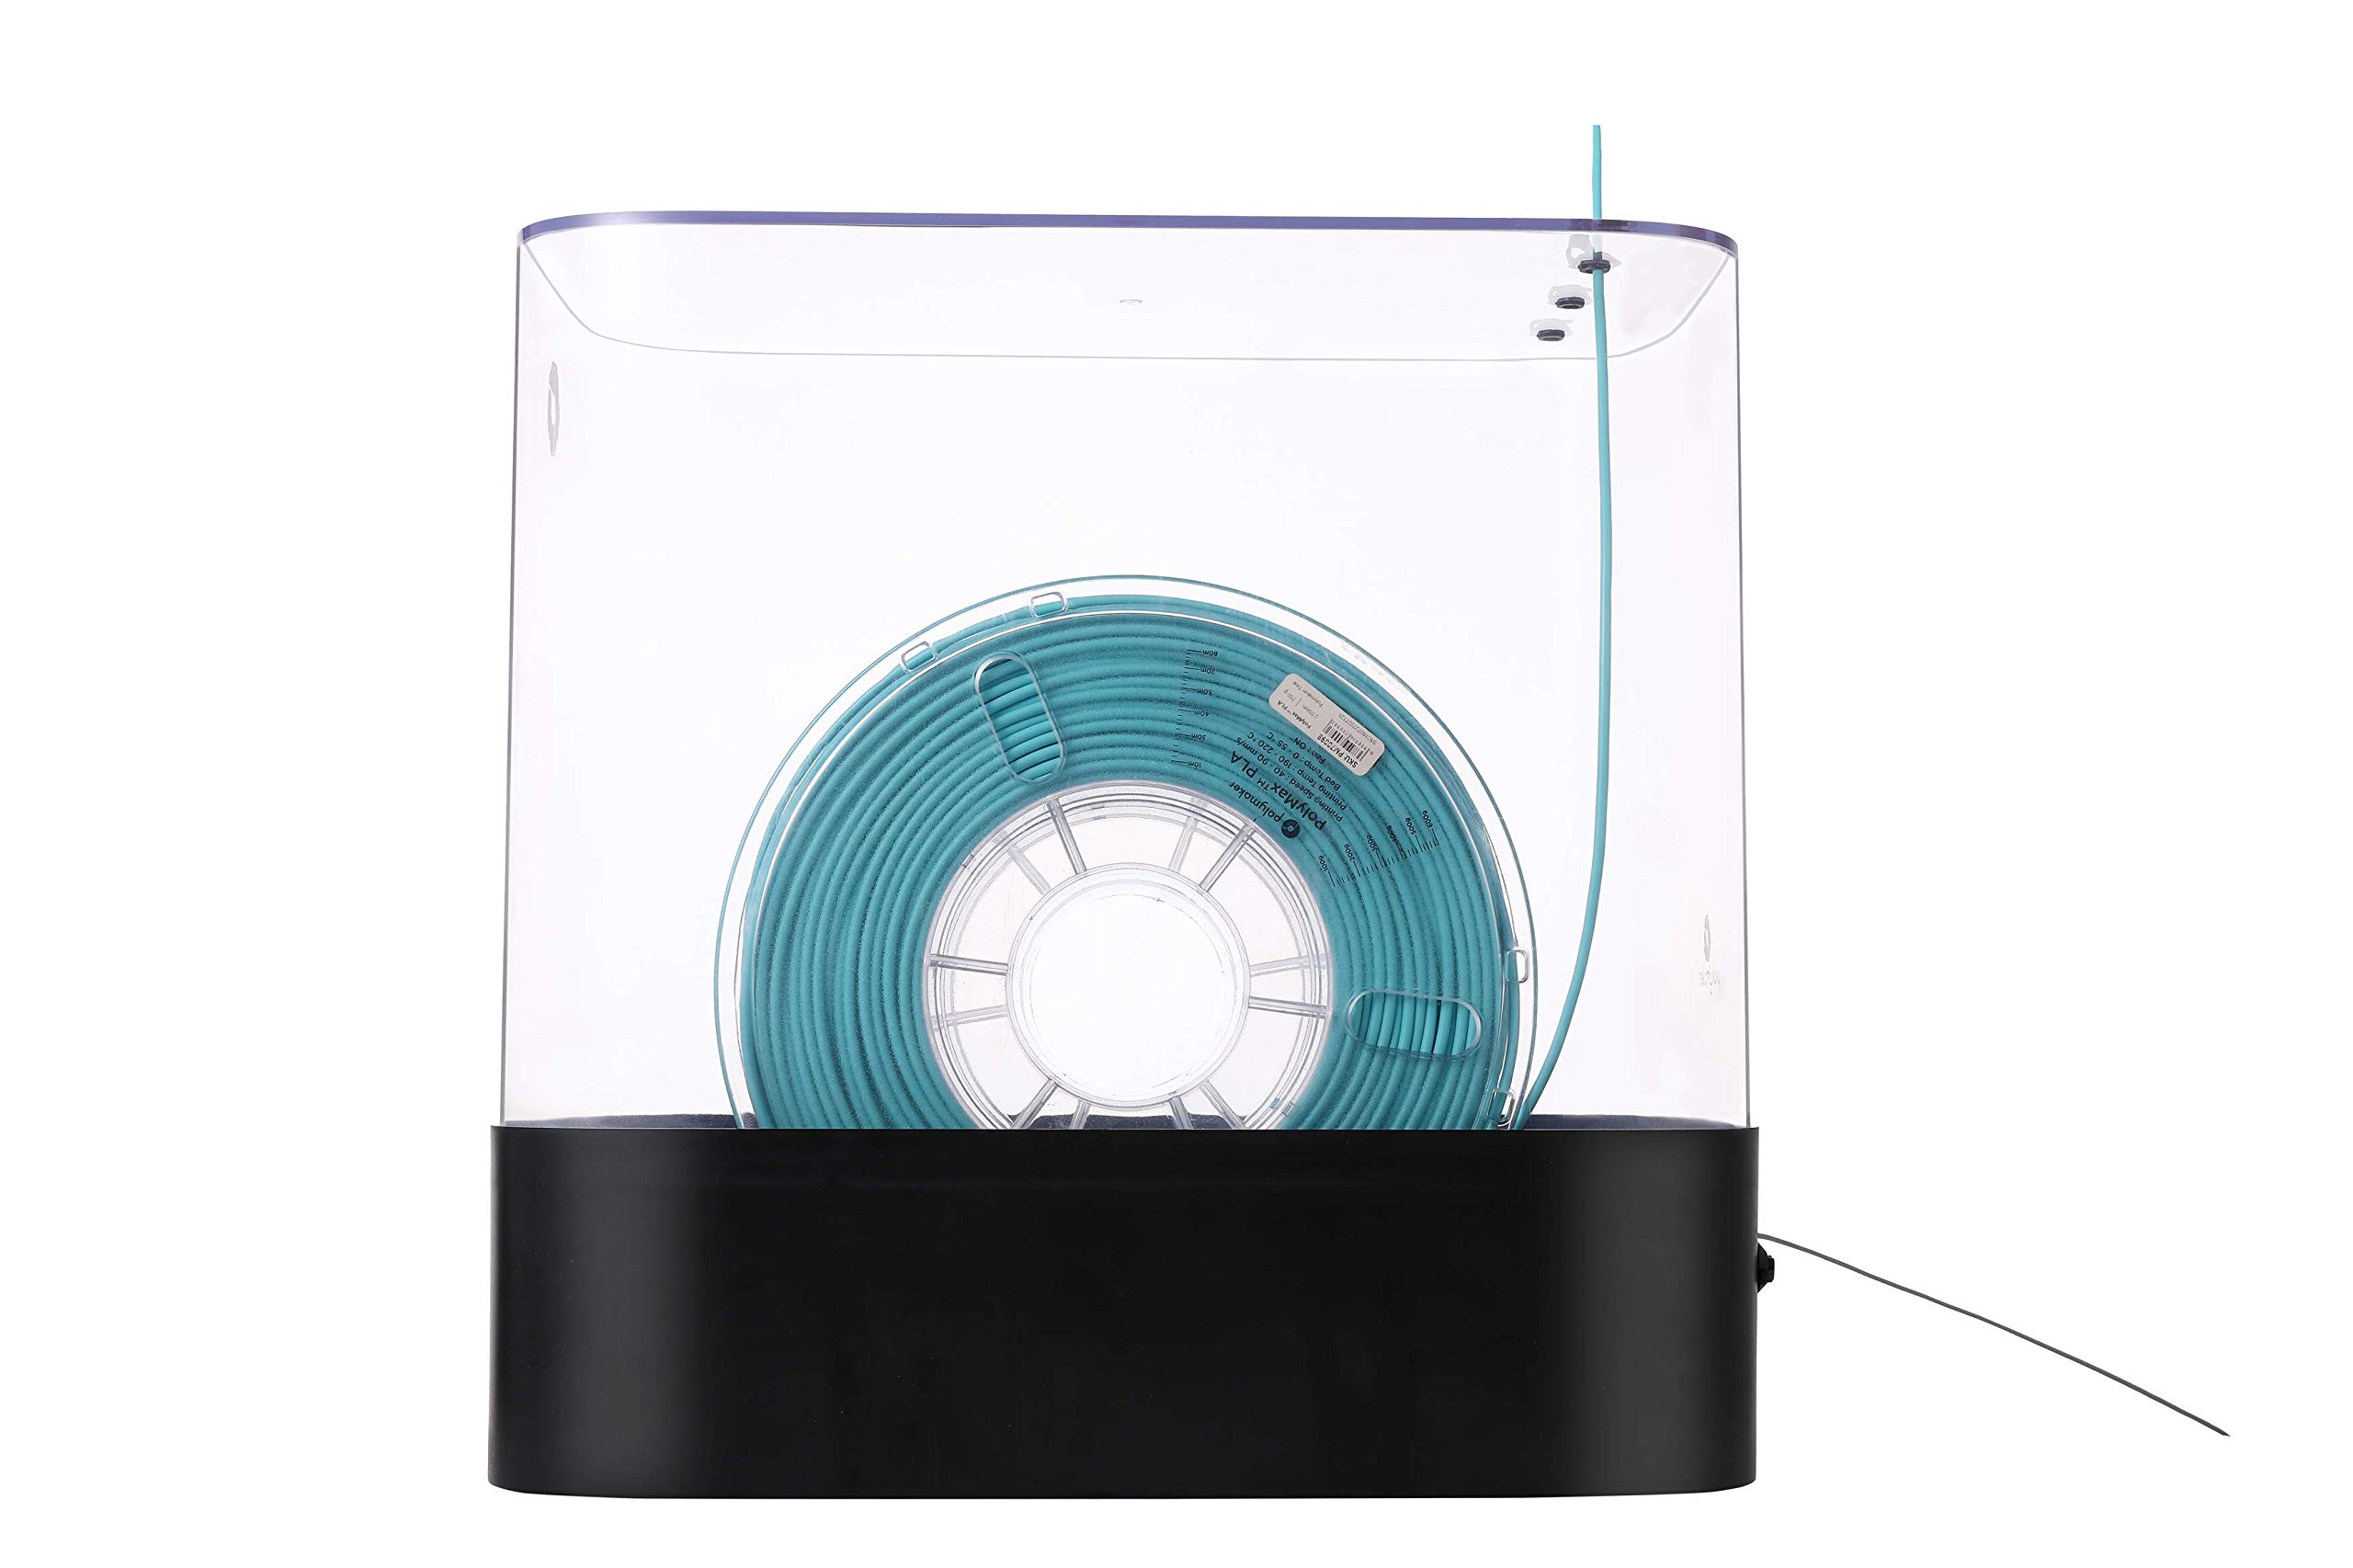
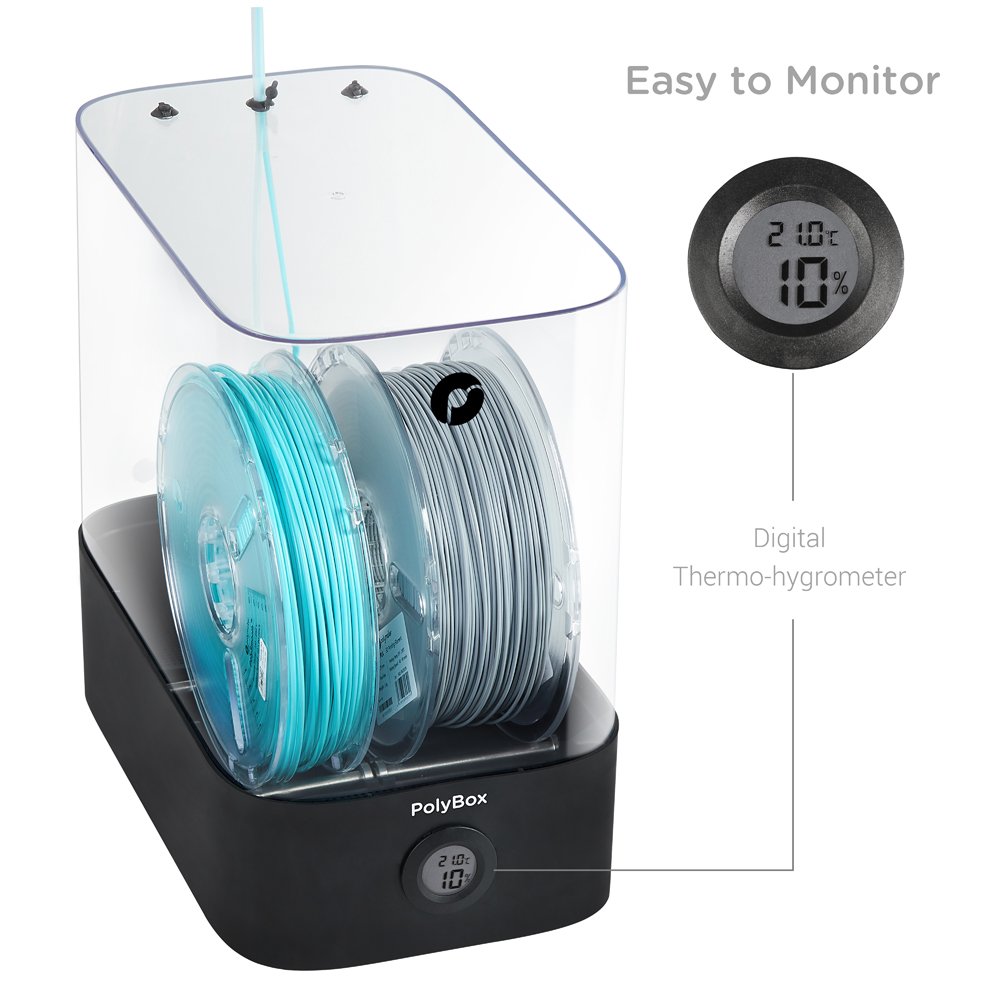
I got the box and set it on table and it went down to 10% humity with nothing inside except the bags. Then I put two spools (one just unwrapped and the other two weeks old, but always kept in a ziplock with desiccant, into the box and it couldn't get below 18%. These spools are standard side Hatchbox size. I then put this https://www.amazon.com/Improved-Eva-dry-333-Renewable-Dehumidifier/dp/B000H0XFCS/ref=pd_bxgy_328_img_2/144-8539925-7220101?_encoding=UTF8&pd_rd_i=B000H0XFCS&pd_rd_r=54ff743c-1e82-11e9-841b-4d76d22006a0&pd_rd_w=Cjb2O&pd_rd_wg=c4OaS&pf_rd_p=6725dbd6-9917-451d-beba-16af7874e407&pf_rd_r=ZNMWFTVA03VQKTT8MNXS&psc=1&refRID=ZNMWFTVA03VQKTT8MNXS Into the side of the box opposite the temp gage where it just fits and allows the two filmanets to come up from the the bottom and exit from the top of the box without touching the evadry. Within an hour the temp is now back to 10%. I think this combo works well. The Bowden tubes are nice but I was worried I would crack the unit pluggin them in, they are that tight. Oh, and please include a second long tube because after I cut mine it in half I could just reach my unit, but others might need a second one and I don't see how to get that extra part. Also, you should include two short pieces of 2mm ID /4 mm OD second Bowden to use as a plug at the other open end, which works well when you insert the 4mm into the 6mm and the pull the filament through the inner 2mm hole. A big tip: the filament coming out of the reel has a natural curve instinct, as does the polybox Bowden tube. If these curves are opposing the filament will try to twist and push against the inner walls of the Bowden. This can create a lot of friction as the filament pulls through. Try to aliogn the natural direction of the curves by placing the box and tubes in such a way that neither wants to kink or twist against the other. Overll I am very happy with this and can say it does, with these modifications, keep two rolls of filament at 10% humidity, and it beats trying to create one of these on my own.
Z**N
Works great, but awkward to load and move around.
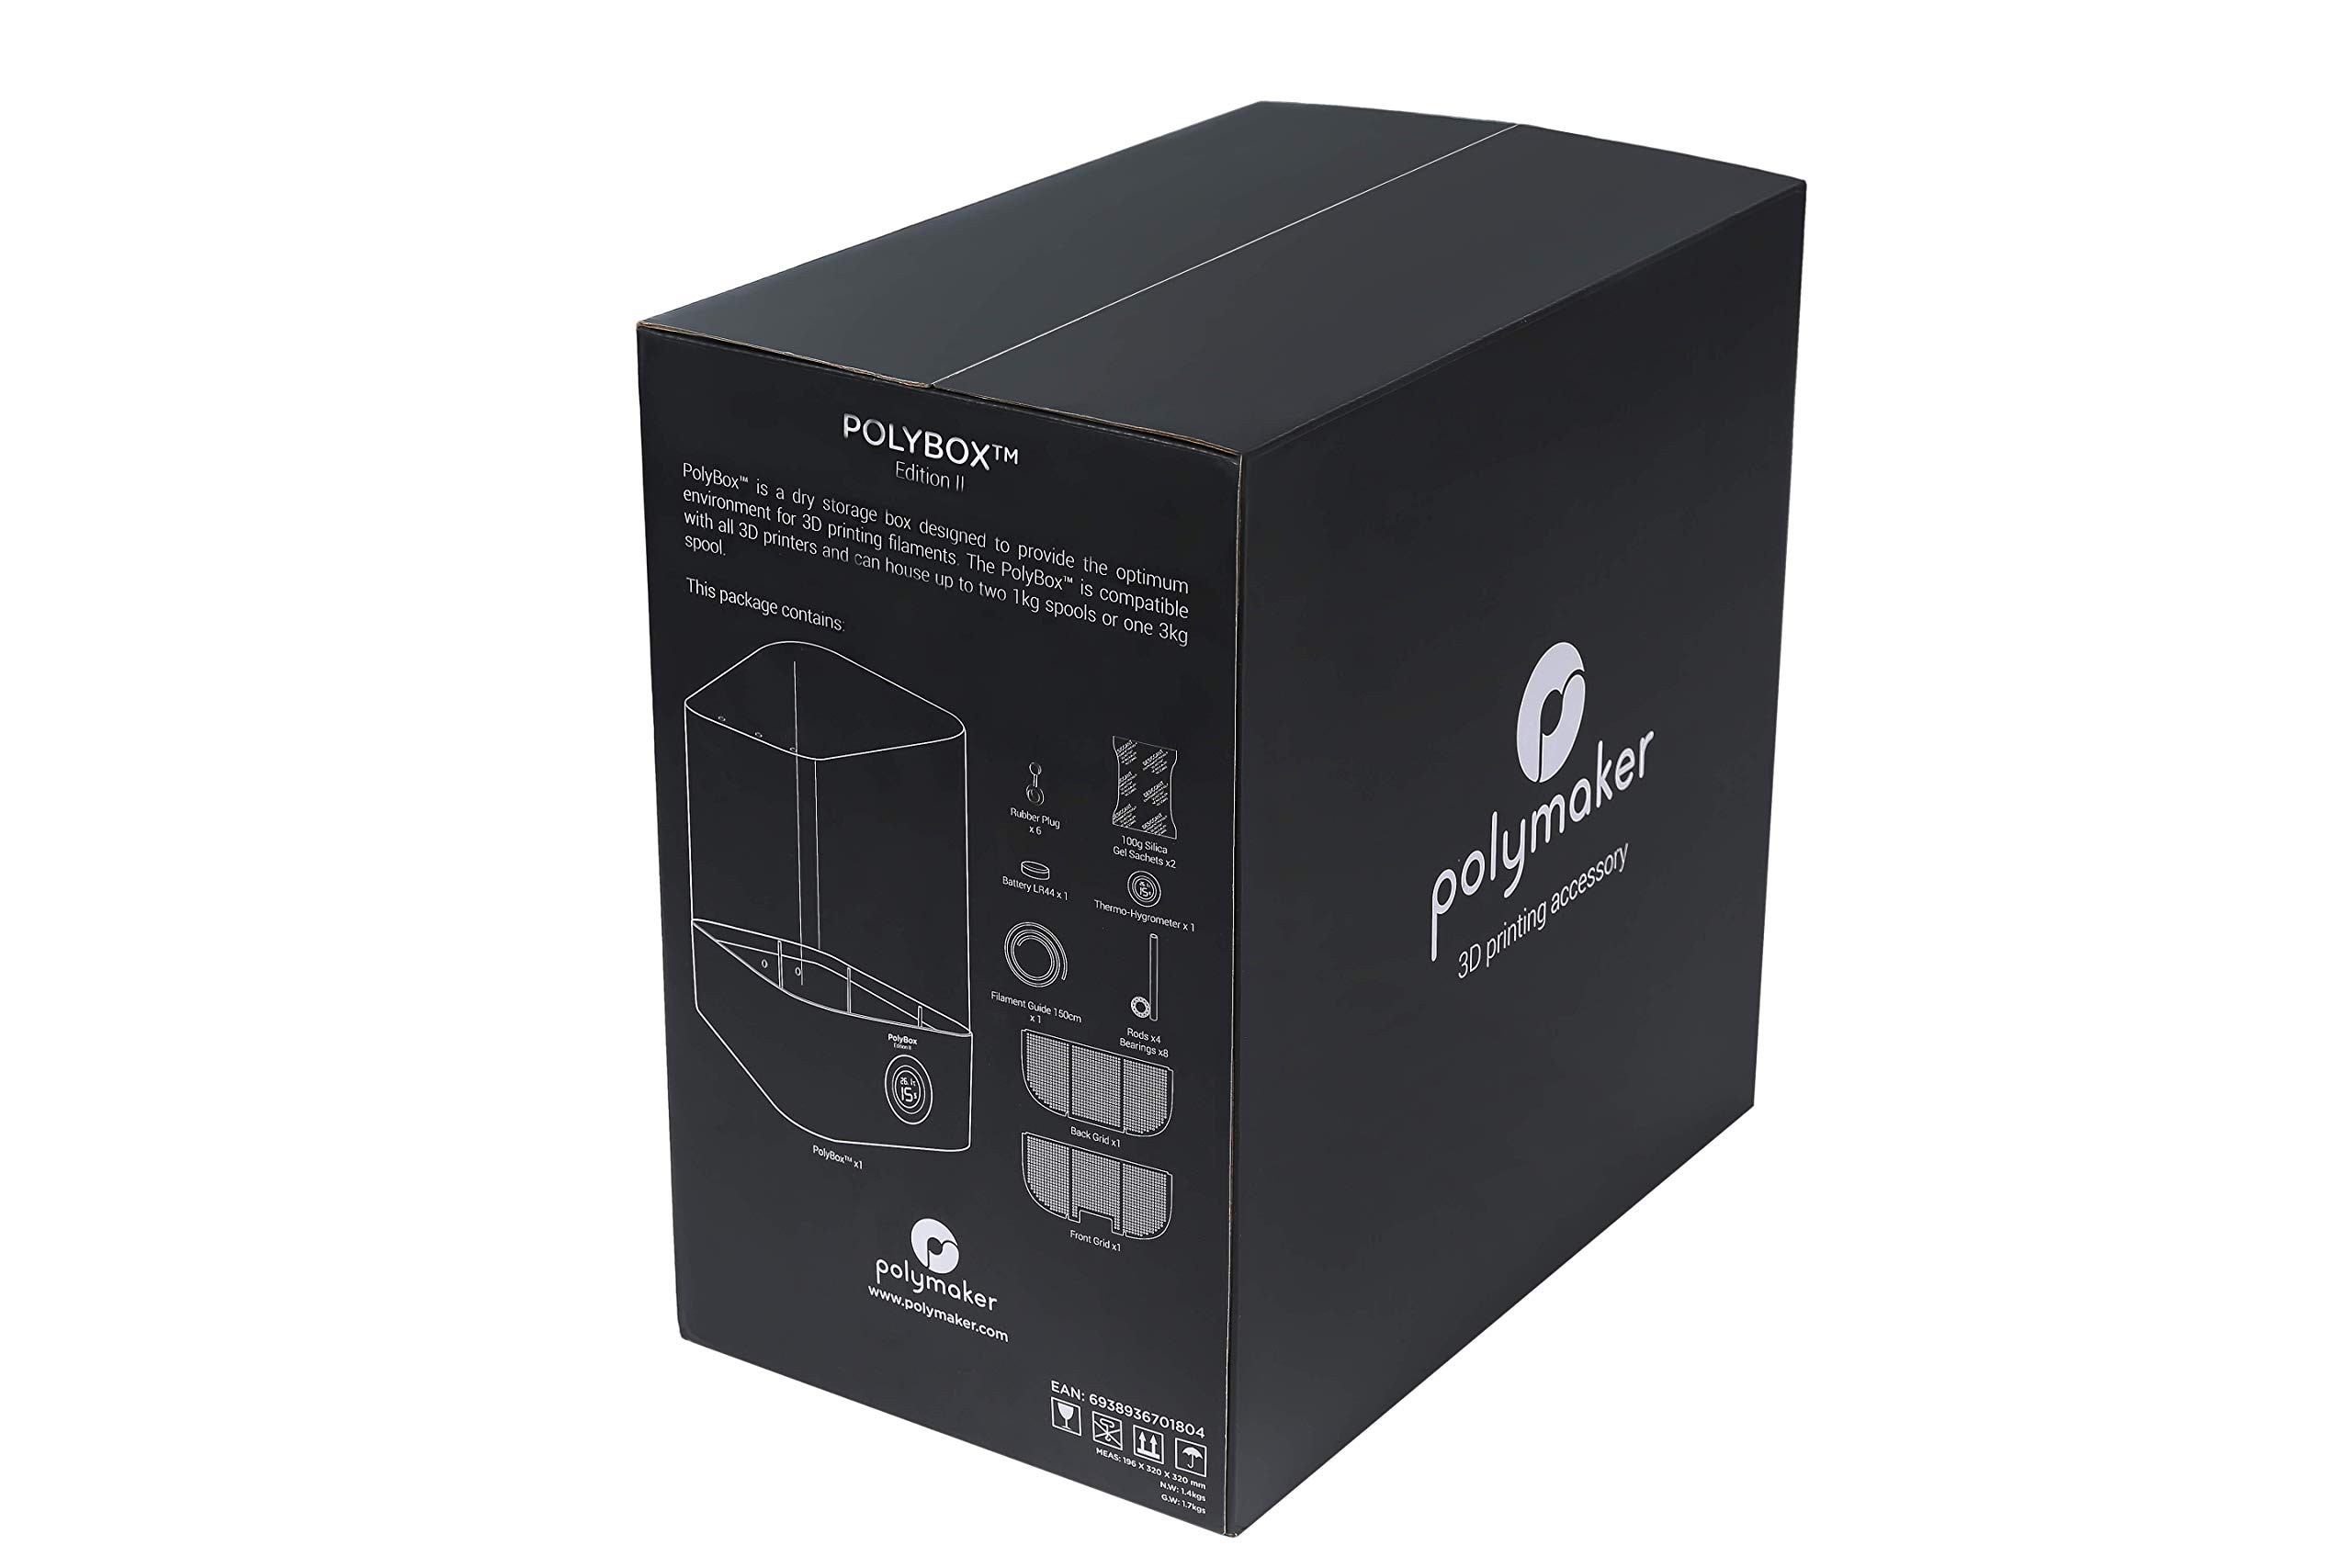
I'm starting off this review train with an average three-star rating as this product works well but has some usability issues that will hopefully be addressed in a 2.0 version down the road.First off, let's start on a positive note. The Polybox is easy to assemble. All that is required is to chuck some desiccant packs into the compartments (it takes two at a time and comes with four so that two packs can be drying in an oven while the other two are in use), then you place the desiccant covers over them. After that, you slide two bearings each onto four rods and press them in place in the base. Next you install the battery into the thermometer / hygrometer unit. Lastly, you can insert the Teflon tube(s) into one or two of six grommet-lined access holes. That's pretty much it.Now we move on to loading the spools and using the box, and I'm afraid this is where things get a little ugly. First you remove the cover and place it beside the base. Then you place the spool or spools onto the rods. Good, no problems so far. Now you have to thread the filament through the tube in the cover. OK, not bad. Now you need to place the lid on the base while trying to pull out the slack on the real. At this point either the filament is going to jump off the real, or the filament or tube is going to knock over the spool. But after some fiddling, we get the cover on. Good. But then we realize that the tube is inserted too far so we pull it out a little, but then the grommet comes out of the lid and we can't get it back in with the tube in it because the fit is too tight, so we take the lid back off and pull the filament back out of the tube which knocks over our spool and tangles our filament. Damn. Now we pull the grommet off the tube and press it back into place on the lid, then re-insert the tube the correct amount. And then we fight with loading the filament again while placing the lid back on. But, finally, we get it done and all is good! Except, we now need to move the Polybox into place by the printer. But how do we pick it up as it is mostly lid and the base is slick? It looks like we have to tip it and get our hand underneath. Fine, we do that, and then the spool falls over inside the box and starts to unravel. Ugh. So we go through the motions of fixing this and learn from our mistakes by picking the Polybox up by squeezing on the base and moving it to the printer while holding our breath and trying not to sneeze or trip over the cat. It seems that fortune is now smiling on us and we get it into place. We load the filament into the printer and hit print. Everything is fine after that, cats and dogs live together in harmony, and we can now easily check our box's moisture level just by looking at the LCD display. Lovely. It was a tough road to travel, but like I said, the box does work and keeps nylon and polycarbonate nice and dry while printing. Cool.If Polymaker happens to read this, I have a few suggestions for improvement. Have the base come up higher and incorporate some finger slots into the sides. The filament access holes should also be in the base so loading the filament isn't an awkward experience. Also, maybe a drop a glue on those grommets. Cheers!
G**A
semplice contenitore passivo
è un semplice contenitore passivo e con il display ben publicizzato ci ha ingannato, per la fretta non abbiamo letto attentamente le specifiche e appena arrivato l'abbiamo subito restituito
F**Q
cher pour l'utilité..
Boitier de bonne facture, prix élevé pour une boite en plastique avec un afficheur quartz d'hydrométrie à pile, honnêtement très déçu par ce produit, ne baisse jamais en dessous des 30%, les sachez de perles pour retenir l'humidité ne sont même pas réutilisable, pour 75€ c'est malheureux, on sent bien le produit qui surfe sur la vague de l'impression 3d...
Trustpilot
Hace 5 días
Hace 1 mes
