

🔥 Elevate Your Furnace Game with ICM282A!
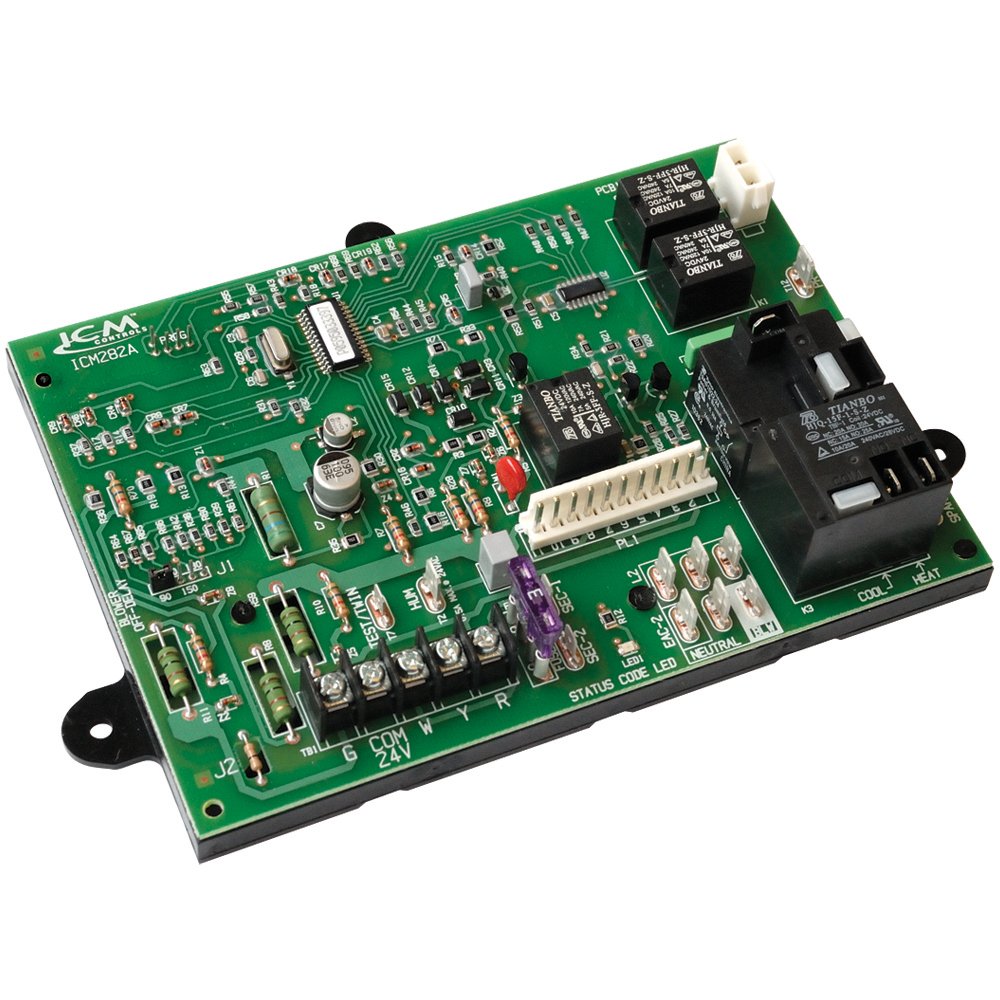
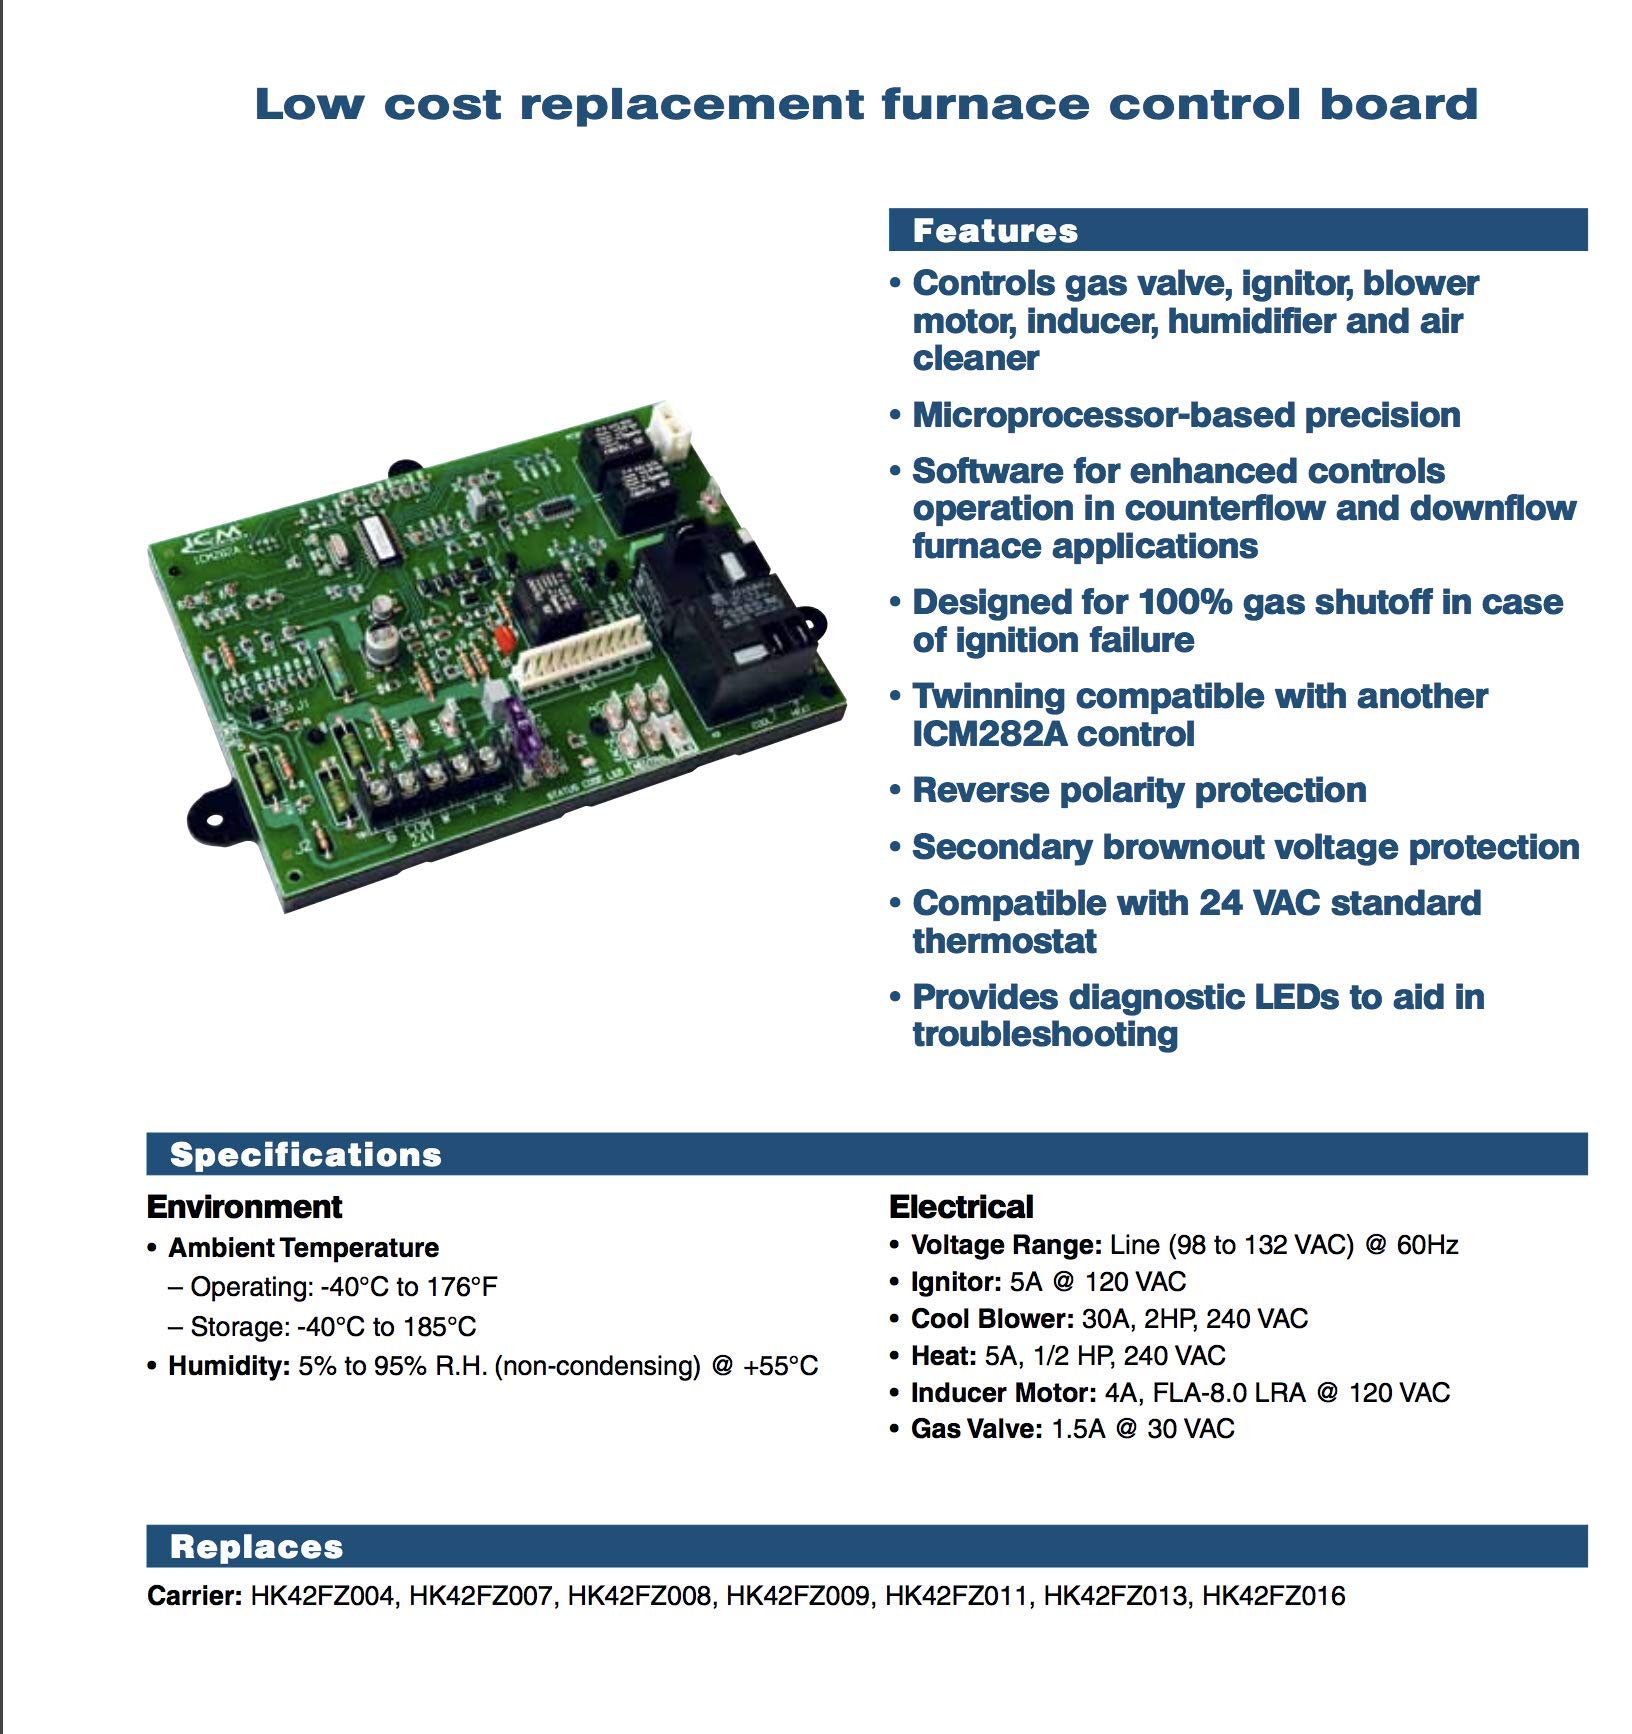
The ICM Controls ICM282A OEM Replacement is a state-of-the-art furnace control board module designed for compatibility with various Carrier models. It ensures optimal performance with advanced safety features, including 100% gas shutoff and diagnostic LEDs for easy troubleshooting. Perfect for both counterflow and downflow applications, this module is a must-have for modern HVAC systems.


G**R
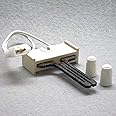
Drop-in replacement for a troublesome HK42FZ007 on an old Resco (Carrier subsidiary) furnace.
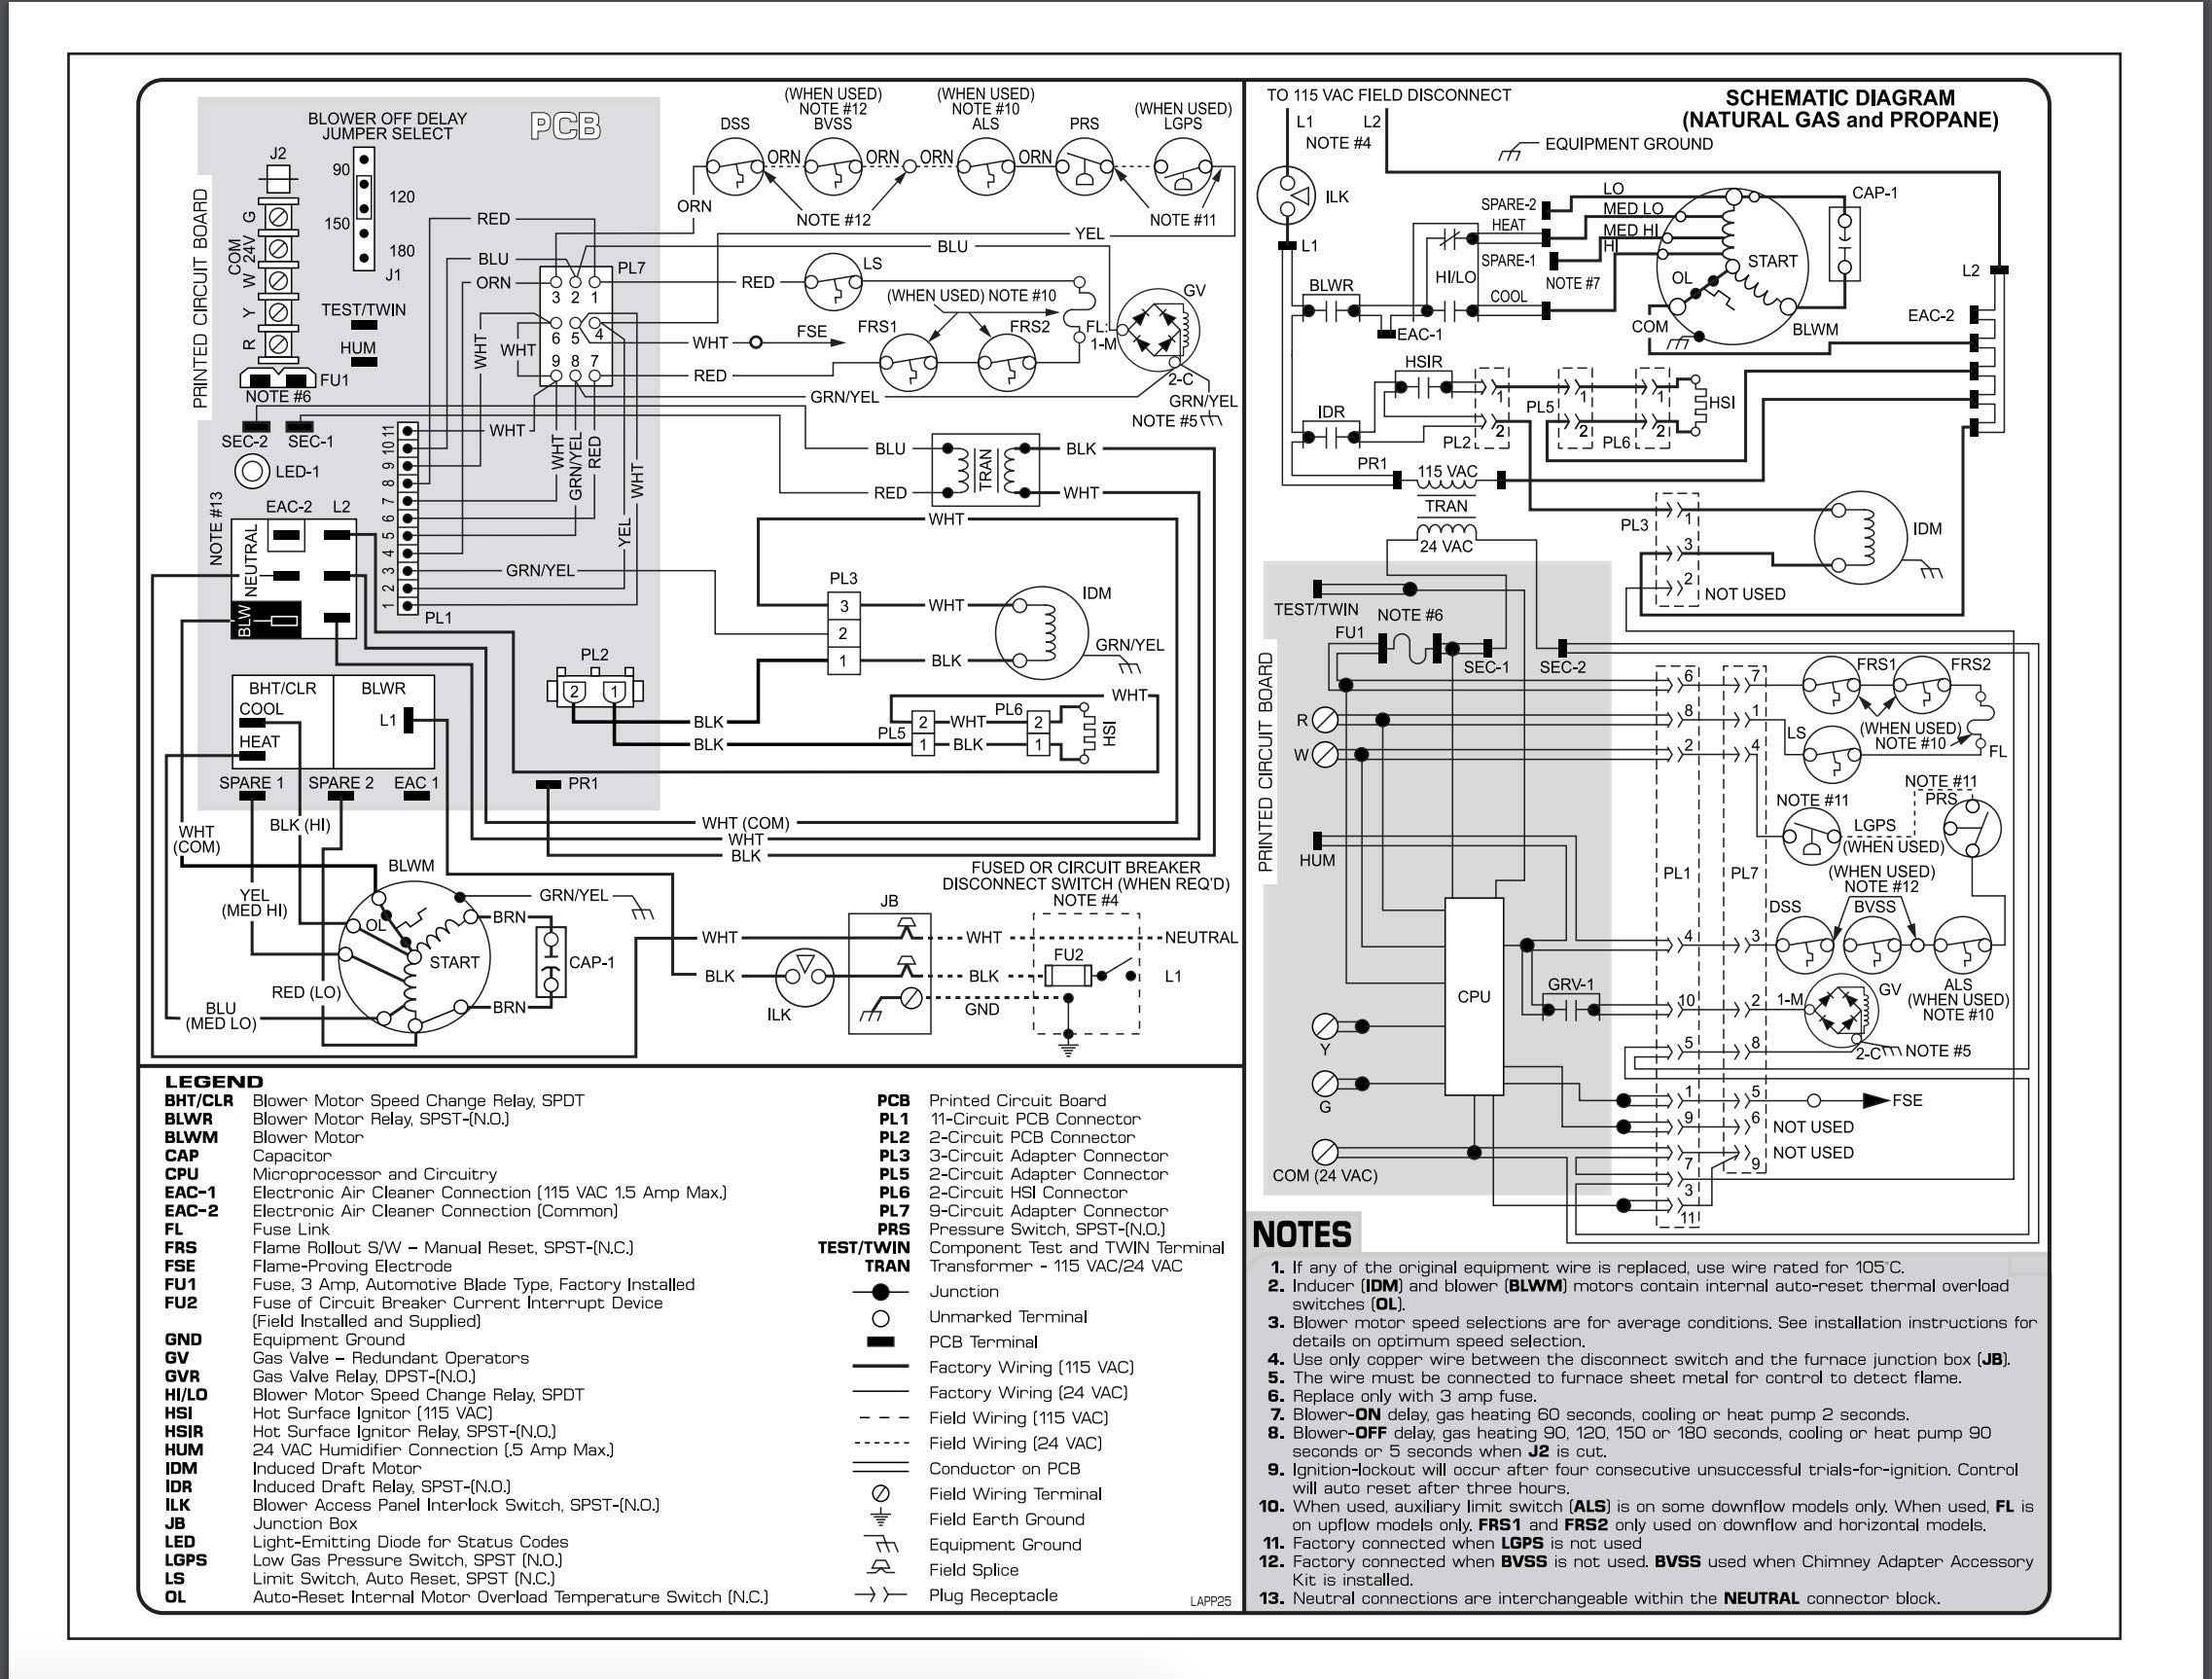
We had a white-label Resco furnace from circa 1995 with a HK42FZ007 controller in it. The original controller started to randomly fail to start the inducer fan and this became permanent at the worst possible time. The board would give a blink-code of 3-1 because the pressure sensor correctly detected that the inducer wasn't running properly. After futzing around I discovered that the relay on the controller wasn't sending power to the inducer. When manually powering the inducer in the correct sequence the furnace would run properly. This suggested that it was just the relay and that all the other components and safety sensors were working correctly.To confirm, we had a HVAC tech do a call-out and check as well. He confirmed that (as I suspected) the controller was bad. He estimated the replacement cost at $1600(!), if they could even get the part. I'm pretty sure they wanted to sell a replacement and weren't particularly interested in doing a repair like this. Needless to say, I decided to check my options.I found I could get genuine used controllers from eBay for about 10% of the estimated cost but they had been removed from old furnaces that were being replaced. While they were promised to work, you never know if you're inheriting somebody else's problems. Those furnaces were being replaced for a reason.So, I tried this one from Amazon instead. The cost was comparable to the used controllers from eBay but without the worry.It's a fairly generic gas furnace controller and came with a wiring harness to adapt the controller to this particular flavor of furnace. Obviously it's not exactly the same and it's clearly a more modern design.As others have noted, it does not come with its own plastic cover. However, I believe this is fine. The old OEM boards had live 120VAC terminals for as long as it's powered on. This board disconnects/isolates live 120VAC when it's not being used. This feels like a safety improvement over the old 1990's version of the controller I was replacing. I suspect this is why there is no replacement cover.Installation was easy. The instructions were direct and to the point. The wiring adapter harness did not get in the way. The mounting holes for the old controller matched the replacement and it literally dropped in place.One caveat - some of the connections are on opposite sides of the board relative to the original version. If your furnace wiring loom in the furnace is a bit tight then you may have to tweak your original loom a bit. This was not a concern in our furnace but I could imagine it might be for some.The self-test function didn't function exactly the same as the old controller. This replacement did not include the gas burner in the test cycle while the old one did.Post installation, it has run exactly as it needed to. Time will tell if it holds up. So far, this has been an ideal drop-in replacement / minor upgrade over the original.
C**N
Great replacement control board. Not an exact replacement, but easy enough.
This unit worked for my control board # HK42FZ009 replacement. If you don't know your board number, don't ask somebody else for it. Simply take the control board off the furnace, and pull it apart just enough to get a picture of the part number off the board with your phone and flash. If you aren't comfortable doing this, you should not buy this part, as you will be taking the entire board out and apart to do this replacement. You don't need to be a furnace tech or electrician to replace this unit, but you do need to be able to follow directions. For my unit, I went through the old schematics to cross reference which wires went where to verify I was doing it correctly. You probably should do the same, but this is America and I'm not going to tell you how to live your life. Other reviews have said the same things I am about to go through, but I will try to group all these tips into one newer review.I had an issue where if I wiggled the wires on the old board, my furnace would turn off and on like a light switch. Every cycle would vibrate the wires until it would shut off. I talked to a furnace tech, who told me there's no way to diagnose a board, you just have to replace it and see if that fixes the problem. I'm not sure on his diagnostic statement, but with his quote of $400+ with no guarantee, I passed. I wasn't sure if I needed a new board, new plugs or both, but when I saw the wiring harness with this universal unit for $128, I figured it should repair both. If you had to, you could cut the plugs off, twist the wires together to eliminate the plugs in question. I did not have to do this thankfully.1. For my 80% furnace, you discard the old control board box, and mount this board right to the furnace in the original spot. This unit didn't fit inside the original plastic protective box. Seems weird to have the board exposed like this, but that's how they made it. I saved my old board and the plastic box just in case anything happens. Mount it before plugging anything in to help avoid static shock or dropping the new unit.2. Take tons of pictures of the wires and the post name it is plugged into. I use different colored tape and zip ties to differentiate each wire and make sure I can read the post name and see the wire in each picture, because this is not an exact replacement (at least for my unit). You have to read the instructions (really). For the most part, the wires end up going back onto the same named post (Spare 2-->Spare 2, PL1-->PL1, COOL-->COOL), but none of the plug locations are the same (geographically) and a few have different names. COM became BLW (despite there being a COM on the board).3. Neutral wires: there's 3 or 4 of them and it doesn't matter how you place them within the grouping of NEU posts which are in an "L" configuration amongst other posts, just make sure it is in fact a Neutral post. I personally think they should be off on their own, individually labeled or at least in a straight line to help clarify, but I'm sure the manufacturer has their reason for this.4. Testing. The instructions tell you to briefly short two posts on the control board. I held mine for a FEW seconds (too long, read on) and nothing happened except a rapid flashing led light telling me I need to reverse polarity. I checked my work, reset the unit, and shorted the unit for not even a second and it cycled through the test without a hitch. If you just tap the wire against the post, nothing will happen (no LED flashing, no function test).I'm happy to report this unit has been working without issue for the last 16 hours, where the old unit cut out every 15 minutes. I am confident in this unit and my repair. The plugs are all solid, and the control board functions just as it should.
Trustpilot
Hace 1 día
Hace 1 mes