🛠️ Restore, Revive, Rejoice!
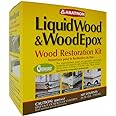
The Abatron Wood Restoration Kit is a comprehensive solution for repairing damaged wood, featuring LiquidWood Epoxy Resin Wood Hardener and WoodEpox Wood Filler. This kit is designed for easy application, with a quick hardening time and eco-friendly credentials, making it ideal for both professional restorers and DIY enthusiasts.

K**L
Amazing Results!
Amazing product! Used to repair decorative wood posts on exterior of home that were crumbling apart due to water intrusion and rot. Fairly easy to use and shape. Hardens like a rock and can easily be sanded and painted. Tried wood filler in the past and didn't hold up well and would start having issues after a couple months again, but after 8 months with this product, it still looks great!
C**X
Great stuff!
Best wood repair kit I have come across. The 2 part liquid hardener levels nicely and settled deeply into old soft wood. The filler is great! With gloves you can mix it in your hand and then apply and knife out. Sets up like a rock! Highly recommend this! Other brands are thin, don’t really do the job and the filler are more like working with bondo.
H**L
I swear this is the best product out there:) Saves one a lot of $
I had purchased this product from this seller November 22, 2016 but the 'leave a review' button is gone but I wanted to leave one now bc I just used the product:)So it took awhile for me to get the courage to do this project but today, I didn't think about it I just did it. I looked at the online videos a few times, read the instructs a few times and then got started.I'm repairing a wood floor from 1946 (I know this is original bc I've taken out a couple of walls and the floor was underneath and already stained). This was a previous doorway before someone else took out that wall. When I bought the house there was carpet down so I didn't know about it. Took out the carpet and HORRORS! I thought I would have to have the wood cut out and maybe put a perpendicular long piece in w supports under the floor etc. Research always gives more than one solution:) I found this and I knew I could do it and save a lot of $.When I got the Liquid Wood painted on I realized I didn't know when to put the Woodepox in... wait or immediate? So... I took a chance (it's Sunday), several ppl answered:). The seller gave me really good advice and the one following him in the post. 5-20 minutes said the seller and the other guy said he waited about an hour. I'd already waited about two hours but my stuff was soaked and just right... tacky to the touch. So I mixed up my play doh and started squeezing it into all the rotten crevices and smashed and smashed it in then leveled it off as best I could. I did all the holes, one after the other then went back and smoothed a bit with the alcohol. I poured some alcohol into a plastic cat food dish (I save these bc they are so great for painting on canvas and small jobs) and smoothed out the surface with the mud knife. It had already started getting firm but the alcohol made it pliable a bit again.When I painted on the Liquid Wood I used a paintbrush from my art set, a 1/2 inch across brush. Some of the crevices were under the wood so I couldn't see how far back or big so I poured the liquid on top of the brush next to the hole and just dabbed everywhere the brush would go and then I wouldn't waste the liquid trying to scoop it up into holes. This worked great. I coated everything about three times. I had mixed one ounce each of A and B of the liquid and had trouble using it all. There was more than enough even though I had a lot to cover. There's lots left over too. I did use all the Woodepox though. I realized it was best to take smaller amounts of each, mix them together then add some more bc the color has to be one color when the mixing is done. With the larger amount it seemed to take forever to get it to be one color. I just put it out on a plastic grocery bag and put my feet at either end of the bag to hold it down. Some pieces would fall out of my ball of play doh and I would just dab it up with the ball in my hand. Super easy to work with. I used the gloves but they must have been super man's:) Huge! I could have used my hair coloring gloves and the fit would be better. It did the job though. I'll try and post some pics of my pitiful floor. I know this is extremely amateurish but I wish I'd seen something similar while I was trying to work up the courage to start. Had no idea except the directions on what to do and I did just fine:)
P**S
Great product
Does only a small area, but excelllent jobFollow directions carefully
J**H
Abatron Use and Effectiveness
This is a great product for rebuilding wood that is damaged by rot or other causes.
B**.
Easy to Use
I used the product to repair a rotted exterior window sill. Can't say at this point how well the product will stand up to weather. However, I can say that both LiquidWood and WoodEpox are easy to work with. Although each product requires measuring and mixing 2 parts, it's worth the effort. WoodEpox proved especially easy to work with. I mixed it with gloved hands and shaped it in place with my hands. It's very malleable. (Compared to a product like PlasticWood, much better.) I started by mixing a small amount out of concern that it would harden before I was done. Realized I could have mixed it all at once. Ended up using all of the WoodEpox and would have liked a bit more. With no experience doing this kind of repair, I found it hard to gauge how much was needed to do the job.
M**N
Great product
Excellent product. It did what I needed it to do. It also stained great, but I did use a solid stain.
B**4
Will it work and hold up to the elements
I'm buying this to find out how well it actually works. I bought a similar product five years ago and the repair didn't hold up
Trustpilot
Hace 1 mes
Hace 1 mes