We remain fully operational. Our teams are working around the clock to ensure your deliveries continue safely.

Descargar la aplicación


Servicios al cliente
Sobre nosotros
Copyright © 2025 Desertcart Holdings Limited
Descargar la aplicación

🌡️ Take control of your environment—because precision is the new power move.
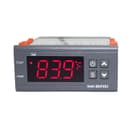
The Inkbird ITC1000 is a dual-stage digital temperature controller designed for professional-grade heating and cooling management. Featuring a clear ℃/℉ LCD display, reliable NTC sensor, and built-in alarms for sensor failure and high temperature, it offers precise, user-friendly control ideal for applications like 3D printing, refrigeration, and incubation. Operating at 110 volts, this compact device delivers consistent performance and easy installation, making it a top choice for millennial professionals seeking dependable climate control solutions.


| ASIN | B0152LYY0I |
| Best Sellers Rank | #18,704 in Industrial & Scientific ( See Top 100 in Industrial & Scientific ) #14 in Temperature Controllers |
| Brand Name | Inkbird |
| Color | Grey |
| Customer Reviews | 4.4 4.4 out of 5 stars (524) |
| Display Type | LCD or LED |
| Included Components | Temp Control Thermostat |
| Item Dimensions L x W x H | 3.93"L x 3.77"W x 1.49"H |
| Item Type Name | Temp Control Thermostat |
| Manufacturer | LERWAY Tech. |
| Material Type | Plastic |
| UPC | 705701562658 |
| Voltage | 110 Volts |
S**D
Perfect!
I got this several years ago to replace the thermostat in my fridge, and it has been great! The temp is much more consistent than with the original thermostat, and it's been perfectly reliable. Easy to install.
B**N
Great STC-1000 Type Controller
Full Disclosure - I was offered a discount on this product in exchange for an honest review. I purchased a Inkbird All-Purpose Digital Temperature Controller Fahrenheit &Centigrade Thermostat w Sensor 2 Relays back in April and have been very happy with its performance. I wired it into a small project box and hooked up my chest freezer to make a nice effective fermentation chamber. I have since picked up a second chest freezer so I needed something to control the temperature. This device fits the bill perfectly! You will see my make-shift controller box build for this unit in my pictures. This is almost certainly not to code, please do not think that I am suggesting you build your box like this. For what it's worth, it is working just fine on my chest freezer right now. PROs: Price - Great low-cost controller, especially if you already have the parts to wire this up sitting in your garage. Ease of Use - Adding the Fahrenheit display makes this much more user friendly. Effectiveness - Control heating and cooling with one device. CONs: Not Programmable - This is not the V1.0 A400 model STC-1000, you can't flash STC-1000p on this. Not Pre-Wired - If you are not sure how to read a wiring diagram, or you don't have the parts/tools around your house, then you would be better off buying Inkbird Itc-308 Digital Temperature Controller Outlet Thermostat, 2-stage, 1000w, w/ Sensor which does exactly the same thing, but is already wired for you. Additional Notes: This appears to be functionally identical to the earlier STC-1000 that I purchased. You can set the temperature, display unit, the compressor delay, and the calibration offset. The temperature probe is the same plastic-coated probe. The screw terminals and wiring diagram on the back look the same. In 7 months of continuous use my first STC-1000 has not had a single issue, I would guess that this one will be just as great. Inkbird is a great company to deal with and are very friendly to customers, I would say that alone is enough reason to pick this model.
C**.
Fun diy and accurate thermostat
I recently acquired the inkbird Incubator Thermostat Controller for my egg incubation setup, and I must say it has impressed me with its precise temperature control capabilities. One of the standout features of this controller is its remarkable precision in temperature control. With a temperature range of just 1°F and the ability to calibrate in increments of 0.1°F, it allows me to achieve and maintain the exact temperature required for successful incubation. This level of accuracy is crucial for the healthy development of embryos, and I appreciate the fine-tuning options it provides. The quick sample rate of the included temperature probe is another commendable aspect of this controller. It rapidly determines temperature changes, ensuring that the incubator environment remains stable and within the desired range. This fast response time is particularly valuable during critical phases of egg incubation when even minor temperature fluctuations can have a significant impact. It's important to note that while this controller excels in temperature control, it doesn't assist with humidity levels, which may require an additional humidity control system if necessary for your incubation setup. In summary, the inkbird Incubator Thermostat Controller is a fantastic choice for those seeking precise temperature control during egg incubation. Its 1°F temperature range, 0.1°F calibration capability, and quick sample rate make it a reliable tool for maintaining the optimal environment for embryo development. However, keep in mind that it doesn't regulate humidity levels, so you may need to pair it with a separate humidity control system if that's a requirement for your specific incubation needs.
R**N
Works great when used as intended. Relays are for 10 amps
Good cheap temp control for when a pid is overbore. If using to control a full size fridge or freezer you will likely need to add an AC SSR and heat sink or the internal relay will stick and your beer fridge will turn into a beer freezer. It took a year for that to happen. The user interface is simple, but no intuitive. Some toss the directions you will need them if you only make adjustments every couple of months. Cools to within 3 degrees in an upright freezer being used as a fridge. I think it would be more accurate in a more efficient application.
M**F
Great value and high reliability for conversion projects
Awesome affordable controller. Used a couple of these over the years. Latest purchase was to convert a high end Marvel wine cooler that was firmware locked to no colder than 55F to a drink cooler capable of 39F or colder. No issues driving the compressor, two circulating fans, and condenser fan direct from the controller's inner relay. Retained the stock controller just for the door temp display and the classy fade effect of the blue internal LED lighting.
F**O
Work fine nice product
Working very fine i use to replace an old mechanic thermostat. easy to replace
Trustpilot
Hace 2 semanas
Hace 2 meses