✨ Craft Your Masterpiece with Confidence! 🎨
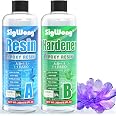
The SigWong Epoxy Resin Kit includes two 260ml bottles of resin and hardener, gloves, and a detailed manual. This 17.6OZ kit is designed for both professional artists and DIY enthusiasts, offering a crystal clear, anti-yellowing finish that is easy to mix and apply. Perfect for a variety of projects, it ensures a durable and glossy result.


| Material Type | Epoxy Resin |
| Size | 17.6OZ |
| Number of Pieces | 2 |
| Item Weight | 1 Pounds |
| Additional Features | Self-leveling, high gloss resistant, anti-scratch, anti-yellowing, wide applicability in DIY projects |
| Style | Professional |
| Seasons | All Seasons |
| Color | Multicolor |
E**V
Great repair kit
This is great for crafts as it has glitter and dye. It also works well for repairs. The epoxy bottles work well together when mixed to fill damaged tables and holes in items and furniture. Works well to repair wood and manufactured engineered wood too. I’m sure it would work well in plastic for filling dents and damage as well. They dye is nice for repairing as well to help match ton product. Most importantly this dries clear not yellow so you may not even have to use dyes to blend in.
E**R
Awesome resin
This was the resin I first ever used. I use it still and prefer it. It is a forgiving resin. It is crystal clear and has a wonderful shine. It sets in 12-15 hrs and fully cures in 24-36 depending on heat and humidity. Take note: this resin is not super hard once cured. If heat is applied, the resin may warp and malform.I followed the directions and my first project came out good but bubbly. Since then, I use a heat gun to banish bubbles.Tips for success:1. Warm that resin! I place my resin (still in the containers and sealed) in a hot water bath. I let them warm for 15 or so mins. 2. Pour the hardener first. The resin portion of the two part mixture is a bit heavier. Adding the resin second makes it easier to mix 3. Mix SLOWLY and DELIBERATELY. Resin is not an egg to be scrambled. The faster you mix, the more air bubbles you get. 4. Mix for 3-5 mins. I use songs to keep time, it's far more entertaining to listen to music than to stare at a clock 5. Pour into second container and stir again...Pretty explanatory. 6. Use a heat gun to pop them bubbles. 7. Pour slowly and in layers. Pour, heat gun, pour, heat gun. 8. If adding inks, make sure they are not oil based. It won't mix as well. 9. Pay attention to your working times. If you go over, the resin will begin to set and it gets wonky and sticky and weird. 10. I prefer to use this for CASTING not coating. It doesn't level as well as coating resin and it's a bit thinner than coating resin.
A**N
Creative flexibility, fun and easy...worth the purchase.
This was my first time working with resin and I absolutely loved this product. Even with all my novice mistakes I had a blast learning how to work with this product. Mixing mica with this resin was easy and the gradient colors were spot on. I tested different layers of drying time and I wasn't disappointed. Even this size of resin I thought it would give me just a few practice runs but it lasted longer than I thought. I would definitely purchase this item again and recommend it wholeheartedly.Tip...wear glovesTip...paper towels at hand is a mustTip...a working base will keep things tidy and protect your tableTip...preseal your fabric, paper and pictures before covering with resin. Also pour the resin in layers giving an hour or two between layers as you place your items in it so it does not sink or float.Tip...the bottom is less shiny but you can sand it a bit and buff it out so it is super shiny if you want.Tip...room temperature is best for curing quality and timing.Tip...cover with a good bet cover if you have pets to avoid fur contamination..lol...trust me on this one.Tip...patience is a must give it time to dry without touching or moving.Tip...use a level to make sure your design settled evenly.Tip...measure your mold with rice so you know how much resin you need. That way you don't waste any. Working in small batches is best. It is easy and quick to redo a batch if needed.Tip...mark the caps so you know which bottle it belongs to.Tip...after use quickly wipe the bottle opening so it does not dry or shut tight on you.Tip... preparing your items before you start is just smart. Think of the items and line them up as you will need them.This product is easy to use, and loads of creative options available to you. Lots of fun. I purchased it to make funeral memorial giveaways and everyone loved the pendants.
N**S
Kit Safety Needs A Boosting
The product itself for me in my use case of carbon fiber application on weave has been effective and reliable. However, the kit lacks proper explanations on safety protocol. The lack of necessary information on the risks is noteworthy. Even worse are the safety materials provided.The fact that there's no mask says it all. This needs to be corrected IMMEDIATELY. and if there's no profit friendly way to do it, warn people to use one. Your safety instructions explicitly leave out mention of a mask in how to prepare to use. That's egregious, at best, if I'm being honest.Not to mention, the gloves (2 pairs) provided are a genuine liability. I'd rather have no gloves and be hyper aware of letting epoxy touch my skin than the gloves provided and trust they won't break. Because they did 10/10 for me. Never, and I mean never, did a gloves NOT rip. I go through an enormous amount of gloves unfortunately just working with epoxy and photopol resins. i'm capable of using them without tearing them off like an animal so I know this isn't totally user error. This is down to the gloves. Which can cause problems when you have your hands mixing and applying without really realizing it's been exposed this entire time to resin.Net, the product works. Anyone who says it doesn't is more than likely not using correctly. Like all resins, it can be tricky. but Not necessarily so. But that's where my defense of this brand ends. It's hard to ignore or forgive the gaps in safety.
T**I
Easy to use
Wanted to try epoxy resin...never had used it prior .... Ordered this kit & I couldn't be more pleased! Measured the hardener in one cup and the resin in another then poured the resin into the hardener. Stir for the full 5 mins. Started my small tray paint poured practice project...the resin poured easily and no bubbles at all. Covered & Dried overnite. Crystal clear and hard surface. Going to try and add another layer and do the tray sides to finish it up. Only con...had to use different mix cups..the ones in the kit are very tiny... For me as a very beginner this kit was awesome!
Trustpilot
Hace 2 semanas
Hace 2 meses