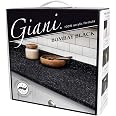
🖤 Upgrade your space with the luxe look of granite—without the granite price!
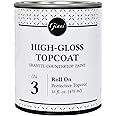
The Giani Granite Countertop Paint Kit 2.0 in Bombay Black offers a durable, 100% acrylic, water-based formula that transforms laminate, Formica, and more into a stunning granite finish in just a weekend. Covering up to 35 sq. ft. with a high-gloss, food-safe topcoat, this low-odor kit includes all tools needed for a professional-quality, customizable application—all proudly made in the USA.


| Brand | Giani |
| Color | Bombay Black |
| Finish Type | Gloss |
| Size | 44 Fl Oz (Pack of 1) |
| Item Volume | 44 Fluid Ounces |
| Special Feature | Low Odor |
| Unit Count | 44.0 Fluid Ounces |
| Paint Type | Acrylic |
| Specific Uses For Product | Interior |
| Surface Recommendation | Formica, Laminate |
| Indoor/Outdoor Usage | Indoor |
| Item Form | Liquid |
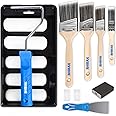
| Included Components | Foam Brush, Roller Arm, Roller Pads, Practice Board, Paint Sponge |
| Age Range (Description) | Adult |
| Is Waterproof | True |
| Package Information | Can |
| Color Code | Bombay Black |
| Coverage | 35 square feet |
| Water Resistance Level | Water Resistant |
| UPC | 850015970108 |
| Manufacturer | Giani, Inc. |
| Part Number | FG-G2 BLACK |
| Item Weight | 5.33 pounds |
| Product Dimensions | 11.5 x 4 x 11 inches |
| Country of Origin | USA |
| Item model number | FG-G2 BLACK |
| Style | 100% Acrylic Topcoat |
| Finish | Gloss |
| Material | water based |
| Item Package Quantity | 1 |
| Special Features | Low Odor |
| Batteries Required? | No |
S**N
AMAZING!!
I never write reviews but I am in such a state of awe, I couldn’t help myself!! This completely transformed my kitchen countertops and looks like I hired a professional and pay thousands of dollars to replace my counters with granite. I had a dull old ceramic tile and after using this product, it’s looks completely transformed and brand-new!! I can’t believe for this price I could achieve such impressive results!! I’m also a lady and not too handy, coordinated, or comfortable doing home repairs, but even I could do it and it was simple!! I am proud! Easy instructions, and also watched the video. I can’t stop looking at my counter, as I am shocked on the fantastic results. I definitely will be telling others about this product, and will buy again for my next countertop project!!
K**R
PHENOMENAL Customer Service!!
This is my third time using this product over the past four years. I had dingy white laminate countertops that were not in great shape. Was looking for an economical refresh and this has been it! In the past I didn't have the best looking end result using the sponge on technique, (I was happier with some areas over others) so this time I tossed the sponge and decided to forgo the sponge on technique entirely. I simply primed, and mixed a bit of the White Limestone into the Inca Gold until I achieved the tan shade I was looking for. From there I rolled it on with a foam roller, and used a quality 2" angled sash paintbrush for the back splash. I have about 18 square feet of counterspace and technically squeaked by/pulled it off using one kit. Because I'd prefer thicker coverage, I ordered an additional can of Inca Gold and White Limestone for that reason. But that's just me. I have found that the areas along the edge of the countertops that get leaned against the most, while reaching into the upper cabinets get the most wear. Also, even after applying the top coat, when wet items are placed on the countertops, it leaves water marks. Until fully dry. Then they disappear completely. For the price, ease of use and OUTSTANDING customer service I would highly recommend this product. It will buy me time, until I can finally decide if I want butcher block or quartz kitchen countertops. Until then, this is a decent refresh. They DO sell an epoxy that would be more durable than the top coat that is included in this kit. I believe it's about $114.00. Having no experience using an epoxy though, I will be staying within my comfort zone and using the top coat that is included. Place painters tape around your sink and stove, keep damp paper towels or baby wipes at the ready, and I suggest wearing disposable gloves. Great product.
L**
Watch all instruction videos !!
I can’t believe how amazing my bathroom vanity countertop looks !! I watched the videos ( all that I could find online ) over and over amd during the stages of application . This really helped me be confident in what I was doing . I trusted the product and system and I’m soooo happy ! Saved me 1000’s in replacing my vanity . My actual area of painting was small , I can imagine a larger kitchen would take two kits , and I was tired , don’t think it’s going to be automatic perfection , but if you do it exactly like you are supposed to , you will be so pleased !!
A**R
Looks great, is mid range project to accomplish, but make sure you open the bubble wrap.
It turned out great. Love the way it looks. I'm a 75 Yr. Old Lady who is still working and I did the project alone. I would diffinetly recommend the product and would happily do so again. But, with 2 small notes and 1 big negative. 1. Make sure you take their advice about preparaing the countertops before hand, it makes a difference when you come up against something you hadn't accounted for in your schedule. 2. Make sure your countertops are level, otherwise the the the epoxy could pool in an area and make it thicker. 3. There is only one negative, and it's a big one. The kits arrived with all the equipment and cans. However, the activator was seperated in a bubble wrap, I could read that it was the activator so left is alone (The activator is clear). Other than checking to make sure everthing was there I did not check further. When I went to mix the epoxy (Last step in the process), I took off the bubble wrap from the activator and found that 3 out of the 4 cans (betweem two kits) had leaked. I had ordered 1 Large and 1 small kit to make sure that I had enough for the project, this includes 4 cans of activator. The instructions are very clear about only using 1 can of activator per 1 can of epoxy and to make sure you use all of the activator to maintain the proper ratio for activation of the Epoxy. Since I had extra I was able to measure and make sure I had enough. I ended up using only 2 cans of Epoxy and 2 cans of activator with enought left to do another small project. Actually only 1 can of activator had leaked significantly and the other 2 not nearly as bad. Open the bubble wrap before you start your project as the Activator is clear and does not show when it leaks. You do not want to have your kitchen/bathroom torn apart and two thirds thru the project and have to wait to get more activator. This is why I gave it only 4 stars when I truly believe it is a great product. (P.S. The Epoxy has no smell).
T**R
Not hard to do at all very easy and simple
First thing I did ran out of the black paint for my size kitchen which is not big, paint colors are A B and C. C did not use I tested didn’t like it, but it still came out great and I’m very satisfied with the outcome I will get another clear glossy paint to go over the counter to get it that better glossy shine but Overall I love my new counter oh yeah get another roller The first counter came out perfect but when I when to use the roller on my kitchen island it was harder to use wasn’t rolling well at all, got another roller and everything went well overall very satisfying yes work the money.
Trustpilot
Hace 2 meses
Hace 2 días