♟️ Elevate your game with creativity and style!
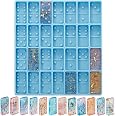
The LET'S RESIN Chess Molds set includes 25 pieces, featuring molds for a full-size chessboard and all chess pieces, allowing for easy customization and creativity. Made from high-quality silicone, this upgraded set is perfect for DIY enthusiasts and families looking to bond over crafting unique chess sets. The included storage bag ensures everything stays organized, making it a fantastic gift for any occasion.


| Item Dimensions | 11.5 x 11.46 x 2.06 inches |
| Material Type | Resin |
| Item Shape | Chess Pieces, Chess Board |
| Color | Chess Molds |
M**Y
Set is so awesome! You’ll love it, buy it if you love resin!
We have yet to make a full set of chess pieces, but we have made a few random pawns and bishops.The chess board we completed after several failed attempts. You are supposed to do every other square with color, wait 12 hours, then do the remaining squares.Watching the video that Lets Resin has of making the board REALLY helped me understand how to do it right & then I was successful in making the board. I based my board off of their idea they show in the video with the white squares and a rainbow swirl made with clear resin + several colors of alcohol inks swirled together with a popsicle stick, with some white resin on top to add contrast to the swirl.At the last second I threw in some of my random hotfix rhinestones because I bought a 20,000 pack and so I often toss them in to resin while it’s curing to “spice it up” a bit.It doesn’t look nearly as good as the video they have of the board, but I am happy with it! Sadly I was a little short on filling up the entire board mold so my chess board isn’t completely level. But I’m thrilled I finally made one without messing it up like I did a few times before.Comes with really nice velour fabric drawstrings bags to hold your chess pieces too, which is a bonus.I stored all the molds in a large ziploc bag, that way they will all stay together.Molds are thick, but make sure they are SUPER rock solid cured before taking resin out of chess piece molds. A pawn I made lost its top ball shaped piece because it wasn’t all the way cured and I tried turning the mold inside out to remove the resin.The pieces stand up really well with the design they have for them. Easy to release as long as you are fully cured, you shouldn’t have a problem.
K**K
Definitely recommend this (speaking as a beginner)
Honestly the set was great. I totally thought it came with resin but it didn’t, my mistake for not reading the whole description though.Full disclaimer it did take like 5 hours bc you have to do the pieces in two sets as well as the board. Also a few of the pawns heads fell off so I had to make a third batch, but user error tbh.Definitely be careful when filling the chess board bc the colors will leak if filled to high or not level.Truly turned out better than expected and wasn’t that hard.Also recommend gloves for sure. Don’t skip those.
D**S
Creative Way To Make Games.
My son plays chess and he loved this set. Making his own Dallas set was the first thing he did.The pieces have cross bases that allow them to stand freely while curing. Easy to decorate and pour, pieces are a bit difficult to get out but they are worth it. The board is not as thick as it seems and the edges curl a bit as it cures but can be gently bent to flat as it hardens. Once it is all together it is a truly stunning game and it plays beautifully.
M**Y
Stabilize the pieces
I really do love these molds. The detail is great.The pieces are NOT stable on their own! I walked away and came back to pop bubbles and one had tipped over spilling it's resin. This happened 3 more times. By that point I needed to make more resin and start over. I was able to stabilize them in the sticky spilled epoxy so that worked out! I kind of wonder if this was a packing issue. One piece is oval rather than round. And the chess board itself wanted to lift up at the corners so I taped the corners to my table. Other than that I really like them. And like I said, they may have been bent because of shipping.
S**Z
Crafts
Love the mold
M**R
Wrecked the mold the first time using it
I was so excited to get this kit as i've wanted to make a chess board for a while now. The chess pieces turned out fantastic. All the molds worked beautifully, especially when following the directions on squeezing it as you poured the resin. The rest of the kit however i was greatly disappointed. Both the checkers mold and the board mold itself, bonded with the resin, ruining both molds when i tried to remove the molded resin. the board really surprised me. i made it in 3 pours, over the course of a week. the first pour was have the squares, the second pour was the other half of the squares, and the final pour was the backing and the outline. the mold bonded in places with the second and third pours. not sure why since the first pour demolded so well. i ended up taking an exacto knife to slowly cut away the mold from the resin. The checker mold was even worse. ended up just throwing the whole thing in the garbage. extremely disappointed.
K**R
Chess mold
Super cute but have not had chance to use yet
P**T
Very good mold
I am giving this set 5 stars because I do like the whole set. However, I would like to let people know some things (especially beginning resin crafters). First, I definitely recommend getting a chess piece mold holder. Second, I recommend pouring resin less than halfway and then squeezing the resin into all the nooks, crannies and ridges and nubs and really paying close attention to make sure the resin is getting into all the places. Then, especially on the pawns, pour a tad bit more and squeeze the bottom (ball) to get the bubble past the ridge thing that goes all the way around. I would give multiple squeezes periodically until it starts to set up and then you can add more resin almost to the top. Reason: even if you don't see a bubble deep in the middle of the ball, there might be one there and you won't know until you go to demold and the ball pops right off and you see that it is partly hollow...yep, that happened to me on two of them. The board itself is pretty easy to do, if you take your time with it. I would love if the individual squares had just a tiny bit higher sides separating them, but as long as you are very careful then you shouldn't overflow into the next square. I am super happy with this set.
Trustpilot
Hace 1 mes
Hace 2 días
Hace 2 meses
Hace 3 semanas