🛁 Refresh your bathroom vibe—DIY tub perfection made simple!
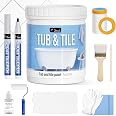
DWIL Tub Paint is a water-based, low-odor refinishing kit designed for bathtubs, sinks, tiles, and more. Covering up to 55 sq.ft with a durable semi-gloss finish, it includes all necessary tools for a fast, professional-quality makeover. The paint dries to touch in 24-36 hours and fully cures in 7 days, offering waterproof, scratch-resistant results without harsh fumes.


| Brand | DWIL |
| Color | White |
| Finish Type | Semi-Gloss |
| Size | 3.5 Ounce (Pack of 10) |
| Item Volume | 1 Quarts |
| Special Feature | Low VOC, Low Odor |
| Paint Type | Water based |
| Specific Uses For Product | Bathtub,Countertop,Floors,Sink,Sinks,Tile |
| Surface Recommendation | Tile, Glass, Wood, Stone, Plastic, Fiberglass |
| Indoor/Outdoor Usage | Indoor |
| Item Form | Acrylic |
| Included Components | Part A: Tub and Tile Refinshing Emulsion 1kg * 1., Part B: Hardener 10g * 2, Tool Sets: Masking Film * 1; Paint Roller * 1; Brush * 1; Sandpaper * 2; Gloves * 1; Masking Tape * 1. |
| Is Waterproof | True |
| Package Information | Can |
| Color Code | #FFFFFF |
| Full Cure Time | 7 Days |
| Coverage | Covers 2 layers of 50 sq.ft |
| Water Resistance Level | Waterproof |
| UPC | 605765932933 |
| Manufacturer | DWIL |
| Dry Time In Hours | 24.03 |
| Item Weight | 2.19 pounds |
| Product Dimensions | 4.53 x 4.53 x 5.71 inches |
| Style | Bathtub kit/50sq.ft |
| Finish | Semi-Gloss |
| Special Features | Low VOC, Low Odor |
| Batteries Included? | No |
| Batteries Required? | No |
J**N
Simple and Effective.
This is a simple and effective product. Great finish and look, super easy to use, and overall a good value.
M**N
Extremely happy with the results
Packaging: came with a roller, brush, plastic gloves (which were very helpful), tape, tape with plastic attached (very useful), paint, and two hardening solution packs. I still needed to get extra rollers, a few paint trays, painters tape, paint stirers, liquid sander and scrubbing pad.Application: Went on easily. My first coat was a thin layer. I used the brush on the grout lines and then applied the roller. The difference was very visible. I think sticking with the roller for the first two coats would have worked better for a more even application (I also think a sprayer would have done the job perfectly) . Not sure if it was the grout or the curve of the tub that caused the roller to split, but you will need a few extra rollers just in case.Drying: I was working in a relative warm bathroom (my upper level is difficult to cool) so that may have impacted things. But boy, this product wants to dry! I sometimes accidentally touched a spot I had previously completed and the coating was dry enough that i didn't disrupt anything. It's best to work thoroughly in small methodical sections. I also ran into an issue with the paint in the tray forming skin layers. I wasn't aware of the formation until I applied more paint to the roller and then to the tub. It may be helpful to keep the tray covered with plastic to hopefully avoid this. Because of this, I used a new paint tray every time I finished a layer. It's difficult to clean them out completely and I didn't want old paint flecks/ skin causing issues with the next layer. Unfortunately there are still flecks that I couldn't get out. I don't feel terribly picky about it. Manage any drips immediately though.Coating: for my shower/tub project, one container made 2 full coatings. I ordered two containers because I wasn't sure what to expect. Glad I did. I actually liked the two coatings and hubs thought it was good enough. But I did see a bit of unevenness in my application in places. I used the second container to liberally apply a thicker third coat. That was exactly what it needed. A few paint brush touch ups at that point blended nicely and the product self- leveled.I absolutely love the result. We were going to go through an expensive rehab in the bathroom. This product changed our minds. The tub looks brand new and we saved ourselves several thousand dollars. I will say that our tub is porcelain with ceramic tile. The matte finish combined with the roller texture makes it look like a pvc cover up installation lol. Still looks amazing though. Tons better than the grimy mess it once was.
A**E
Good coverage, low smell, but might be best for a spray application
The product is good. Pros are coverage, bright white color, minimal smell. The provided brush and plastic/tape combo were great. Cons are that the tape wasn’t extremely sticky especially to grout and the provided roller had a weird hard spot in the sponge part. Also the finished outcome is a matte to almost flat finish and gritty. I think the interior of the paint can was perhaps a bit dry. Folks who strain the paint prior to spraying seem to have better results. No comments on scratch resistance or general wear and tear yet.Given the amount of research I did prior, here are the steps I took.Time spent: total 16hrsDay 1: 2-3 hrsDay 2: 12.5 hrs plus cleanup timeCost: total $70Paint kit $55 (only one kit. I bought 2 per recommendation but only needed the one.)Roller/tray kit $15Supplies in addition to the paint kit: 4-inch foam roller and tray kit (I only used one roller), scissors, razor blade/knife, rags/towels, microfiber lint cloth, cleaning supplies (shower spray, barkeep, sponge, etc), knee pads. Recommend using the blue painters tape in addition to the provided tape.Prep: (the day before painting, 2-3 hrs) remove caulk, deep clean the surface, cover faucet and shower head with rag and bag taped on.Prep: (painting day, 1 hr) make sure tub is dry, go over it with the lint rag. Tape the edges and around the drain. Shake the paint for a minute, add hardener then stir/shake for a good 5 minutes.Paint: begin with the brush at a top corner, switch to the roller and roll as close to the corner as possible to remove any brush streaks. Work in small sections and quickly correct any heavy lines or drips with the roller. Start with a light coat. Complete the inside, then do the outside front, finishing with the top front edge. I let it dry for the recommended 2hrs. Repeat until desired coverage within the 12-hr time frame. On the fifth coat I had extra paint and went a little heavier at the tub floor. If time had permitted, there was enough paint for 6 coats. (painting took 30 minutes x 5 coats, plus 2 hr drying periods x4, total time 10.5 hrs)Afterthoughts for painting: cover the roller and brush and paint tray during the 2-hr drying periods to avoid them drying out. And stir the paint mixture in between each 2-hr period, prior to starting the next coat of paint.Cleanup: wait another 2-hrs before cleanup, including tape removal. Use the razor blade knife to score the tape as needed. I removed half of the tape at 1-hr but would recommend waiting at least 2-hrs to avoid issues. It was late so I removed the remainder of the tape and plastic the next morning.The directions say to wait to resume normal use after 7-days. Good luck!
Trustpilot
Hace 1 semana
Hace 5 días
Hace 1 semana
Hace 1 semana