Desert Online General Trading LLC
Dubai, United Arab Emirates
Desert Online General Trading LLC
Dubai, United Arab Emirates


🛠️ Patch it, ride on—never miss a mile!
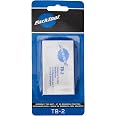
The Park Tool Super Patch Kit is a compact, waterproof cycling repair kit featuring 6 self-adhesive patches with a premium 3M-developed adhesive. Designed for quick, reliable tire repairs on the trail, it fits easily in your pack and comes backed by a limited lifetime warranty.


| Brand | Park Tool |
| Specific Uses For Product | cycling |
| Material | Plastic |
| Item Form | Stick |
| Special Feature | waterproof |
| Color | Blue |
| Item Package Quantity | 1 |
| Package Information | Tube |
| Viscosity | low |
| Water Resistance Level | Not Water Resistant |
| Unit Count | 1.0 Count |
| Viscosity Level | Low |
| UPC | 763477003768 |
| Number of Pieces | 6 |
| Global Trade Identification Number | 00763477003768 |
| Manufacturer | Park Tool |
| Item Package Dimensions L x W x H | 5.39 x 3.78 x 0.59 inches |
| Package Weight | 0.01 Kilograms |
| Item Weight | 9.07 g |
| Brand Name | Park Tool |
| Warranty Description | Limited Lifetime Warranty |
| Model Name | Qkgp02c |
| Suggested Users | unisex |
| Number of Items | 1 |
| Part Number | GP-2C |
| Model Year | 2012 |
| Style | Super Patch Kit |
| Included Components | Puncture Repair |
| Size | One Size |
| Sport Type | Cycling |
Trustpilot
Hace 2 meses
Hace 1 mes