We remain fully operational. Our teams are working around the clock to ensure your deliveries continue safely.

Descargar la aplicación


Servicios al cliente
Sobre nosotros
Copyright © 2025 Desertcart Holdings Limited
Descargar la aplicación


🎞️ Capture nostalgia, create legacy — digitize your past with Elgato!
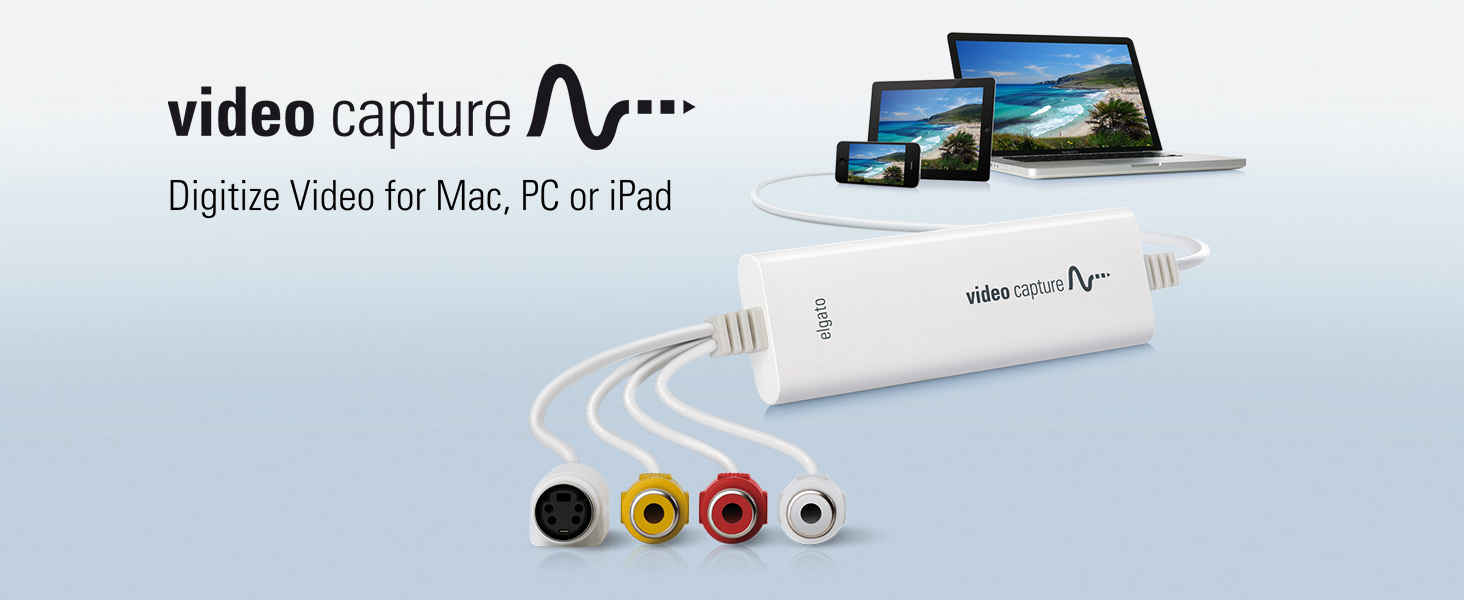
Elgato Video Capture is a compact USB 2.0 device that converts analog video from VCRs, camcorders, and other sources into high-quality H.264 digital files. Compatible with Mac, Windows, and iPad, it supports global video standards (NTSC, SECAM, PAL) and includes easy-to-use software that guides users through capturing, editing, and sharing vintage footage seamlessly. Perfect for professionals and enthusiasts eager to preserve and relive their analog memories in crisp digital format.


| ASIN | B0029U2YSA |
| AV Output | MPEG-4 |
| Antenna Location | Video Recording |
| Best Sellers Rank | #16 in Internal TV Tuner & Video Capture Cards |
| Brand | Elgato |
| Built-In Media | Composite video/RCA stereo cable, Composite-to-SCART adapter, Elgato Video Capture hardware |
| Compatible Devices | Personal Computer |
| Customer Reviews | 4.3 4.3 out of 5 stars (10,726) |
| Global Trade Identification Number | 00852095000225 |
| Hardware Interface | USB 2.0 |
| Item Dimensions | 4.09 x 1.38 x 0.47 inches |
| Item Type Name | Corsair Elgato 1VC104001001 Video Capture for your Mac or PC, iPad and iPhone, white |
| Item Weight | 80 Grams |
| Manufacturer | Elgato |
| Mfr Part Number | 1VC108601001-2 |
| Minimum System Requirements | Minimum system requirements: Mac OS X 10.6.8 or later, Windows 7 or later, 2 GHz Intel Core 2 Duo (or comparable) processor, sound card |
| Model Name | Video Capture - US |
| Model Number | 10020840 |
| Operating System | Mac, Windows |
| Other Special Features of the Product | Easy-to-use software |
| Platform | No Operating System |
| Tuner Type | NTSC, SECAM, PAL, PAL/60 |
| UPC | 806293530725 809186274317 852095000225 523161116460 012303707319 031112451343 887594557222 782941786686 163120866984 793426824281 168141640070 803982721570 012301012538 100177338347 872182673071 059072806942 012304319146 012300176811 172302821901 132018346228 809385669198 |
| Video Capture Resolution | 480p |
| Warranty Description | 1 Year Limited Warranty |
K**N
Amazing SIMPLE to use device!
I have an old 8 mm Sony camera that used FireWire for uploading the video to a computer. It worked great on windows XP. But when Windows 7 released it was glitchy, and I’ve never been able to get it to work on windows 10. It also has a component video audio out port. That is a small 2 1/2 mm plug that adapts to the yellow red white component video connections. It is an amazing old camera but technology moved away from fire wire. I sent the camera to a high-end camera shop that cleaned and tested it. I read a number of Internet blogs on how to make fire wire work with windows 10. I download countless drivers, tried numerous configurations, and it would not upload video. I finally gave up on the FireWire cable, and purchase the Pinnacle Dazzle component video capture device. Years ago I had pinnacle studio 14 and loved the program so I had high hopes this would work, but it did not. Driver issues and all kinds of glitchy gave me countless hours of troubleshooting to no avail . I was really frustrated! I was really getting worried since I have about 50 tapes spanning 35 years I need to digitize and preserve. Nearly 100 hours of memories. After watching an excellent YouTube video about this Elgato device I took one more chance and purchased it . It’s the best $90 I’ve ever spent. I hooked up the device to the component video on my camcorder, went to their website and download the Software for the capture device. I double clicked the software, and there’s four simple steps. 1. name the video click next. 2. Push play on the camera to make sure the video is coming through on the screen. once you see the video click next.3. Confirm you have sound. You can hear the sound when it comes through and there’s a 2 bar scale at the bottom of the page for the right and the left channel of sound. Once you have sound push the red button that says record.4. Wait for the entire video to play which most tapes can run up to two hours and once the video is finished click stop recording. No joke it’s that simple! They had some nice features like muting the sound so if you want to upload the video while you’re doing other work you’re not distracted by the sound. If you know your video on the cam corder is only a 60 minute tape you can automatically stop recording the video at 60 minutes so you can leave your computer and not have to worry about being there to stop it. There’s another simple area that will allow you to adjust the contrast brightness and other settings of the video to try to improve it. I played with this for a little while but found the default setting is the best for my videos. Depending on your computer it takes a short while to render for finalize the video and store it on your hard drive or which ever device you are saving it to. I have a New computer with the Intel I9 processor and and Nvidia 3070 graphics card and a 2 hour video takes about three minutes to process which is incredible! Each hour of 8mm video takes about 1 GB of memory. In the past two weeks I’ve uploaded nearly 25 of these two hour videos directly onto my NAS! I highly recommend anybody with a component video VHS or 8 mm camcorder or anything with the yellow red white cable that wants to save their memories to buy this device! Spend the $90 for this particular one since Elgato’s capture software is the secret sauce! There are hundreds of these devices for sale that look pretty much the same and there only $15. Don’t get fooled by a cheap price! If pinnacle studio can’t get the dazzle device correct I can’t imagine a $15 cheap knock off will get the software correct. Thank you El Gato! You have a very reliable very easy and excellent product! My children in their 30s and my grandchildren are enjoying watching all of these videos through my Apple TV!
P**H
Great Product - Excellent Deal
I received my Elgato Video Capture Device the very next day after ordering. My computer is an iMac running OSX 10.7.5 (Lion). Installing the software was simple and straightforward. After starting up the software for the first time, a message came up recommending that I update to the latest software (version 1.1.2) which I did. To test it out, I connected it to a DVD player. At first the signal was being received and I was able to do a test capture. Turned out perfect, just as it should. But, after attempting a second capture, the signal went missing. I checked and re-checked all connections, tried a second DVD player, and still no signal. I even quit the program and restarted it without any luck. Next I tried the device on my MacBook Pro laptop (OSX 10.7.5 Lion). The same thing happened - Signal received on first try, but on subsequent attempts, no signal being received. So I tried the device on another iMac, this one running OSX 10.6.8 (snow Leopard). The device worked flawlessly, time after time. Ok, so next I decided to go back to using the original software that came with the device (version 1.1.1), and give that a try. Back on my computer, device connected, and running the original Elgato software version 1.1.1, everything worked perfectly! So it appears the their latest software does not work well with OSX 10.7.5. Only version 1.1.1 is working properly. I've been capturing video with excellent results for a week now and I am happy with the performance of device and software, and of the quality of the video captured. One thing I did notice, on very old VHS tapes where signal was less than perfect, the device actually lost signal from time to time. This occurrence was rare and most of my older tapes were captured without any problem. Overall I would recommend this product with high acclaim. It has been performing as good or better than I expected. It is easy to set up, easy to use. The software allows you to adjust video characteristics such as brightness, saturation, contrast, and hue. Audio input signal level is also adjustable. It allows you to save in both H.264 and MPEG-4 formats.
R**S
Facile à installer, efficace. Les numérisations sont parfaites. Basique mais on ne demande rien de plus. Le post traitement si nécessaire devra toujours se faire avec un autre outils que celui de la numérisation.....Mac a Imovie qui est largement suffisant. Rien à voir avec ROXIO EASY VHS to DVD.......qui ne mets pas ses programme à jour et qui fonctionne tres mal.
A**ー
VHSテープのデジタル化を考え購入。 Macで問題なく使えます。 アプリも簡単。映像を取り込んだ時点で切り取りもできます。
X**R
El dispositivo es robusto y con una buena longitud de los cables. diferentes elementos para adaptarlo a los distintos posibles aparatos, cámaras, vídeo cámaras o dispositivos con cables RCA. El que sea USB 2.0 no tiene importancia, ya que la conversión se realiza en tiempo real, Incluye software de Cyberlink (Este software se ha de bajar de su página web con el dispositivo conectado al ordenador) que nos servirá para realizar el traspaso y optando por diferentes formatos de salida. Buen producto, totalmente recomendable.
A**9
L'ho acquistato reduce da esperienza negativa con un prodotto analogo più economico. Ero quindi discretamente prevenuto, ma presto mi sono dovuto ricredere. Il software è essenziale, non aspettatevi di poter intervenire a livello avanzato sui vari settaggi. Badate bene, non lo reputo un difetto. Volevo un prodotto in grado di assicurare una buona qualità di acquisizione con pochi fronzoli, e utilizzabile da chi, come me ha poche conoscenza tecniche in materia di audio video. E così, filmati formato 8mm sono tornati a nuova vita, acquisiti e convertiti in formato mp4. La qualità è buona, per le mie esigenze e considerata l'età avanzata dei video (>20 anni) direi quasi ottima. Il prezzo non è dei più economici, ma ne vale la pena. Per abitudine leggo sempre le opinioni negative, ho deciso di provare, ed ho avuto ragione, non riscontrando nel mio caso i pochi difetti lamentati da altri. Ripeterei l'acquisto al 100%
A**R
With its easy steps to convert to better quality provided by outcome video and audio settings this is the best product I have found.
Trustpilot
Hace 2 semanas
Hace 2 semanas