Desert Online General Trading LLC
Dubai, United Arab Emirates
Desert Online General Trading LLC
Dubai, United Arab Emirates


💼 Elevate your Raspberry Pi into a pro NAS powerhouse — because your data deserves the best!
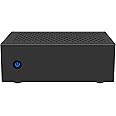
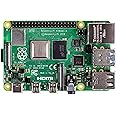
The Geekworm NASPi Gemini 2.5 V2.0 is a premium dual 2.5'' SATA HDD/SSD NAS case kit designed exclusively for Raspberry Pi 4 Model B. Featuring RAID support, a PWM-controlled cooling fan, safe shutdown, and auto power-on capabilities, it delivers reliable, high-speed (5Gbps) storage performance in a sleek metal enclosure. Ideal for professionals building home media centers or web servers, this kit ensures efficient cooling and data protection while maintaining a compact footprint.


| Compatible devices | raspberry pi 4 |
| Hard disk form factor | 2.5 Inches |
| Max number of supported devices | 2 |
| Data transfer rate | 5 Gigabits Per Second |
| Manufacturer | Geekworm |
| UPC | 730709035835 |
| Product Dimensions | 16.7 x 11.2 x 6.1 cm; 426 g |
| Item model number | TB-100312-K |
| Standing screen display size | 2.5 Inches |
| Computer Memory Type | Unknown |
| Are Batteries Included | No |
| Item Weight | 426 g |
| Guaranteed software updates until | unknown |
R**Y
Good product, great customer support
I bought this case but unfortunately it was delivered with a standard 5V fan rather than the PWM fan it was supposed to come with. So, I sent a message to the local supplier, Geekwork-UK, not expecting much, but I had a reply within the hour and by the end of the day (Thursday before Good Friday) they'd arranged to dispatch the correct fan. Easter intervened, but the new fan arrived on the Tuesday after Easter, and all was good. Very impressed with the customer service. So despite the initial screw-up with the fan, it still gets a 5-star.The case and PCB itself is great. Well made, everything fitted properly, and I can't fault the build quality. The chipset and particularly the USB3-SATA bridge works well with the Raspberry Pi and the disk pair, giving full APM on the disks and SMART monitoring. I have a working NAS with dual disks running OpenMediaVault which consumes only 5.5W average over 24 hours from the mains, peak consumption rising to about 7.6W when the disks spin up.All-in all a pleasing product, and if you're at all technical I'd recommend it in an instant
D**Z
Works well
Paired with a 12V8A power-supply, it works great. No issues running two 1A 2TB HDDs and PI4B. Has all the extra bits needed (not actually noted on product description) like screws, jumpers, etc. The only minor issue is that I had to unscrew the board stand-offs from outside, and then one brass stand-off was jammed into the screw. All installed fine and no issues with the PI. Make sure to download the updated xscripts as the newer ones don't require python.
G**F
What a brilliant piece of kit and so easy to assemble and setup.
What a brilliant piece of kit and so easy to assemble and setup.Be sure to watch the Geekworm video on how to assemble your Geekworm NASPi Gemini V2.0 Dual 2.5" SATA. In particular, my NASPi came with the main board screwed onto the standoffs; so me being impatient me, I just unscrewed the board, fitted the 2 x Integral 240GB SSDs and screwed the board back into the case - big mistake, as I realised once I'd watched the video (after I'd got it all assembled !!!) The flanges on the top of the case get in the way of using a nut driver to fit the fan standoffs, and fiddling with screws in the corners is also real fiddly. So do yourself a big favour and watch the assembly video first, and assemble everything outside of the enclosure before finally putting the tested unit back into the enclosure when you will just have to screw 4 machine screws from the outside of the enclosure.So apart from describing my assembly mistakes, here's my configuration.2 x Integral 240GB SSDs1 x 4GB RPI 4After assembling the 2 x SSDs onto the main board, I plugged the USB 3 socket into my Windows PC USB 3, set the jumper for RAID 1, pressed the set button for 5 secs, and waited for blue flashing lights. Then in Windows I started up Disk Management, diskmgmt.msc, to verify that the SSDs could be seen by the OS, and that only a single disk was being seen, ie 2 x SSDs in RAID 1 = 1 disk as far as the OS is concerned, and identify the disk number/name.Next I started up Raspberry Pi Imager,1) selected 32 Bit Bullseye for the OS,2) selected the just added disk for storage,3) clicked on the gearwheel,a) configured the hostname,b) enabled SSH,c) entered the default user and password,d) configured wireless lan,i) set wireless countrye) set locale & keyboard layoutand flashed the SSDs.Before further assembly, I thought I should test the installed s/w, so I connected my RPI4 via USB 3.0 to the disk board USB 3.0 and booted the RPI4.I then discovered the IP address of the RPI4 - I used a program called AdvancedIP scanner - then SSHed from my PC into the discovered RPI4.ssh [email protected] (that's just my IP address, you will need to use whatever your IP scanner found)and logged in using user pi and the password I had set up using Raspberry Pi Imager.The first thing to do to make life more comfortable is enable VNC using sudo raspi-config, select interface options, and enable VNC, then reboot.After the reboot, start up VNC viewer on your PC and connect to the VNC GUI, and setup the NASPI - NB to give your NASPi a static IP address.In order to check the speed of my configuration, I run the following shell script#Write Speed Test.echo Write Speed Testsync; dd if=/dev/zero of=/tmp/tempfile bs=1M count=1024;echo#Read Test.#Make sure the caches are cleared so that we get a true speed reading from the diskecho Clearing Cachessudo /sbin/sysctl -w vm.drop_caches=3echoecho Read Speed Testdd if=/tmp/tempfile of=/dev/null bs=1M count=1024echo#Clean up when completed.echo Clean Uprm /tmp/tempfileechowhich for my configuration producesWrite Speed Test1024+0 records in1024+0 records out1073741824 bytes (1.1 GB, 1.0 GiB) copied, 4.61787 s, 233 MB/sClearing Cachesvm.drop_caches = 3Read Speed Test1024+0 records in1024+0 records out1073741824 bytes (1.1 GB, 1.0 GiB) copied, 4.84538 s, 222 MB/sClean UpI also modified Geekworm's fan.py python script to make it better IMHO#!/usr/bin/pythonimport pigpioimport timeimport sys#If set to 1 then running`in background, ie daemonruntimeenviron=0if sys.stdin and sys.stdin.isatty():# running interactivelyprint("Executing Interactively")else:runtimeenviron=1servo = 18pwm = pigpio.pi()pwm.set_mode(servo, pigpio.OUTPUT)pwm.set_PWM_frequency( servo, 25000 )pwm.set_PWM_range(servo, 100)while(1):#get CPU tempfile = open("/sys/class/thermal/thermal_zone0/temp")temp = float(file.read()) / 1000.00temp = float('%.2f' % temp)file.close()#the original Geekworm script can cause multiple blocks to be actioned#eg if Temp is GT 70, then the >30, >40, >50 & >60 will all be actioned needlesly#default to fan OFFpwmfactor=0if(temp >= 20 and temp <30): #if 20~29 then 30%pwmfactor=20if(temp >= 30 and temp <40): #if 30~39 then 40%pwmfactor=40if(temp >= 40 and temp <50): #if 40~49 then 50%pwmfactor=50if(temp >= 50 and temp <60): #if 50~59 then 60%pwmfactor=70if(temp >= 60 and temp < 70): #if 60~69 then 70%pwmfactor=80if(temp >=70 and temp < 75): ##if 70~75 then 90%pwmfactor=90if(temp >= 75):pwmfactor=100 #if >75 then full speedpwm.set_PWM_dutycycle(servo, pwmfactor) #Go set the fan speed#if we're running interactively, display the PWMFactorif(runtimeenviron==0):print ("PWMFactor=", pwmfactor)time.sleep(1)So, in summary, I would thoroughly recommend the Geekworm NASPi Gemini V2.0 Dual 2.5" SATA *****
N**H
Doesn’t play nice with large SSDs
Purchased this to use as a home NAS/Media server. Followed the instructions and used the recommended power supply. I installed 2 WD Green 1TB SSDs in the enclosure and went to configure everything. Upon trying to format and partition the drives, one of the drives reported a error. After swapping their position in the enclosure and trying again, own drive still reported the error. Troubleshooting, I connected each drive to my RasPi with a single external drive enclosure and both worked without issue.Ultimately ended up purchasing a different enclosure entirely, EON something, which worked the first time and provides space for expansion of up to 4 drives, including larger 3.5 drives.I’ve used the single geekpi enclosure before without issue, but this one doesn’t seem up to the advertised feature set.
T**T
Well made and works well
Went for this and the X825 and X735 as a set - works really well. Solidly made and now have a nice Pi4 server running off SSD that runs silently and uses way less power than my old Linux Server. Current F/W means still needs an SD card to boot from, but after that runs off SSD to stop wear on card and has good performance. If you are putting in multiple boards with this then plan out the "stack" and don't follow the instructions for single boards.
,**S
Nice little NAS unit
Dose what it says on the tin. Its a nice quality product
C**E
No issues at all
No surprises, it just works. I'm using it to host a Time Machine drive and had no issues with the daily backups.
W**L
Disappointing
On examining the contents it promised all the component parts appeared to be of reasonable quality, from thereon things went downhill.The for some peculiar reason the 4 studs for anchoring the hard drives are threaded, which makes it difficult to fit the discs, This was overcome by drilling out the threads.After fitting the two drives (Seagate 1TB 2.5") configured a two standalone discs and the rest of the components assembled, the came the next issue.The recommended power supply is not man enough to handle the Pi and the two drives, ie, it would not power up, this was solved by replacing it with a 10A PSU.The wiki is risible it's written in some form of fractured English
Trustpilot
Hace 5 días
Hace 1 mes