Desert Online General Trading LLC
Dubai, United Arab Emirates
Desert Online General Trading LLC
Dubai, United Arab Emirates


🚗✨ See and be seen—restore your ride’s glow like a pro!
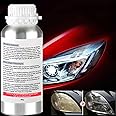
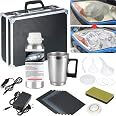
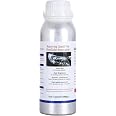
This 800g auto headlight restoration liquid by Ghguole is a high-capacity silicon carbide polish designed to remove yellowing, scratches, haze, and oxidation from vehicle headlights. Compatible with various motor vehicles and requiring an atomizing cup for application, it restores clarity and brightness while providing long-lasting protection and easy storage.


| Grit Material | Silicon Carbide |
| Item dimensions L x W x H | 2.83 x 2.83 x 7.91 inches |
| Brand | Ghguole |
| Grit Type | Fine |
| Item Weight | 800 Grams |
| Number of Items | 1 |
| Manufacturer | Ghguole |
| Item Weight | 1.76 pounds |
| Product Dimensions | 2.83 x 2.83 x 7.91 inches |
| Manufacturer Part Number | QW21 |
Trustpilot
Hace 2 semanas
Hace 3 semanas
Hace 2 semanas
Hace 3 semanas