


💖 Craft, Create, Celebrate!
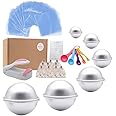
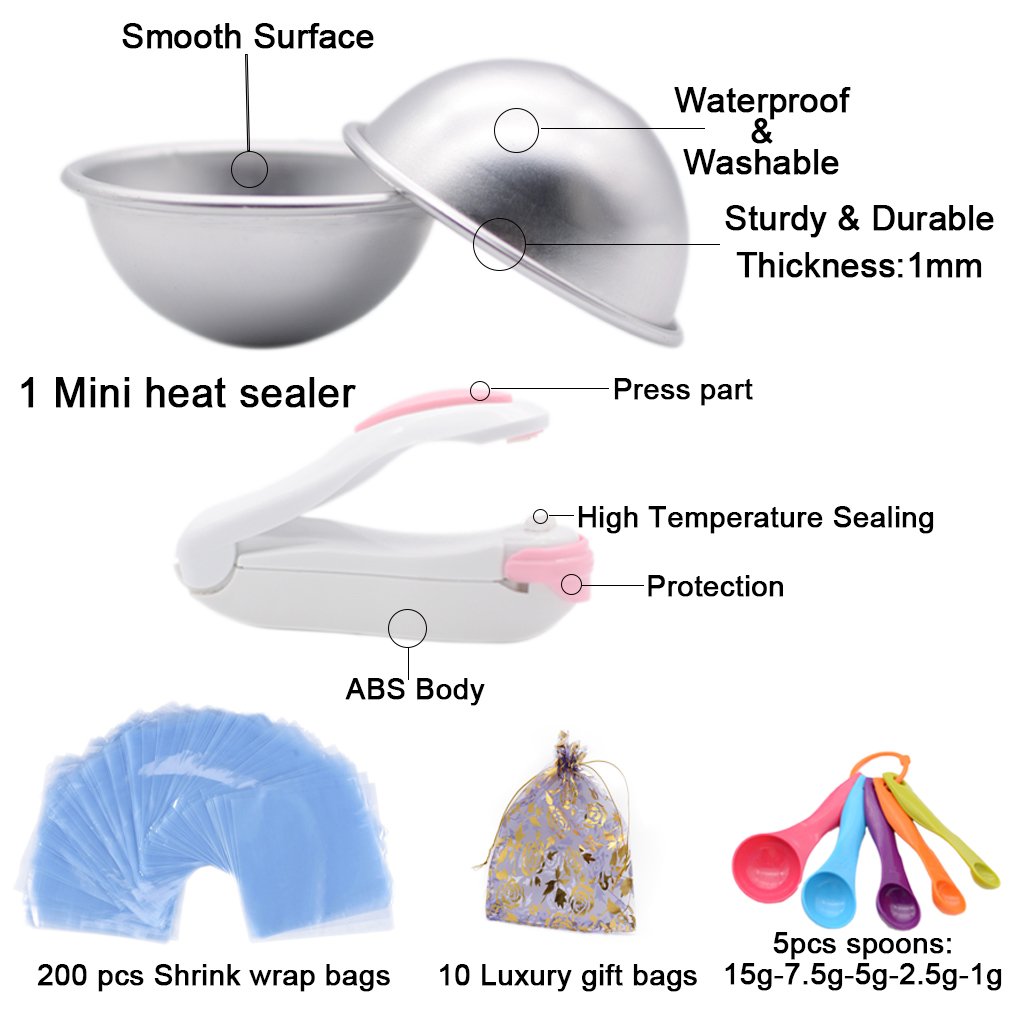
This comprehensive Bath Bomb Mold Set includes 228 pieces, featuring 200 shrink wrap bags, 12 durable metal molds in three sizes, 10 luxury gift bags, 5 measuring spoons, and a mini heat sealer, making it the ultimate kit for DIY bath bomb enthusiasts and crafters alike.


B**3
A smash with the grandkids
My DIL tried making bombs on her own (not this kit) and was unsuccessful in getting the bombs to hold together. I wanted to try with the kids with this kit, but we didn't tell the children about it yet. My DIL and I made a batch after the kids went to sleep (4 yo & 6 yo). I wanted to make sure we could successfully make them before letting the kids try them. I didn't want them getting frustrated.These were perfect. The three different sized molds came in handy as my granddaughter has tiny fingers so the small size was perfect for her to push and hold together. She even did the mid-sized molds (my favorite). It's nice that you get two of each size, so both grandkids got their own set. There was a learning curve, but more of that later. I did not try the shrink wrap and sealer thingy, but the gift bags are lovely. I didn't find out how many you can pack into the bags as I left Georgia before they were cured (24-48 hrs). The molds washed up nicely. They feel like aluminum but I forgot if they said stainless steel or aluminum. Don't put aluminum in the dishwasher. And, they are durable molds as they got dropped from table height multiple times and were just fine. I do not know how they are in the bath yet.We used the recipe that came with the kit. I had success while my DIL (daughter-in-law) struggled. I believe it has to do with how hard you pack the two sides before squeezing them together. Pack a little lightly (much less than packing brown sugar) and then over-flow each side by sprinkling more bath bombs material over each half of the mold. Rest one edge along a finger, bring the other half to the same location on your finger so the edges are lined up, and press together hard. Do NOT twist. You should see some material spew out the seam between the two halves. Remove excess with you fingers. Tap the top of one and gently remove the mold. If it doesn't come off, tap some more. Carefully place your hand over the released half and gently flip the bomb into that hand, keeping your other hand on the mold side. Tap, gently release the other half of the mold, and quickly (!) put the bomb gently on a plate. Do not hold up the bomb to show someone as my grandson did and then it quickly collapsed. Do not try to smooth out the seam as it is fragile and you will cause the bombe to either significantly dent or crumble. I tried different techniques and was unsuccessful. Maybe after they dry you can do it? The bombs need to dry/cure for 24-48 hrs and then you can shrink wrap and package.Tips:1. We weighed out the ingredients so you will need a scale.2. We made multiple batches of only the dry ingredients and saved them in separate zip lock storage bags The corn starch sticks like crazy, to everything, so it's easier to have it all set to go for future trials with only one messy clean up. When emptying contents from the bag, if you plan on reusing the bags, invert the bag inside out and dust off the remaining sediments into the bowl/container you are working with.3. For two different bomb scents, weigh your bowl. Write it down. Tare the scale with the bowl and measure all the ingredients into the bowl. Mix all the dry ingredients together very (!) well. Measure the bowl and contents, subtract the weight of the bowl that you wrote down and you have the weight of just the dry ingredients. You divide that number by two, and that is how much you weigh out for each batch. I suggest only 2 because the wet ingredients are so minimal that it would be hard to break down between more batches.4. ingredients. Make sure your baking soda is fresh for best results (fizz in the bath tub).5. Color. I bought dry mica colors. These gave shuttle color to the bombs, but perhaps affected the dry-to-wet ratio of ingredients? At. Buff City Soap you can paint your own colors onto the already-cured bombs. The colors are MUCH more vibrant that way, but I don't know what liquid they use to suspend the colors in because water would start to dissolve the bombs. Maybe alcohol of some sort?6. The essential oils you add to the wet ingredients is not diluted.7. Combining crafts. Since we already had the essential oils out, and we had left over we pocket-sized roller-ball vials with crystals inside (kids loved that project from the last time I visited), we made the remaining ones for us (I brought some new fragrances) and as scent-therapy gifts for my daughter-in-law's parents.Enjoy, the kit has a lot to offer for the price and I would definitely buy this again
D**Y
Bath Bomb
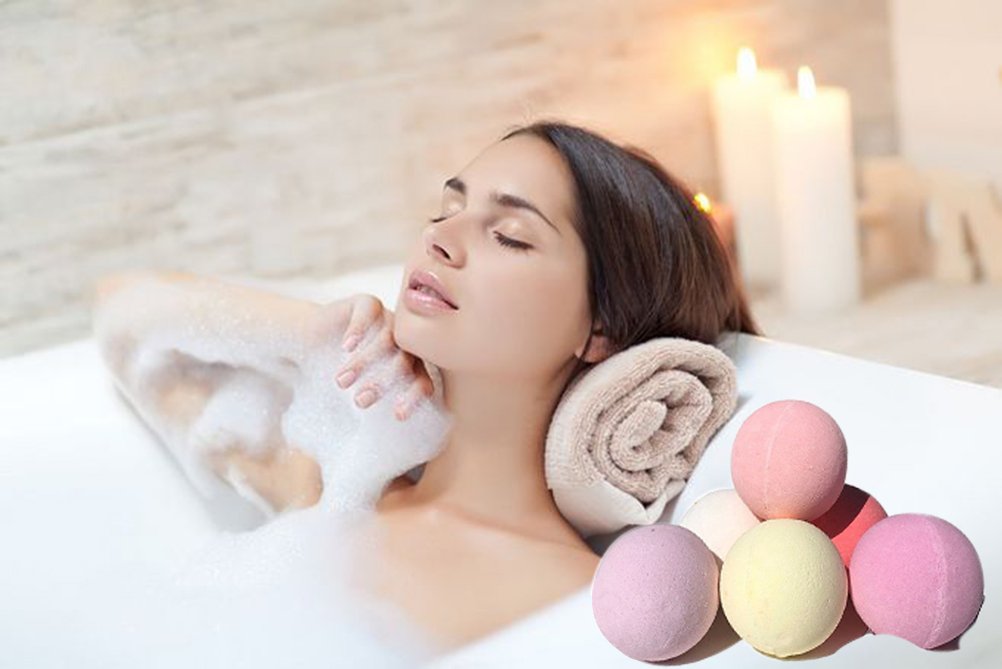
Love this bath bomb moment
C**Z
Great Starter Kit for Bath Bomb Making
This kit comes with everything you need to get started making bath bombs at home molds, shrink wrap bags, gift bags, measuring spoons, and even a mini heat sealer. The metal molds are sturdy and come in multiple sizes, which is a huge plus. They are very easy to clean. The instructions were easy to follow, and my first batch turned out great! The only reason I’m giving 4 stars instead of 5 is that the heat sealer takes a bit of practice to get the hang of. Other than that, it’s a fantastic value and perfect for beginners
A**R
Fun!
This kit makes it easy and fun to make your own bath bombs. Follow the instructions and you'll end up with something you can give as a gift, sell at a craft fair, and enjoy for your own treat in a bath.
A**R
Not as easy as you think
I was going to make these for a craft fair that I'm in. But I spent 40$ on all the ingredients and more for this kit. So many issues with it. SO, I looked it up and found a video on how to make them and what went wrong. So complicated, I tried again with no luck. I'm so disappointed. If I hadn't used them, I would return them. I suggest you watch the videos first before you buy this.
T**W
Perfectly packaged. Beginner friendly. Very nice products.
I loved the set of bath bomb molds (3 sizes) . I loved the sheer organza gift bags, they have a gold/ silver print on a very sheer bag... it’s cute. I wold buy the bags if they sold them . The kit includes DIY in-depth instructions on how to create bath bombs and materials needed. Definitely more beginning to intermediate level. The instructions also include how to shrink wrap. Many Shrink Wrap bags are included along with a boxed sealer. The multicolored measuring spoons are a delightful add in the package. Delivery was quick and the packaging safely protected contents. Delivery by Amazon this time was phenomenal and the placed package exactly where requested. Excellent purchase experience. I would buy again and suggest others purchase. Very good value
J**Y
Awesome kit
This kit is a awesome little kit unlike my ball making skills. Comes with everything you need except the physical ability to do the craft. So far, I suck at making balls, but one day with the help of this little master kit, I will be able to master the trade of ball making! But today is not my day apparently.... Maybe tomorrow....
K**R
Awesome customer service
Customer service is outstanding. My first order had a defective item but resolved in 2 days which was lightning fast shipping time!! Just in time for Christmas gifts!! Great quality with the bath bomb molds. Has a small flat surface on bottom of sphere molds so they do not roll when making bath bombs. Shrink wrap is of good quality too. Thank you so much.
Trustpilot
Hace 3 días
Hace 2 semanas