Desertcart purchases this item on your behalf and handles shipping, customs, and support to Bolivia.
✨ Curl Up & Stand Out: Lash Lifts That Last & Impress! 💁♀️
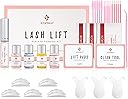
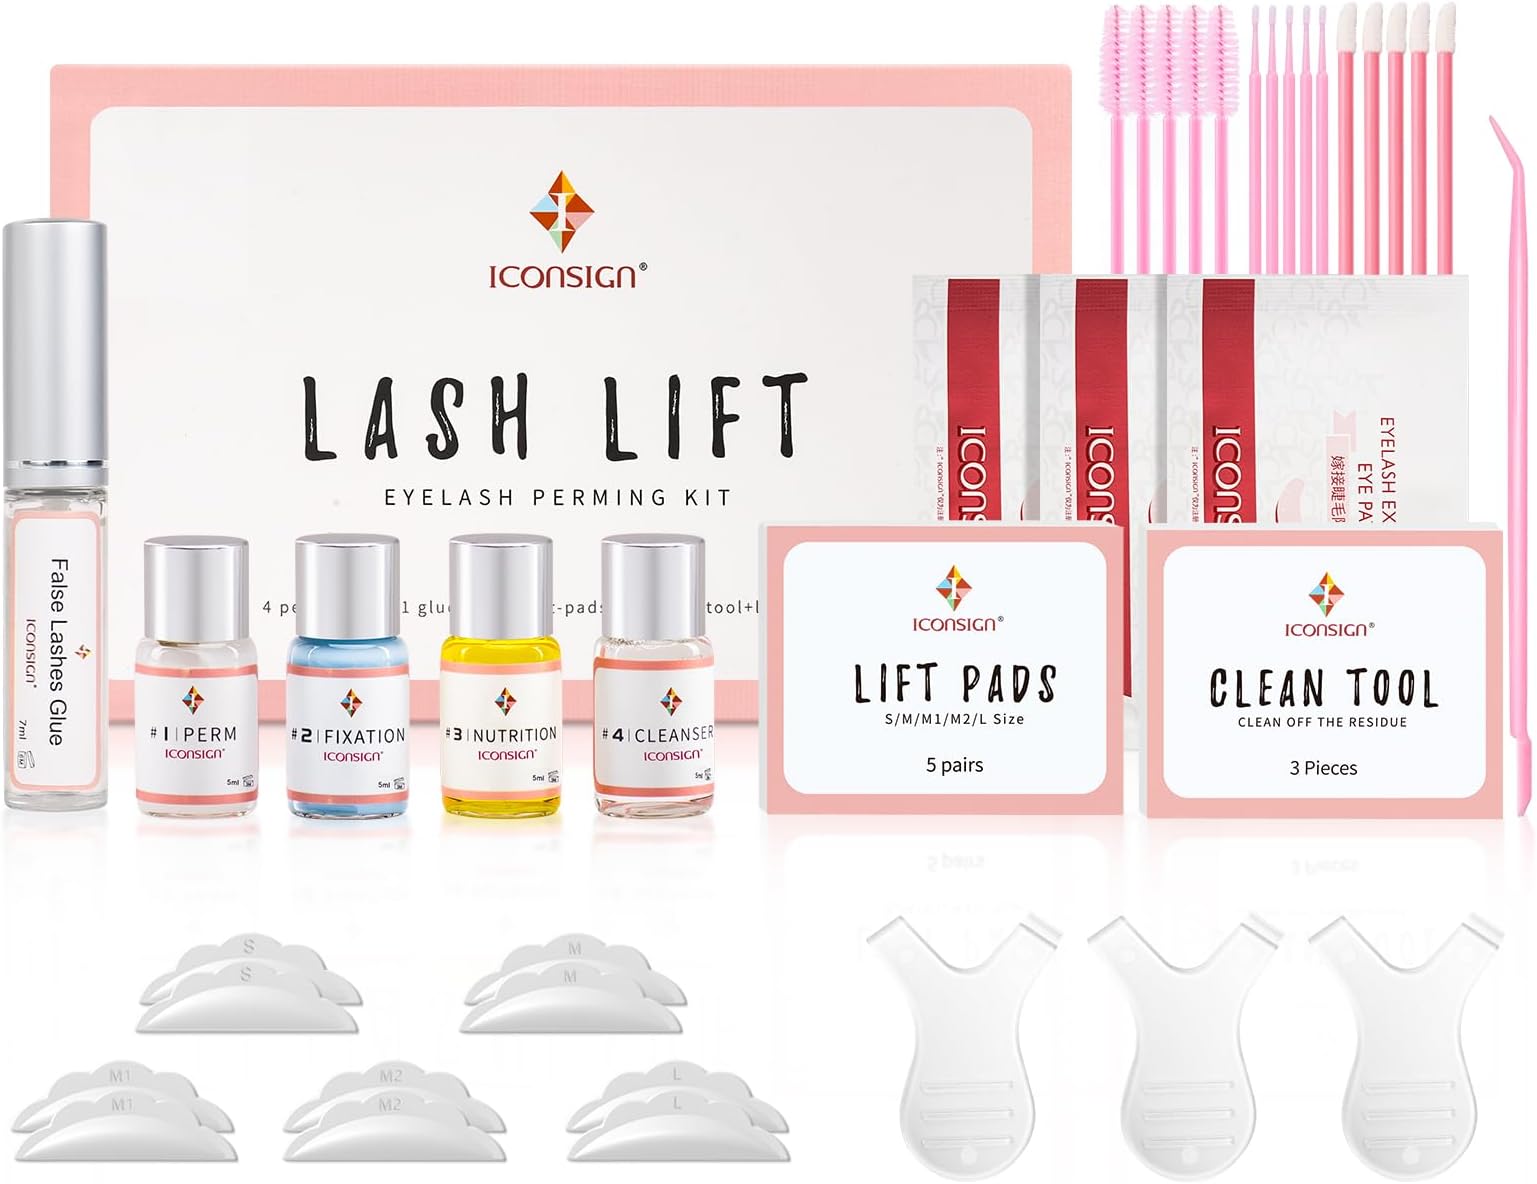
The ICONSIGN Lash Lifting Kit is a professional-grade, semi-permanent eyelash perming system designed for both beginners and pros. Featuring an upgraded milky white glue for easy application, it delivers natural, voluminous curls lasting up to 3 months. Each kit includes enough product for 10-13 applications, offering exceptional value and salon-quality results from the comfort of home—perfect for enhancing your look for any special occasion.


| ASIN | B07NZ38MXK |
| Benefits | Effortlessly achieve stunning, voluminous lashes with impressive longevity and perfect for special occasions. |
| Best Sellers Rank | 4,346 in Beauty ( See Top 100 in Beauty ) 7 in Lash Curlers |
| Brand | ICONSIGN |
| Brand Name | ICONSIGN |
| Colour | Regular |
| Country Of Origin | China |
| Customer Reviews | 4.1 out of 5 stars 16,237 Reviews |
| Finish Type | Natural |
| Included Components | Perming Agent |
| Item Dimensions | 18.2 x 11.8 x 2.2 centimetres |
| Item Form | Liquid |
| Item Weight | 0.15 Kilograms |
| Item form | Liquid |
| Manufacturer | ICONSIGN |
| Manufacturer Part Number | IKA-001H |
| Material Type Free | Alcohol-Free |
| Model Number | IKA-001H |
| Number of Items | 1 |
| Product benefits | Effortlessly achieve stunning, voluminous lashes with impressive longevity and perfect for special occasions. Product benefits Effortlessly achieve stunning, voluminous lashes with impressive longevity and perfect for special occasions. See more |
| Skin Tone | All |
| Skin Type | All |
| Skin tone | All |
| Skin type | All |
| UPC | 740646336971 788482087299 |
| Unit Count | 1.0 count |
A**R
Brilliant value for money and great quality
Brilliant value for money. Watched an 8 minute video online, made sure I left on for the max time stated and bobs your uncle! I wear mascara quite regularly and it does weigh my lashes a bit but before the lift the outer corner lashes drooped and then with the mascara it weighed them down even more. I used M1. M2 or L wouldn't likely give the nice curl you'd want from a lash lift but I may try M next time also. I even managed to create a cat eye effect via watching a video also. Has multiple uses- I genuinely think more than 4 uses which it states, so fab value for money. I'm also super super sensitive and this didn't cause any reaction. I did patch test all of the parts of this 24h in advance on the inside of my elbow and no issues. 2 weeks later it's holding up well, albeit not as perfect as the first week, but then I do use a lot of product. As some people said, new lashes won't be curled, and I use lash serum so the new growth being less curly does make the lashes look less lifted, but that's because the new growth hasn't been lifted/permed, so completely normal and natural. My lashes have also been a good quality since perming, no additional falling or breakage. I'll probably do another lift in a few weeks, so maybe around 4-6 weeks after the first lift for nice maintenance. All around really happy. Oh and let the glue get a little tacky before applying the M1 sizer to the lid, and hold down nice and firm for a nice fit as close to the lash line as possible. Also one eye at a time. Great product
T**A
I would repurchase
great product, very easy to apply and I think the results are very natural. Photo of one eye done to show the results.
N**S
If you have long lashes don’t use the small lift pad!
When I first had a professional lash lift done, I asked the technician not use the ‘small’ lift pad (the smaller the lift pad, the bigger the lift) because I have naturally long lashes and I was afraid it would make them look like spider legs! She assured me it wouldn’t, so I took her advice and she was right. They turned out great. I’ve had a few done since then and assumed it was always with the small lift pad to obtain the ultimate result. So. When it came to me doing my own at home; I too used the ‘small’ lift pad. I chose to do one eye at a time the first time I did it, and I’m glad I did. Firstly, the instructions are insufficient and I found myself watching a couple of YouTube videos to ensure I was doing it correctly. But once I had, I found it pretty straight forward and proceeded with my left eye. I left the solutions on for 10 mins each (instructions are 10-12). Well. It worked a little too well, and now my lashes on my left eye are pretty much flat against my eyelid and are digging into my eye crease. It feels strange. And looks it. I decided to go with the medium lift pad for the right eye, and also not leave it on quite as long (9 mins) as I didn’t want the same to happen with that eye, and I also wanted to test for the correct lift pad (for me). Yes, I knew this would result in different looking lashes but I honestly preferred this over having my lashes eating into my eyelid on both eyes. The result was better, although I do believe that I could have left the solution for the 10 mins and not reduce it to 9. So yes, my eyes look different right now. As you can see from the pictures, the extreme lift on the left even somehow makes my eyelid look a little dropped which isn’t great. I took a side view so you can see how flat they are on my eyelid. The right looks more natural (I hadn’t brushed them out for the pic, they do look better than that), and would probably look even better if I had left it on for the 10 mins. To summarise:- 1. It works 2. Don’t use the ‘small’ lift pad if you have long lashes 3. The instructions need to be better but you can find tutorials on YouTube 4. You will need some cottons buds and potentially cling film depending on which method you follow I will use it again in a couple of months, taking my own mistakes into account.
A**R
Works like magic!
It actually works! I love it.
J**J
all factors together… not worth it.
ive tried a couple times now and its certainly good at what it does if YOU are good at executing it. i like to dye my lashes aswell to make them darker but dye doesn’t come with it, getting that separately is another £7-10. the only money i think you’re saving doing this yourself rather than going to a salon, is the transport there. you only get one use put of this kit. as much as it looks like you could get a few, as soon as the perm solution seal is broken, within a week it goes yellow and off, and it wont work again. Soooo, 20 odd quid for a fiddly single use, trying to do everything with one eye closed the whole time, when i could just get someone else to do it… not entirely worth it the money or time spent for me. sorry🤷🏼♀️
C**A
Do not buy
Useless I ordered as I have some straight lashes. The glue is useless all the lashes came loose after the perm. I am left with Same straight lashes
H**E
Absolutely phenomenal! 10/10
Absolutely fantastic product! I have very long straight lashes which I have to curl on a daily basis (but that falls out after an hour!) so I started having LVL but even with that my lashes used to start to drop after a week . I can hands down say that I have got 10x better results with this kit than I ever have with having my lashes done professionally. I’m only on my 2nd day so the true test will be in a weeks time but already I think they’re better. It is quite a fiddly process and I really did struggle to get the pads to stick to my eyelids but I got there eventually. I used the “small” pad this time so I could get an idea of how well the kit would actually work with curling my lashes and I think next time I would use the “medium” one just because my lashes are so long it’ll give a more gentler curl. The instructions are also very basic and I actually think you get more info from the amazon description than on the actual box so if you’re unsure I’d recommend watching a few YouTube videos first. The cling film is an absolute must! I know a few people that have done it without and haven’t got as good results. I would also recommend putting on both the perm and fixation solution with a cotton bud and also when cleaning the lashes with the cleansing solution. I absolutely love this product and have recommended it to many people who after seeing the amazing results I’ve got have purchase a kit themselves. So stop hesitating and BUY BUY BUY!
A**R
Amazing, better than the salon results!
I brought this after reading the reviews and I watched the video tutorial on YouTube. The trick with the glue is to let it air dry for about 20 to 30 seconds before you stick it to your eyelid and it will be super sticky. I have very thick long eyelashes and went for medium number two and the results were amazing. I think next time I may try medium number one or medium to give me more of a curl. In the video she does say if you opt for a smaller one, don't put the perm solution on the tips until the very end to stop them curling back on themselves. I will never go to a shop again to get these done and have saved myself a fortune such a good value for money. I also applied a separate tinting kit to them after and they look amazing.
M**.
DETAILED REVIEW! MUST READ!
DETAILED REVIEW! I have very short, very straight lashes and I usually get extensions. This was an affordable option in the meantime. *Watch YouTube tutorials for this specific brand! Very helpful!* 1. Using the glue to apply the lift pad to your lid, put a fair amount on the pad - not too much, but not just a small swipe either. LET IT GET TACKY BEFORE PLACING ON YOUR LID (about 30 seconds or so). Place as close to the root/base of your lashes as possible 2. Apply about the same amount on the front of the pad, and again wait for the glue to get tacky (but only about 10-20 seconds) before pressing your lashes onto the pad. This part took the longest, and was tricky because the glue dries rather quickly so you have to work fast. *MAKE SURE YOUR LASHES ARE STRAIGHT AND NOT TANGLED! The way they’re placed on the pad is how they’ll look once done! 3. When placing the PERM solution/paste on your lashes, go from just above the root to about 1/2 or 3/4 of the way up your lashes. If you put it on the ends of your lashes where they are more porous and thinner, it will crimp them. Be generous with this step, but be careful not to get it on your waterline! You only need a small piece of plastic wrap; do not press too hard as it will push the solution to the tips of your lashes, which you don’t want. I processed for 8 minutes as it was my first time trying this 4. Use the Y tool to scrape off the perm solution. You can also gently use a qtip. 5. Apply the Fixation solution/paste. Same as before, only apply it from the root of your lashes to about 1/2 or 3/4 of the way up your lash. Small piece of plastic wrap and process for 8 minutes. 6. Use the Y tool to scrape off the fixation solution. 7. Using the ‘lip’ brush (or that’s what I call it at least because it looks like a lip gloss applicator), dip it in the cleanser and gently rub from root to tip to remove the glue and release your lashes from the lift pad. Then using the same brush and cleanser, rub underneath the pad to release it from your lid. 8. Using the same lip brush or a qtip and cleanser, make sure all the glue is removed from your lashes and eye lid. 9. Use a clean lip brush, dip it in the nutrition solution, and wipe your lashes from root to tip, and side to side as well. Saturate the lashes well. You can then use a spoolie to straighten them back up OVERALL: - I used size small lift pads because my lashes are so short - It did lift my lashes but not as much as I had hoped. I was being conservative with this kit because it was my first time using it - It did feel slightly itchy during the perm stage but no burning or stinging - I will update in a few weeks with how long the lift lasted!
D**!
Aanrader!! Werkt geweldig
Super product, als het volgens de instructies gebruikt wordt komt het resultaat heel mooi uit. Ik had een YouTube tutorial erbij gehouden en heb prachtig resultaat Gekregen
M**S
Un chollo! Buen producto calidad-precio
Me he hecho el lifting de pestañas a mí misma, ya que tengo práctica, y no me ha resultado muy difícil. Lo más importante es asegurarse de escoger bien el molde adecuado y tener las pestañas bien pegadas a él. El producto me llegó bien empaquetado pero un día después de lo previsto. Viene muy completo, es de calidad, tiene muy buen precio comparando a los que hay en el mercado (de 50€ en adelante). Y tiene indicaciones en los pasos.
V**E
Buon prodotto, ottimo risultato!
Devo ammettere di aver acquistato questo prodotto dopo averne visionati parecchi, recensioni incluse, e di averlo fatto con un certo scetticismo. Premetto che le mie ciglia erano totalmente piatte e sembravano anche molto corte. In qualche occasione avevo provato a tingerle, ma con nessun risultato effettivo. L'unica cosa che aiutava era l'eyeliner permanente fatto qualche anno fa, ma comunque le ciglia rimanevano praticamente invisibili. Oggi ho provato ad usare questo prodotto, seguendo un tutorial su Internet, e devo dire che l'effetto mi ha sorpresa. Non ho sicuramente una grande manualità nè esperienza in questo genere di cose ma, armatami di contenuto del kit acquistato + specchio posizionato in maniera ravvicinata, dischetti struccanti, cotton fioc e pellicola già tagliata in 4 pezzetti per coprire gli occhi prima durante la permanente e poi durante il fissaggio, sono riuscita senza troppe difficoltà a fare tutto. Allego la foto del risultato, che a me sembra incredibile data la base di partenza. Bisogna avere tempo a disposizione per seguire tutte le fasi per bene e senza fretta, e avere tutto a portata di mano (compreso il portatile/cellulare per seguire il tutorial passo dopo passo). Soprattutto è importante la fase dell'incollaggio del pad alla palpebra: piegate il pad con le dita per accentuarne la forma arrotondata, prima di attaccarlo, e poi mettete tanta colla nella parte inferiore, soprattutto agli angoli del pad (quelli tendono a staccarsi dalla pelle); niente colla invece sotto la linguetta superiore, che vi servirà alla fine per prendere il pad con le dita e staccarlo. Premete il pad sulla palpebra finchè non risulta ben attaccato e poi passate tanta colla sopra alla parte arrotondatra del pad per appiccicarci le ciglia. Aiutatevi con lo stick del kit, o anche con un cotton fioc. Prima di passare a permanente e fissaggio, verificate (anche guardandovi di sbieco allo specchio) che tutte le ciglia siano ben attaccate al pad (io ci ho ripassato sù più volte un cotton fioc facendocelo rotolare sopra e schiacchiando). Poi passate al resto. Io sono riuscita a fare tutti e 2 gli occhi insieme perchè, nonostante gli occhi fossero un po' "appesantiti" dal pad, riuscivo a vedere bene. L'importante è non spingere i prodotti all'interno dell'occhio, altrimenti vi bruceranno. Nei prossimi giorni ho intenzione di nutrire molto le ciglia con olio di ricino, poi verificherò la tenuta del risultato nel tempo, ma per ora sono pienamente soddisfatta. Ho aggiunto una foto scattata 8 giorni dopo il trattamento. Le ciglia sono un po' scese, ma vanno ancora bene, si sono staccate tra di loro e l'effetto, anche se meno forte, mi sembra più naturale. Resto soddisfatta.
T**E
Great Purchase
This is my second time purchasing, I do love the kit. However, my own issue (my own fault) I don't know what size to use! 🥲 And doing it by yourself is time consuming, but the kit itself is great.
Trustpilot
3 weeks ago
1 month ago