


Encore Countertop Kit, Onyx
Product ID: 25051397
⚫True black finish
🎨High/low shade contrast
🏠Contemporary style
🖤 Unleash the Power of Onyx!
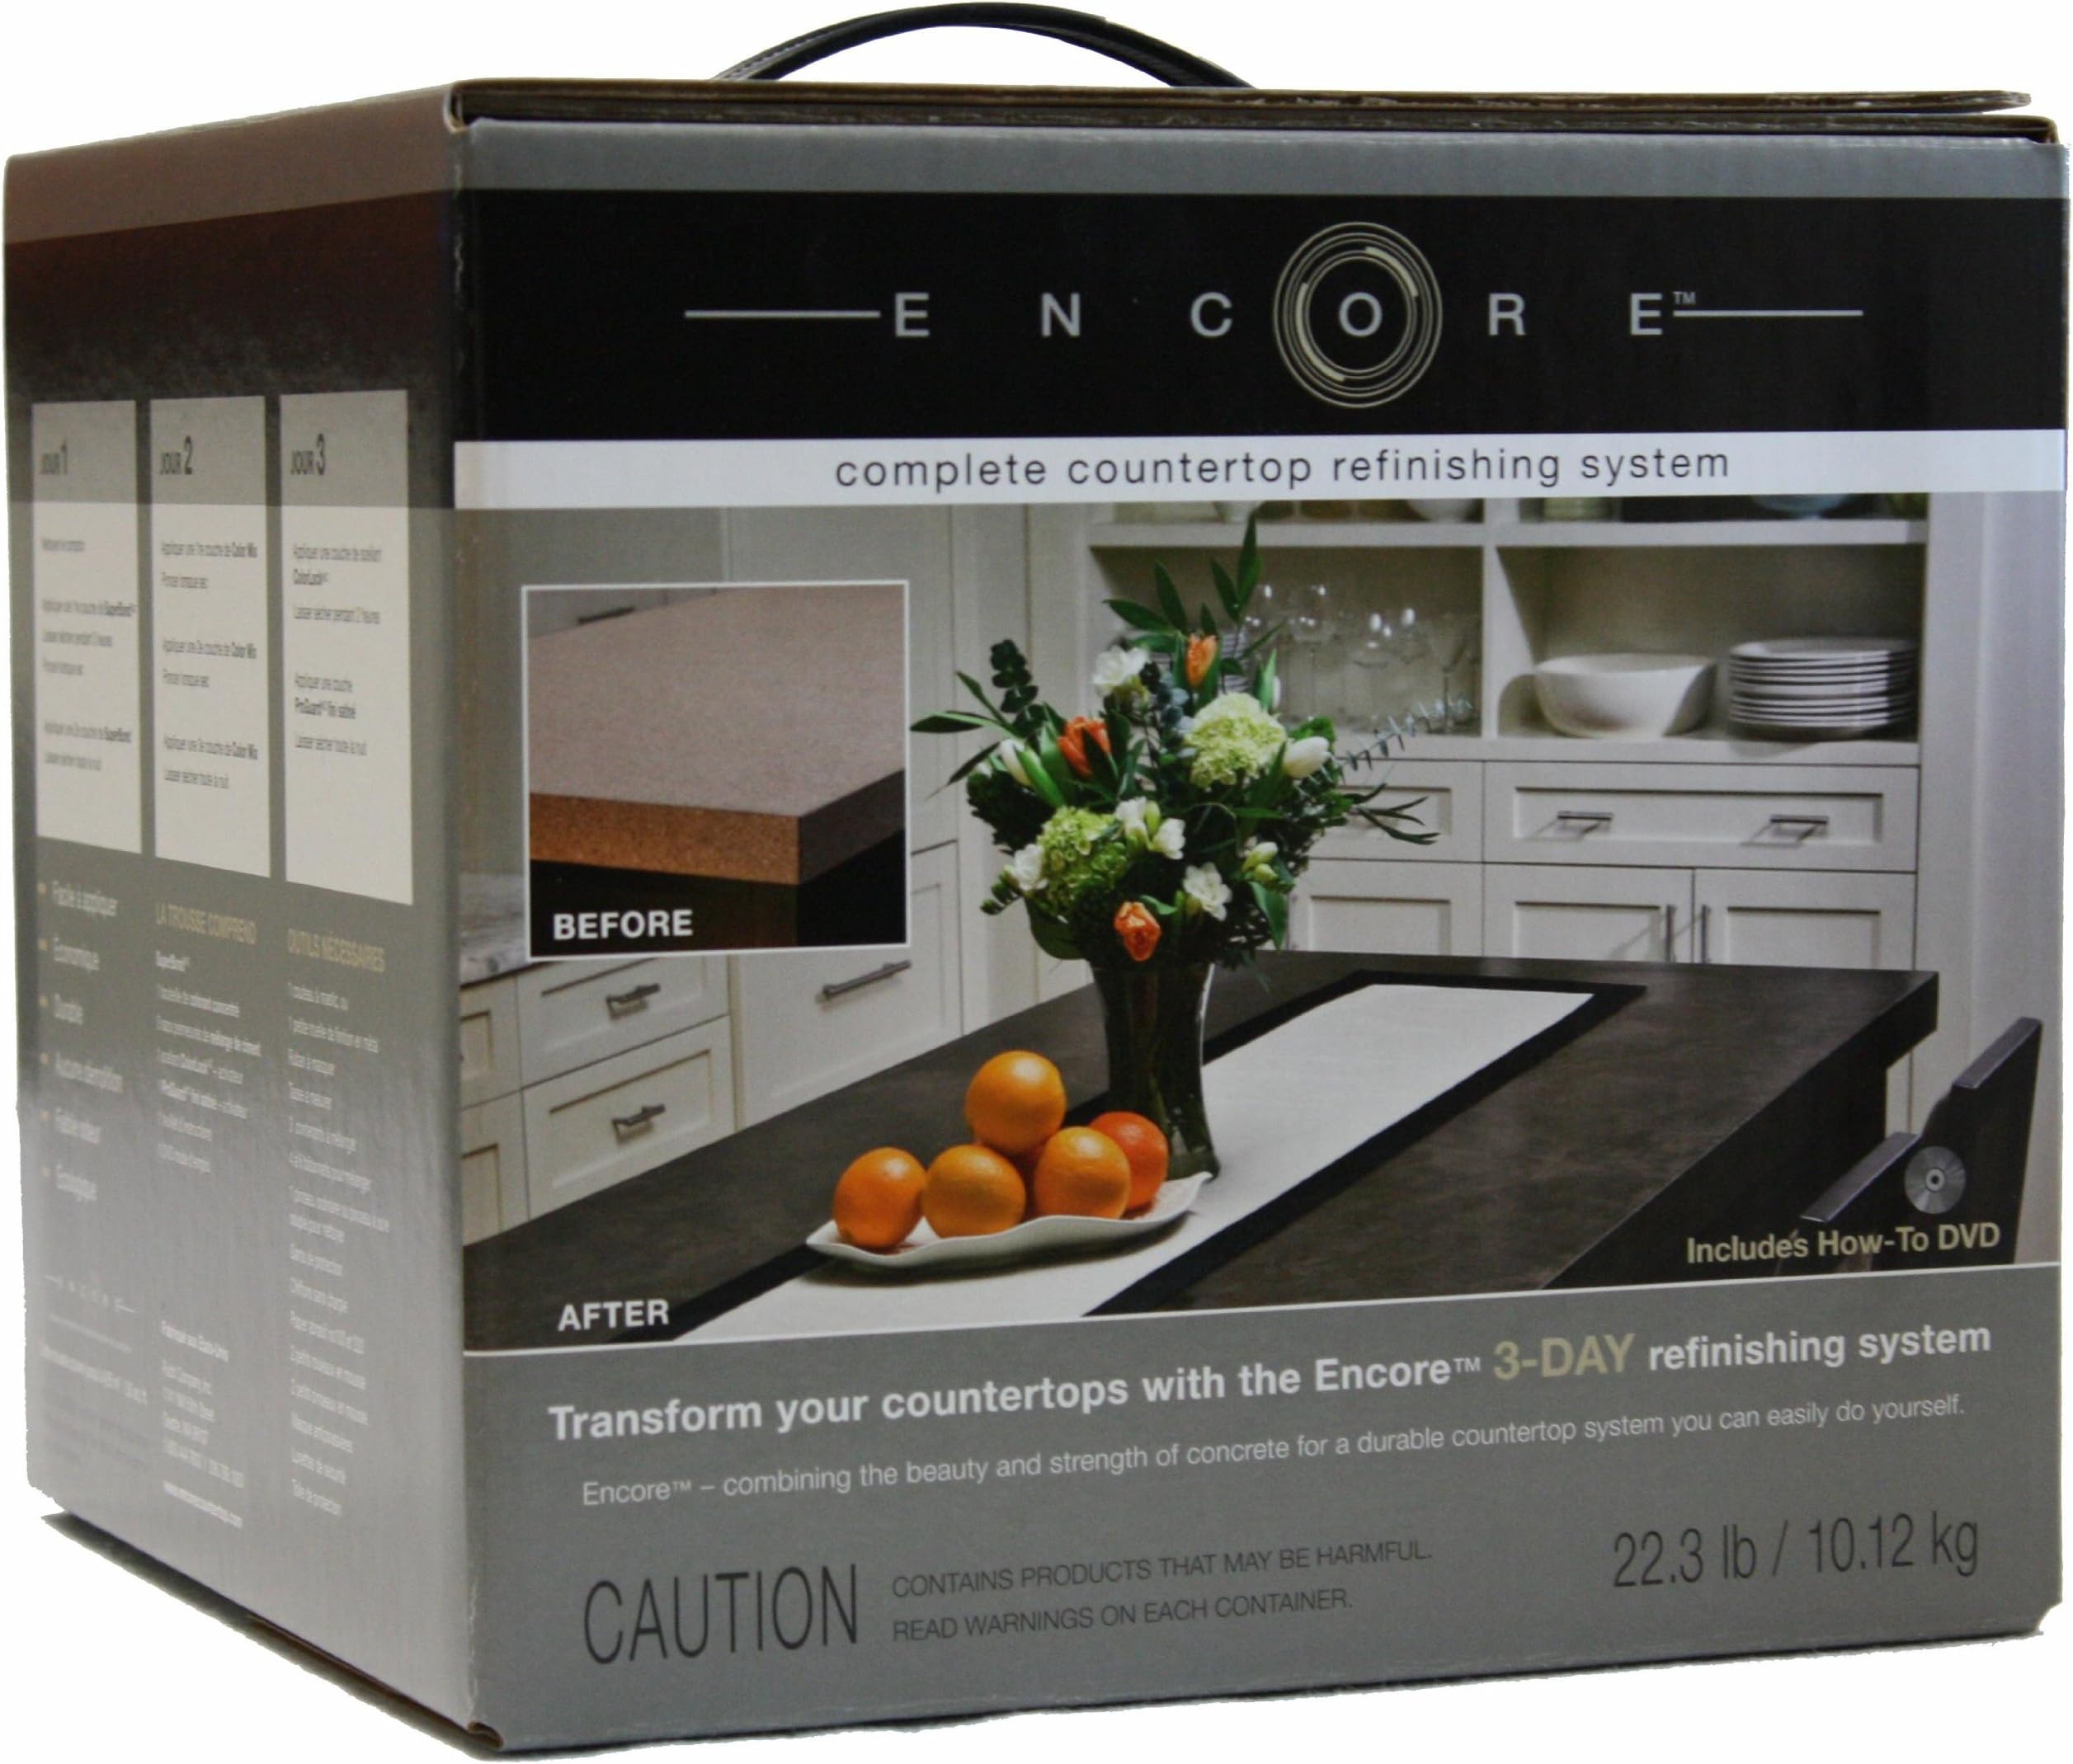
The Encore Countertop Kit in Onyx features a stunning true black finish with high and low shades, designed to complement contemporary décor while making a significant impact in any space.
M**U
it really is that easy
installed the countertops this weekend, and it's as easy as the videos show. but it does take longer than 5-6 hours, more like 10 hours over 3 days. in my case, 4 days because of rains - i decided to wait 24 hrs between resin & poly top coat.if you're covering tile, order plenty. you'll need extra material to fill in the grout lines. i ordered 2 kits and really needed a 3rd; nearly ran out of material on the short counter next to the stove - i was literally scraping the bottom of the container with my fingers to get every bit of concrete. the long counter looks good, but you can still see the grout lines on the side counter; faint, but you can see them. if i could have gotten a 3rd kit locally, i'd have done so. but once you start the process, you're in it.i did not pull the sink - should have, but didn't want to deal w/ a cast iron sink & all the connections. it looks fine, actually better than i thought it would by not pulling the sink.overall, it looks much better than the the tile; it is concrete, so it looks like a concrete counter. i really like the color shading; it's not one flat color. it really is as easy as the online videos show. i spent more time on the backsplash and sanding between coats, so it took longer. low fumes; ammonia-smell in the conrete mix, but the other layers aren't smelly. this will get me over the hump until i can completely re-do the kitchen.
A**R
Encore countertop review - pearl gray
I purchased this product to redo extremely ugly Formica butcher block countertops after seeing the product on the DIY network and reading reviews. Overall I really like the finished product and would recommend to anyone that doesn't want to invest in new stone/granite countertops. It reminds me of using plaster on your walls with the finish and many layers. I would've rated the product higher if the color was more accurate, I purchased Pearl Gray assuming this would be a lighter colored gray and it's a curb colored concrete tan color. It looks good but not the color I wanted or planned with the cabinets and backsplash so will be changing the tile planned. The other issues were the amounts and packaging. We had to skim lightly on the second coat of the day 1 super bond and we were unable to put the second coat along the edges, this ended up working out as the many other layers in the process filled in any gaps and helped give it an actual stone finish. A couple of the other layers we had excess and just enough and we were unsure if the mixed product was correct based on the measurements because they didn't look like the video but as we worked through the layer it was ok. The super bond comes ready to spread and was so thick we broke a stir stick, it looked nothing like the video but we spread it out and it gets covered up so it worked out, very gritty. I'm not sure if one of the bottles leaked or was old because it had black tape around the lid and one lid was sealed from the product and we had to cut the bottle top off with a razor knife.These sound like bigger problems than they were, as we worked each day's step we could see an improvement and the final product is smooth to the touch and looks a lot better than the ugly original. I am happy with the results with the exception of the color.
K**E
Beautiful with a couple of buts...
I love the finished product, though there are a couple of flaws the company should consider fixing.One is the color for Slate shown on their webside. It's a medium grey there, and I chose that color based on viewing the colors at their website. When the kit came, all five color choses are shown on the box, though the slate shown on the box was a dark grey closer to the onyx black side of the color spectrum that the lighter/medium grey side.The product turned out to be exactly has shown on the box, and nothing like the photo shown at their website. Any easy fix for them to make, though an important one for those choosing between the greys.The second problem that they really need to fix is the amount of expoxy used on Day 1. They say the kits will cover 50 sq feet. I was covering 48 sq feet exactly on smooth laminate. The Day 1 product covers about 35 sq feet if applied very thin. The Day 2 product covers about 60 sq feet. And the Day 3 product 100 sq feet.Basically anyone working significantly over 35 sq feet should contact the company and purchase a second gallon of the Day 1 expoxy when ordering the kit.I watered mine down as I didn't want to wait once I started the project. That worked OK, though very messy!Two critical things I found to help success of this project. One is tape around the edges of the wall, just as they recommend. Do this carefully, and remove each evening before totally dried and reapply each morning.The second critical element is to sandpaper when dry, especially prior to the start of Day 2. Basically what happens after the Day 1 epoxy has dried is applying thin paint like substances, so whatever bump or groove is present to start Day 2 is there at the end, unless one smooths the bumps and blemishes with sandpaper.I used the edge of a knife to speed things along on the dry epoxy, and that worked a charm! (Just be careful with your sculptering)I loved working with the three coats of the slate (Day 2.) It dries quick... The last coat is how the finished product will look, so this when the artist in you comes out! No matter how good or bad an artist you are the texture of the finished product is superb, and basically one is nit-picking between coulda shoulda woulda with the swirls of that final coat.Two final thoughts. Make the last coat THIN. Since I realized I had a lot of product to complete the job, and since it is the final coat that protects the surface, I applied thicker than I had with all other applications. It dried a bit bumpy, which overcame all the hard work of sanding I did prior to that. The finish still looks great, though if I had to do it again I would put that final coat on thin and even as possible.The last thing is make sure you have plenty of time to do this project right, as its pretty time consuming with not much opportunity to cut corners. It took me 7 hours on Day 1. 6 hours on Day 2 (+ some drying time.) 4 hours on Day 3 (+ 4 hours of drying time.) and 3 hour clean up on Day 4.The end product looks very eligant and I would defo would recommend people able and willing to put the hours into this DIY project go for it!
Trustpilot
2 weeks ago
2 days ago