Desertcart purchases this item on your behalf and handles shipping, customs, and support to Bolivia.
๐ฏ Elevate your entertainment spaceโditch the clutter, own the sleek!
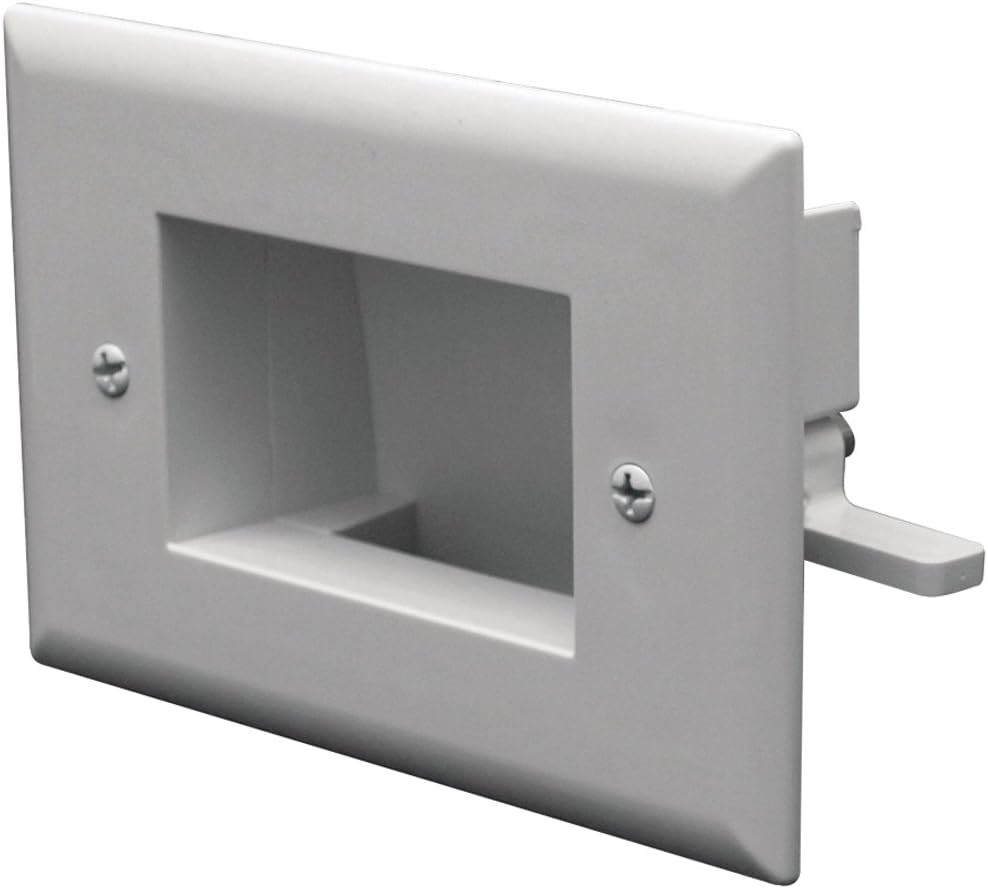
The DATA COMM Electronics 50-3332-WH-KIT is a premium flat panel cable organizer designed to discreetly conceal multiple low voltage cables behind wall-mounted TVs. Its slim ABS plastic plate fits flush with modern thin TVs, offering flexible up/down installation and includes all mounting hardware for quick, tool-minimal DIY or professional setups. Backed by a 10-year warranty, it transforms messy wires into a clean, safe, and stylish home theater statement.


| ASIN | B00390IT7O |
| Best Sellers Rank | #15,469 in Electronics ( See Top 100 in Electronics ) #67 in Audio & Video Distribution Wall Plates |
| Brand | DATA COMM |
| Brand Name | DATA COMM |
| Color | White |
| Configuration | Single |
| Customer Reviews | 4.6 out of 5 stars 3,789 Reviews |
| Finish Type | Abs,Plastic |
| Finish Types | Abs,Plastic |
| Global Trade Identification Number | 00021111891622, 00071020195533, 00152467507421 |
| Included Components | Easy-mount Recessed Low-voltage Cable Plate (white) |
| Installation Type | Screw-In |
| Item Dimensions W x H | 3.25"W x 2.25"H |
| Item Type Name | Cable Plate |
| Item Weight | 3.04 ounces |
| Manufacturer | DataComm Electronics, Inc. |
| Manufacturer Part Number | 45-0008-WH |
| Manufacturer Warranty Description | 10 Years |
| Material | ABS |
| Material Type | ABS |
| Model Number | 45-0008-WH |
| Product Dimensions | 3.25"W x 2.25"H |
| Switch Type | Decorator |
| UPC | 069991995115 080850202410 014444724538 152467507421 809187163764 807032930608 806294956425 115970785663 801200958814 660559008089 071020195533 052778842436 767887453366 807320274131 971479263787 031112235875 521375268142 001910045846 887213581539 163120676439 031112836850 803982881151 168141251306 100177552323 714439011260 885417296105 021111891622 045556032853 021113042923 071020567798 8093875817โฆ |
| Unit Count | 1.0 Count |
E**K
Clean, Attractive, and Very Easy to Install
The Data Comm cable pass-thru is my go-to in-wall cable solution for all my TV mounting projects. My Clients have never been unhappy with the choice: itโs clean, attractive, fast and easy to install. And a pair of units - the upper intake and lower exit - are surprisingly inexpensive. Be diligent in your measuring before creating a hole in the drywall. The most common mistake is to cut a hole equal to the dimensions of the entire wall plate, rather than the dimensions of the pass-through opening that goes inside the wall. But once you are clear on that single detail, it is beyond simple to install. In addition to your drywall cutting tool, a pencil and a tape measure, a Phillips Head screwdriver is all you need. Once you position unit in wall, DO NOT OVER TIGHTEN SCREWS. Gently turn the Phillips Head screwdriver clockwise until you feel the plastic clamp arrive in a horizontal position behind your drywall. Add a rotation or two of the screwdriver to tighten, and youโre all set. And remember, the upper unit and lower unit should stay within the same stud bay (between the same two studs). I usually line upper and lower units up vertically with a 2-4ft level, or with my electronic laser level. I use these units for all my jobs and see no reason to try any others!
J**E
Nice and Easy!
I have run many cables behind walls over the years for flat screens, surround sound, computers, etc. I have used various types of these wall plates in the past, but I will use these from now on now that I've tried them. The quality of the plate is better (thicker plastic) than I expected for the price, and it just doesn't get much easier to install. Other brands require two pieces, a frame and a cover. This unit is all in one and installs in minutes. There is a template in the box for the size of the square that you need to cut in the drywall. Find your hollow channel, trace the template and cut. When you tighten the screws, it opens up two wings that grab the drywall from behind and hold it securely to the wall. No anchors required. You can also install them diagonally or horizontally, depending on your space and direction you are running your cables. They look very professional and can be painted if you need to. This model also has a large opening that will accept multiple cables. I have now installed 8 of them in a recording studio to run cables around the room and they look and work great. Very pleased. Hope this helps.
J**Y
Excellent and inexpensive
Excellent, inexpensive, and a snap to install
R**M
50-3338-WH-KIT Easy Mount Cable Organizer Kit - White
+1 - Item arrive on time, and not damaged +1 - Item is as described +2 - Includes a cut out template, and is easy to install -1 - Cost Thoughts: I really liked the look of this one over others, but other cable management boxes are half the cost of these. I decided to go with them anyway, and have been happy with them. I've installed 4 sets thus far, and they work well with no defects in any of the sets I have ordered to date. Comes with two boxes, a cutout template, and instructions. If you don't like the look of the "brush" or "star" ones, these work great. Just be prepared to spend a little bit more money than you would for those.
T**O
In A Word - Awesome!
For my needs, this little guy was perfect. There is a variety of low voltage wall plates out there so it really depends on your needs. But I found this to be excellent. I wanted a wall plate that could go anywhere I cut a hole in my wall for AV cables. And I didn't want to have to rely on a junction box for mounting. The key to this item's design is the small "wings" on both sides allows you to securely fasten this to a hole in any kind of material...drywall, plastic plate, wooden cabinet...without having to use separate screws directly into those materials. With this, you just insert the unit into your hole (a handy template is provided) and start tightening the built-in screws. This will swing up the wings and your plate will fasten in no time. Only caveat is if you are right next to a stud, the wing may not be able to grip drywall on that side. I used this in conjunction with PVC pipes in the wall for running cables from the basement. The fit is perfect. The wall plate sits right above the top of the PVC and it is ridiculously easy to run my cables while maintaining a clean and attractive look.
J**Y
Love the Datacomm 50-3338-WH-KIT Easy Mount Cable Organizer
Cut the hole for the box with a PORTER-CABLE 43218 3/16-Inch Piloted Down Spiral Drywall Cutout Bit โ helping a friend hang two TVโs with the Mounting Dream MD2298 Premium TV Wall Mount Bracket. In preparation to carry out the task, I made a wood template for the pattern I wanted to cut out. Then used my DEWALT DWP611PK 1.25 HP Max Torque Variable Speed Compact Router to power the bit. If I had more holes to cut would have purchased a DEWALT DW660 Cut-Out 5 Amp 30,000 RPM Rotary Tool with 1/8-Inch and 1/4-Inch Collets When it came time to get to work, I was able to cut out the pattern in about 15 seconds. It gave me the cleanest cut I have ever had doing this sort of work. As a bonus the hole is square with the wall. The template I made was worth the time it took to make it (photos attached). I put a bottom plate in the fixture to make sure I didnโt mark the wall as I move the router around the fixture. To start the hole, I followed the advice of someone from a different review and tilted the router into the wall at the start this was both easy and controlled the depth of cutting. I just finished installing four of these in some drywall to wall-mount two TVโs. They work great and hold all the cables. tip: hold your vacuum sweeper in the lower left corner of the fixture to pick up dust. (You will need an extra pair of hands, but it is worth it!) If you do a lot of drywall work, perhaps a 24 inch 1โ by 2โ Straight Edge template with bottom plate of 1/8โ plywood (the bottom plate also provides a hole edge guide) is useful. To read about the installation of the TV mount you see in the attached pictures, please click on my name, (in blue), above and read the review of Mounting Dream MD2298 Premium TV Wall Mount Bracket dated May 6, 2017.
M**E
Great idea. Wish it was a little bit more sturdy
Love the idea and one worked fine. The second one I bought the latch with the screw that moves out to hold in place on the wall broke. The screw didn't want to tighten with the latch in place. After multiple tries getting it in place the plastic latch broke. Now it's just sitting in the wall hoping that one side doesn't come out and break the other side.
M**N
Great little solution
Easy to use, great product. A paper stencil is included to help make sure the rectangle is cut out properly. Once you have the hole in the wall cut out, insert the top piece and screw it in place by hand. Each screw has a plastic tab on the back that when screwed in, the tab pops out and presses against the inside of the drywall to hole it in place. These tabs aren't super strong, but strong enough to hold it in place. If you use a powered drill you will likely snap the plastic piece off from too much pressure. Use a screw driver and manually screw in each side until it is snug. Mount of top piece first, run all your cables through the wall. Do not mount of the bottom piece yet because you won't be able to get the cables out. Fish your cables out of the bottom hole. Highly recommend using a numbering system, tape, colored tape, etc. to make sure you know which cable is which if you're running similar cables through. I ran 4 HDMI cables though and numbered each end so I knew what I was connecting. Once you have the cables fished out of the bottom hole - you should be able to fit your hand and forearm through the hole, or use something else to snag the cables and pull throgh - slide the cables through the bottom piece, install into the hole in the wall and gently tighen it down. The white matches the standard white wall plates commonly used. From what I read and recall from the directions, specific heigh measures are not provided if you wanted to try line up the inserts with other wall mounts. Doing some basic measuring will get you the info you need to make sure its line up afterwards. Likely won't be an issue since these will probably be hidden from view, but later on it would look nice if you were selling your house or had to change your layout and these are exposed. Overall this was the perfect affordable solution I was looking for and simple. With your own creativity you could seal the plastic openings where the cables come through.
P**S
Easy to use.
Really easy to use and looks great.
A**S
This is a very good low voltage plate
Very happy with this unit as I was looking for a horizontal unit for a TV installation. Needed two on behind the TV and one behind the lower console and these really worked well. Easy to install in drywall, still a bit messy doing the cutting, but installed cleanly and easily. Like any installation of this nature, measure and cut carefully on the hole size to ensure a clean and neat fit.
C**A
Great looking finish!
Once you have identified the location of wall studs, installation of these cable wall plates was a breeze. Ensure you are not cutting drywall near any electrical outlets or cables. Use the provided template for a perfect fit. I used a box cutter blade in lieu of a drywall saw for a much smoother cutout. Secure the plates to the wall as directed and route your cables..a great professional looking finish to hide all your cables. Great product!!
V**N
Excelente
Perfecto para su uso
D**Y
Great product
Good product for my needs.
Trustpilot
2 weeks ago
1 month ago