🎮 Unleash Your Style with eXtremeRate!
The eXtremeRate Clear Orange DIY Replacement Shell for Nintendo Switch Lite is a custom-designed housing that perfectly fits your device. Made from durable ABS material, this vibrant shell not only enhances the aesthetic appeal of your Switch Lite but also includes a screen protector and all necessary tools for installation. Ideal for gamers looking to personalize their console, this product requires some electronic installation experience, with a helpful video guide available online.
Color | Clear Orange |
Hardware Platform | nintendo_ds |
Material Type | Acrylonitrile Butadiene Styrene (ABS) |
S**E
Very nice shell
I used this black translucent shell for a recent swap and it worked great. Fit is immaculate. Looks like it came from the factory. I also used black buttons from this company as well. The thumb stick caps came from another company on Amazon (skull something I think) they just slipped on over top of the original white ones. I did not use the included screen protector as I opted to change the digitizer from the factory blue to a dark grey one. I bought this part from A-mind on Amazon. Everything works great and I am very happy with the results.My main tip is to have experience with stuff like this or pay someone else to do it. It’s not an easy swap by any means and would be very easy to damage multiple parts. I followed a YouTube tutorial where I guy did a SNES gray retro swap shell and everything went smoothly for me for the most part. No complaints. Oh, I also got the Nintendo decal from Etsy and installed it under the translucent shell directly to the metal shield so it wouldn’t get scuffed off.
B**!
Fantastic case! NOT IDEAL FOR BEGINNERS!!
This is a fantastic case! The colour is vibrant and accurate to the product listing and it is a good durable plastic! It looks perfect and I will be ordering more from this brand! I ABSOLUTELY recommend watching the provided youtube video before purchasing (just search extremerate switch light replacement case), it is a very detailed real time video of the whole process. By watching the tutorial you'll know pretty much immediately if you are able to take this project on! THIS REQUIRES FULL DISASSEMBLY OF YOUR SWITCH!!! the tutorial does not do this but ALWAYS disconnect the battery FIRST, if you do not you run the risk of frying your switch!
B**D
Replacement shells are good now!
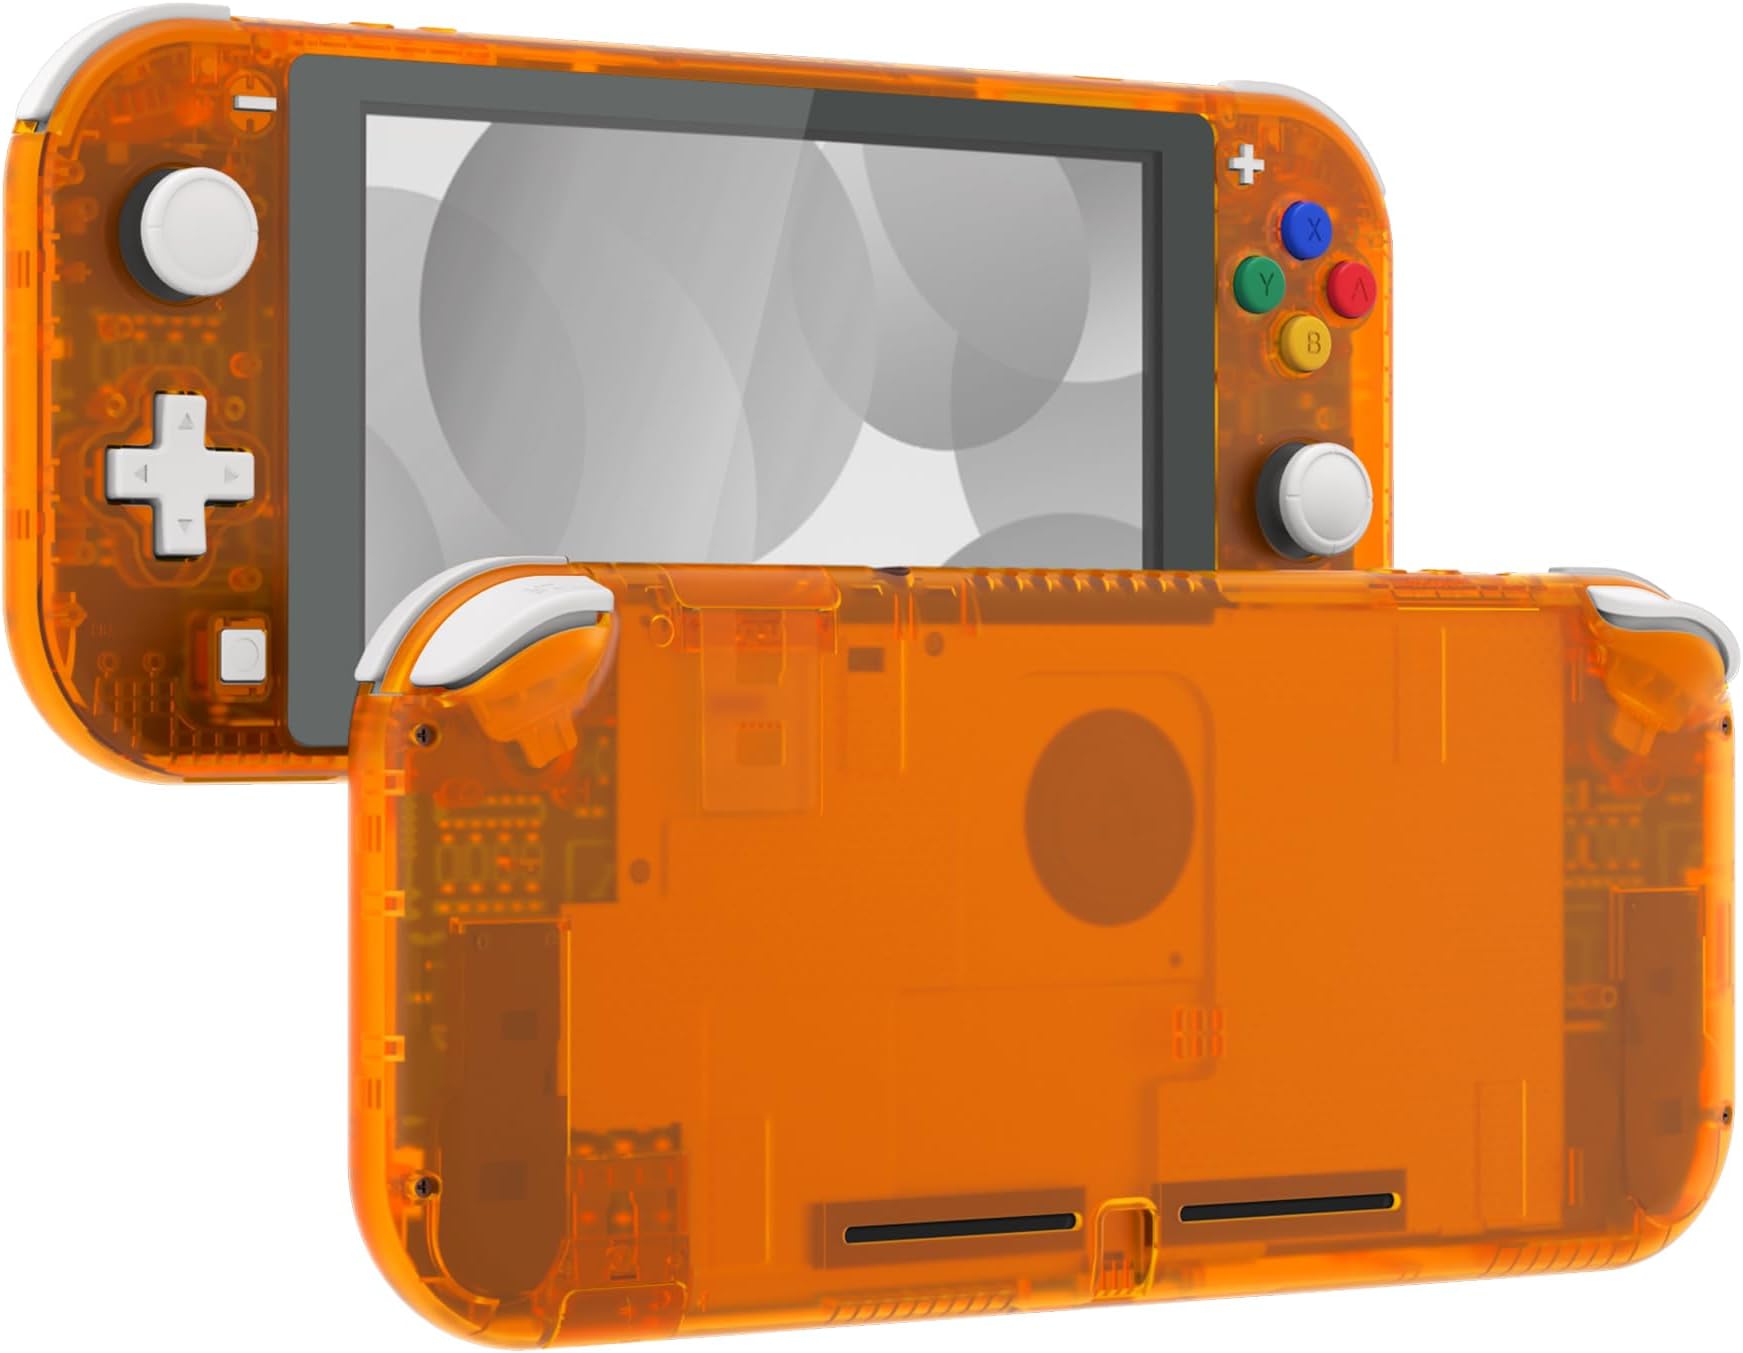
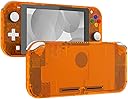
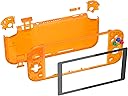
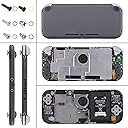
The last full shell replacement I bought was for my DS some 15+ years ago, and I almost immediately regretted installing it - production quality was poor, and I did a bad job installing it on top of that. Until now, I hadn't tried another. But I've heard good things about eXtremeRate, they really seem to know what they're doing.This shell not only looks cool, very close to the original Atomic Purple look, but also fits close to OEM and feels solid, not flimsy at all. The Super Famicom colored buttons are a nice touch, too, I'll always go for those.Unfortunately the card slot dust covers leave something to be desired - they're very rigid and feel like they'll snap if they bend too far. If you can get away with it, you'll want to use the originals. I wouldn't mind paying a bit more for some nicer double-shot plastic covers instead.I also had to grind down the post on my R shoulder button, the fit was too tight otherwise and it wouldn't back off of the microswitch. L button was perfect. Go figure.The installation as a whole is grueling, there's no other way to put it. Clear out more space than you think you'll need and be ready to potentially spend a few hours at it. Take it slow and follow a video guide, especially when you're reassembling the unit. You can't be too careful, all those flat flex cables are daunting if you're not accustomed to working with them. It was moderately stressful when I forgot to plug in the screen backlight and I thought I killed my system.I didn't think I would want the included screen protector with the gray bezel, but the digitizer I bought didn't match near as well as I'd hoped with the purple shell, so I opted to use it after all. Could've saved my money and used the old digitizer.Despite the setbacks, I'm happy with how this shell swap turned out. Might do some retooling in the future, but as it is my Switch Lite looks very cool now, and a little nostalgic.
A**A
Super cute !!
Love my new shell!! A little difficult for a beginner.. but was determined to get it done as I choose this is a project .. this was my first time opening a system up ever.. a little time consuming and tedious but very much worth it !! Everything fit perfectly and all the tools helped .. & there are plenty of YouTube tutorials to do this .. definitely recommend & I will definitely be buying more in the future!
J**T
Nice Shell
There could have been better instructions provided, but after a quick Youtube tutorial the shell is on and looks great. I had minor fitment issues which were easily fixed and the included Screwdrivers were amazing quality.
Q**N
An okay product
Looks pretty good, but:1. Fit is not very good, after fully assembled, slight pressure on the edge from normal holding makes cracking noise.2. They used soft plastic, it's like the original shell not not quite the same, or maybe it's thinner than the original, I'm not sure, it feels like I can bend it anytime.3. The surface has a matte finish, personally I think it can be slightly smoother for such a transparent shell.
M**3
Time consuming but worth it!!
Took about 2 hours, but I replaced my blue digitizer with a black one, and that process took nearly an hour itself. The case looks, feels and fits great. I did have to file down the left bumper a tiny bit because it was sticking, but not a big deal at all. The screwdrivers work fine. I didn’t use the screws that came with the kit, I ended up reusing the oem screws. All in all, I’m impressed. With a little patience, a good YouTube tutorial to follow, and a bit of time on your hands, I highly recommend.
T**E
5 hours and one busted speaker later 👍
Nice protective shell, as described! It was a very difficult process to put together! Took around 5 hours and one of the speakers busted in the process😅 if you have prior experience with stuff like this, it will probably take significantly less time. I suggest watching multiple different videos, not just the one recommended. It was hard to find how to apply the *gray screen. I had the turquoise switch and it did not show how to replace the screen in the video recommended. I found another video of someone showing how to do it and turns out it’s the very last step (once you’ve put every thing together)! It literally just sticks to the screen at the end to cover the turquoise boarder. Hope that helps!
A**S
Never experienced problems with eXtremeRate until this delivery..
I've done 4 different shell swaps from eXtremeRate and had nothing but great experiences. (Never had a pre damaged shell until this one)This one came cracked but I decided to continue with the process as it wasn't as visible until installed. After having the internals behind the crack it's become very visible which is a huge disappointment but sadly the way it goes. In theory I should have just sent it back for a swap seeing as amazon would have done it no questions asked but I didn't.I regret not just sending it back for a swap but after all this work I don't feel it's worth it to disassemble and send it back after finding out.It still looks great but just heartbreaking experience. The screen protector was so difficult to install, I've never had a screen protector want to hold so many bubbles. Actually I've never had a problem with screen protectors in general. I continued working at the bubbles for about an hour and eventually got 99% of them out, but man that was one of the most challenging tasks of this swap.After all said and done I'd do it again, I still trust eXtremeRates products. Maybe they'll try and make things right but I won't "count my chickens". Be vigilant with your shells before installing. Make your own decisions accordingly. Be mindful any damage/cracks will be much more visible upon installation.
C**N
Al 100
Quedo muy bien, el único detalle son los botones de color que trae, tuve que comprar unos por separado.
S**Ē
Lo volvería a comprar.
Me gustó mucho la calidad, el color, viene con desarmadores y tornillería de más.. pero recomiendo ver algún tutorial antes de armarlo jaja porque si no sabes, mínimo una hora si te vas a tardar en armarlo.
D**L
Detalles
Llegó con unas partes como estrelladas de la parte de atrás y como transparentes se nota mucho
N**E
Beautiful
Took me an hour to complete. I’m not tech savvy but it’s pretty easy to understand what to do if you follow the instructions. Better to unplug the power first and then do the other stuff.Btw my only experience was switching to the white shell before this (which took me hours and always had problems with screen not turning on and me panicking if I fried the battery), otherwise no other real experience ..The white shell was amazing tho don’t get me wrong and it was matte and soft to touch but unfortunately got messed up when wiped with an ORANGE microfiber so the sides look rusty orange :’)… I attached the pic if anyone wanted to know what it looked like with white and grey. I kept the white power buttons from the white shell for the gradient shell. Thinking to switch to the black screen protector to have a cleaner look and less distracting. The gradient shell is shiny and felt like hard plastic.The only problem I had during shelling was my L button. Always had trouble making it click, was squishing the button. Had to take a chance and file the part down a bit - which didn’t quite work but if you lift the button up and screw the cover on the same time, it kinda just stays in the correct position. Hard to explain but it’s kinda dumb they make it like that
Trustpilot
2 weeks ago
1 week ago