🚙 Light up your adventure—see farther, drive safer, and own the night!
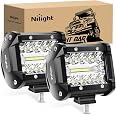
The Nilight 2PCS 42W Flush Mount LED Light Pods combine a powerful 7800 lumen output with a smart spot-flood combo beam, housed in a durable IP68 waterproof aluminum casing. Designed for easy, precise installation using a provided template, these lights are perfect for mounting on bumpers or grilles of 4x4 trucks and SUVs, enhancing visibility for backup, reverse, and offroad driving.


| Color | 2Pcs 42W LED Pods |
| Material | Aluminum |
| Light Source Type | LED |
| Brand | Nilight |
| Style | 2Pcs 42W LED Pods |
| Voltage | 12 Volts |
| Light Source Wattage | 42 Watts |
| Number of Light Sources | 2 |
| Are Batteries Included | No |
| Global Trade Identification Number | 00812227031909 |
| Manufacturer | Nilight |
| UPC | 812227031909 |
| Model | 14024C-B |
| Item Weight | 2.25 pounds |
| Package Dimensions | 7.09 x 5.24 x 3.78 inches |
| Item model number | 14024C-B |
| Exterior | Painted |
| Manufacturer Part Number | 14024C-B |
| Position | Front |
| Special Features | Waterproof |
| Wattage | 42 watts |
D**G
Looks like stock equipment. Easy installation. Great illumination!
Wasn't too sure about these when I saw them online. I was expecting something cheaply made and something that felt equally cheap in my hand. I was pleasantly surprised when I opened the box and unpacked the contents. Everything was well packaged and nothing was scratched or damaged. The lights are heavy gauge metal body construction and are very sturdily built. I wouldn't recommend using the cardboard template though. U installed the first one without using it and everything came out good. Using the template, the holes were off a little and had to be bored out a little larger in order to get the bolt through the hole. Just slide the light through the cutout you make then mark the mounting holes and drill - perfect fit. I can't wait to see the difference these things make. As you can see in the picture, the bag contains bolts, buts and washers. It also contains an allen wrench to tighten the bolts.I could barely tell when my factory reverse lamps came on. After installing these lamps, I can clearly see when I am backing up. I get great illumination at least 50 feet behind my truck now; more than enough to safely back up without worry. I hope to get a long life of use from these, but if I were still deciding on which set to buy, I'd choose these.As I was installing them, a neighbor came by and said they looked great on the truck and that they didn't look aftermarket or out of place at all.All-in-all I would say the install is fairly easy with minimal "mechanical knowledge" required. Tools required: 4 1/2" grinder to cut through the bumper, needle nose vice grips, marker, drill with bit. On a 1 (easy) to 10 (hard) scale I'd give the install procedure a 2.The last picture shows the lights on. You can see the OEM reverse lights under the tail lights Huge difference.******UPDATE******About a week after installing the lights, I noticed one light was not working. I have not figured out yet what the problem is. I was thinking it was shorting out but that doesn't seem to be the problem. If I tap the back of the light, it will turn on (as long as it is suppose to be on). Now I am thinking it is defective.
A**
Very bright
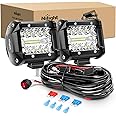
Originally bought these for my plow truck, but never got around to installing them. We bought a 36’ diesel pusher RV and had a two week long cross country trip coming up not long after buying it. Knowing I’d be in dark areas and unfamiliar territory, I felt it was necessary to upgrade the junk factory reverse lights by adding these. They look great, don’t flicker, and are very bright at night! So far they still work great with no moisture or water intrusion even after multiple washes and 5200 miles of driving. Came with everything needed to get them installed on the bumper, but did not include any wiring or switches to get the power to them. Great price though and I’ll be buying more for my other vehicles! So far I’ve had zero issues with any of the NiLight products I’ve purchased
J**N
Bright, good quality
Very bright, easy to mount with mounting diagram provided. Mounted them on the bumper of my 01 Yukon with no problems. Just needed to trim a few of the heat deflectors on back of the light to fit with the tow package but no problem. Easily as bright as some of my Auxbeam pods
L**T
Honda Pioneer side light
Just what I was looking for. The are built well and wicked bright . Wanted side lights for my Honda pioneer but needed them lower not on roll cage . Came out perfect.
J**A
Bright and they work
These are bright, but much more of a scattered flood than I was hoping for there's not much focus if any for the light beam. I have other nitlight lights on another truck they are a little smaller and have a more focused beam to them. Install is straight forward and difficult do to my choice of 1/4" diamondplate on my homemade bumper should be easy on anything else just make sure you aren't planning on cutting the holes with a 4.5" grinder there's no room for the corners to cover any overcut. So I started with grinder ended with Sawzall. They look nice very low profile now I just need to figure out how to keep them from lighting up the sky and keep them a bit more tamed toward the ground. This is not a defect just a flood light with a very impressive spread more than my personal preference
D**Y
Great products
I have purchased many light brands for my vehicle and this brand by far is the best bang for your buck. They last. I live in the northeast where the roads are heavily salted in the winter and they continue to hold up to the abuse where my other brands quickly deteriorate. Also super bright!
J**Y
Work great
Very bright for the price. I wired them in with my reverse lights and they work great.
J**N
GREAT Fog Lights or Daytime Running Lights! - Hummer H2 and other Vehicles
A fantastic OEM fog light or Day-Time Running Light replacement for my Hummer H2, fit perfectly in the OEM holes, could also be great for a number of other applications. I use all of their lights on my rig including pods, light bars, and now these fog lights. Genuinely really good for the cost, have gotten them super wet, under water, etc. Never gone out on me!
Trustpilot
1 month ago
3 weeks ago