🛠️ Elevate your flooring game with ArdexFeather—where speed meets seamless style!
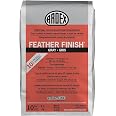
ArdexFeather Finish is a professional-grade, self-drying cement underlayment that bonds to multiple substrates and sets in just 15 minutes. Its featheredge design ensures smooth, seamless transitions, making it perfect for prepping floors for tile, vinyl, laminate, and engineered wood. Easy to mix with only water and engineered to resist stains and discoloration, it’s the go-to solution for contractors and DIYers seeking durable, fast, and flawless floor preparation.
M**U
amazing product to resurface fireplace
After seeing some youtube videos that used this product for faux concrete counters, I decided to try it on my fireplace. I was able to put it directly over my old ugly tiles with no prep other than a quick wipe-down with a wet rag. It is very easy to mix with just some water. I used a plastic takeout container, put about 1 cup of powder and poured a little water at a time and mixed it with a disposable spoon until it resembled brownie batter. Each small batch gave me about 20 minutes of working time. I was able to get it on and smooth it very well with just a spackling knife. My fireplace required 3 thin coats and no sanding was ever needed. I used up maybe 1/3 of the bag for my fireplace. Now i have a concrete looking fireplace. Very pleased with the outcome and highly recommend this product!
S**1
Used for subfloor prep for covering cutback residue, mastic, or glue!
Long story short, we used Ardex Feather Finish to encapsulate cutback residue (mastic, glue, etc...) on concrete that was left from asbestos tile in our basement storage room. Which it worked perfectly!A little insight: Our first "major" winter project in our new home was to clean/renovate our basement storage room. The floor was partially covered in asbestos floor tile. We had the tile professionally removed, but the job did not include the removal of the cutback residue leftover from the tile. We thought about just covering the concrete with vinyl plank and call it a day, but the cutback residue had a really musty smell, which kind of stunk. (no pun intended).After doing a little research and getting a recommendation from a friend (who's a contractor), we decided on the Ardex Feather Finish. It's main purpose is to prep your subfloor for a covering, whether it's carpet, tile, or some sort of plank flooring (wood, laminate, etc...). It can be applied to ALMOST any surface to including old floor adhesive. Which is what we were looking for. We ended up using DriCore for the floor covering.READ THE INSTRUCTIONS! Probably the most important thing!Since our surface was already clean from having the tile removed (they washed the whole room down, floor to ceiling), there wasn't much prep. I did wet mop the area one more time to be safe, and let it dry overnight. It was winter when we did this, so we had space heater in the room to bring up with ambient temp. We live in Minnesota, and the room is unconditioned, so it was pretty chilly in there. You need to make sure the surface you are applying it to is the minimum temp recommend in the instructions or you could run into issues with it properly adhering.I started with a small test area, about 12"x12". I wanted to make sure it would stay adhered to the cutback residue. I checked the test area after 24hrs, and it was rock hard. I then proceeded to do the rest. I used a 12" flat trowel with a sweeping motion and feathered the area until it was pretty smooth. It levels itself, so you don't have to be super picky about getting it perfect. If I remember correctly, the consistency is like heavy whipping cream, maybe a little thicker...(It's not like mortar you use to lay floor tile). It does dry fast, so only mix as much as you can work with!I let it sit for a week to be safe (cold basement), before installing the DriCore,. I did apply this a year prior to writing this review, and it's still sound and holding well. We did contemplate just leaving the feather finish uncovered, but Ardex states you should use something over it. Although this was a storage room, we didn't want to risk damaging it, or have it wear through. That's when we decided on the DriCore, which has worked well. Hopefully this helps!Cheers!
B**R
Great!
So, I'm finisheing my basement, there are some uneven edges that I had to grind down with a angle saw due to sloppy cement, and an area where the plumbers had chunky cement I had to smooth out to put LVP over. Also, a portion if it was still about an 1/8 of an inch lower then the rest of the flooring so I needed something to fill and smooth over with and this feathering cement worked! The instructions in the bag didnt work for me, I weighed the ingredients in the directions water vs product, but it was too chunky and not smooth. I added a little bit more water until it reached the consistency of cake batter, then smoothed over to where I needed, it set really quick, so I did half the bag first, then after that the second half. Here are some pictures. A couple hours later a contractor showed up at my house and stepped all over my work! Thankfully it had set and was fine....but one picture there are black finger marks?! Lol, I dont know what he was doin 😅, but ohwell. LVP flooring here I come!
C**A
NO SAND method for countertops/tabletops
If this helps one DIYer then it is worth it! I would have loved having this information before starting this project. This was EASY and I finished it in a Saturday afternoon. After reading a dozen tutorials for ardex feather finish on countertops, I was ready to take the plunge and try on my less-risky wood table that needed refinishing anyways. My biggest concern was the amount of dust created by other tutorials involving a ton of sanding between coats and at the end of the process. As someone who has worked a lot with concrete, I just didn’t see why this was necessary! If concrete (cement) is applied properly, it should have a nice smooth surface on its own. Plus, I think the sanding takes away from the natural velvety finish of concrete and ends up looking too forced. Here’s what I did:1) OK here’s where I did sand the table a little bit... you do want to rough up your surface so the cement has something to grab on to. This took me 3 minutes with a sanding sponge.2) I didn’t use a huge trowel or professional float, I just used a 4 inch scraper because that’s what I had on hand, but I think this led to my smooth finish and no sanding needed because I was able to apply the product in thin coats using a lot of pressure since my tool has a thick sturdy blade. Your first coat: don’t fret about it too much. I mixed the feather finish to a peanut butter consistency and spread it on as smoothly as I could, making sure to work as cleanly as I could and not leave anything too rough. I’ve included photos of coats 1,2, and 3 so you can see it gets dramatically better as you go.3) Let it dry until it makes a hard sound when you tap on it. Mix up less for your second coat, (and I hate to say a little bit thinner like pancake batter because I don’t want people to mix it too thin, but this worked for me) using firm pressure I applied a coat as thinly as I could. This really started to smooth things out. Each coat is easier and faster and smoother than the one prior. If you use a thick coat, you will probably have more unevenness that you will have to sand! Think THIN and pressure and keep your blade clean! I wiped off excess cement on dry areas if I felt like I was creating too many trowel lines. In between coats I would let things *almost completely dry* (not too soon or you’ll just add more texture) and then come back with a clean scraper and smooth out any ridges. No sanding needed and the finish looks more natural because I smoothed out any trowel lines this way.3) Repeat until you have the coverage you need. I spent time with a small putty knife obsessing over the edges because I wanted the flat “slab” look and my wood tabletop had rounded edges.4) I lightly lightly sanded the edges or any rough burrs with the sanding block at the very end once I was happy with the finish, creating less than a dime sized pile of dust after I swept it up. The tabletop is buttery smooth and not at all rough, and sealing it will only make it smoother. I really was just in awe of these other people who are blowing horrible cement dust all over their houses!5) I will be sealing after a few days and will update my review to cover any durability issues. My only areas of concern are the corners that I really had to build up with a thicker amount of cement, we will see how these hold together.
Trustpilot
1 day ago
2 months ago
2 months ago