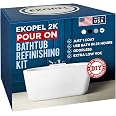
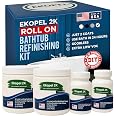
🛁 Transform your tub, elevate your space—safety and style rolled into one!
The Ekopel Roll On Bathtub Refinishing Kit features a dual-component 2K epoxy formula that covers 16-20 square feet with a durable, non-slip finish. Designed for easy roll-on application, this USA-made kit provides a professional-grade bathtub makeover that enhances safety and aesthetics in one seamless step.
Manufacturer | Refinished Bath Solutions |
Item Weight | 8.1 ounces |
Product Dimensions | 4 x 4 x 9 inches |
Country of Origin | USA |
Item model number | Roll On |
Size | 1 count (pack of 1) |
Color | Roll on Non Slip |
Material | Epoxy |
Coverage | 16-20 square feet |
Included Components | Ekopel 2K Non Slip Part A, Ekopel 2K Non Slip Part B |
Batteries Included? | No |
Batteries Required? | No |
R**S
Great DIY project, must follow instructions!
This product was truly amazing! I did extensive research prior to committing to the daunting task of reglazing my own bathtub. This product kept coming during my video research, so I decided to purchase it based on what I saw. Note; I have never done this before, so as expected, I was quite nervous about doing this, nevertheless I wanted a better looking bathtub so I took the plunge! Based on everything I watched and read about reglazing, I knew that the prep would not only be the most important part, but essential to a successful outcome. I was not wrong. You must follow the instructions to a letter or your results may not be what you expect. I cleaned and cleaned and scrubbed a lot prior to getting ready to even prep the tub. I must stress that you can’t “over-prep” for this job. The more you prep and scrub the surface, the better the results. I spent a few days prior to the actual prep day getting the tub ready. It had lots of soap scum and rust stains on the bottom that had been there for a long time as the house is almost 79 years old and the tub is original. Once I was assured the prep was sufficient, I waited overnight for everything to be dry and ready then painted the tub the next day. Although the instructions said you need to wait at least 3 hours before applying the second coat, I waited a day (24 hours) between the first and second coat. It was not dry, even three hours after applying the first coat, still tacky to the touch. The next day the tub was completely dry. Also, be aware that the temperature of the room must be at least 72 degrees in order for the paint to dry effectively. I had the window open and it was only 66 degrees, so that could have contributed to the additional time it took to thoroughly dry. I was glad I waited the full day. The second coat seemed easier because I decided to pour it on, then roll it instead of using the paint tray. I ended up using everything in the jar with the second coat, which is a good thing because you want as much coverage as possible. The next day it was dry and we were able to re-silicone the tub and it was ready for use. I would recommend this to anyone who is brave enough to want to give it a try, but as I said, prep, prep and prep some more for the best results!
S**A
Pretty Good
Ok it was easy to apply. I still ended up with some fisheyes on top of the tub. With guidance from customer support( awesome by the way) I sanded smooth (the first coat) where the fisheyes were. It was better but I still had a few. I see where I made some mistakes. No doubt I would do much better the second time applying this. So far it’s staying bonded to the old tub. I cleaned it four times and still had fisheye so I’m thinking it was the humidity. (Which was high that day) Overall the tub looks brand new. I also applied the skid resistant epoxy. Very easy to do but I still had large pieces of sand or whatever is in there to made it nonslip. Not sure what I did wrong. Maybe rolled it too much. Can’t express enough to make sure the tub is free of all silicone and soap scum etc. I used two entire bottles of toilet bowl cleaner and used a rotating scrubber (attached to my drill)Triple made sure there was no hair or dust or lint in the tub. Wore long sleeve and a hat and I still ended up with lint and a couple hairs. Had the heat off and windows closed and at 72-75 degrees. Time will tell how durable this is but like I said the tub looks new. I can see the mistakes but everyone that sees it doesn’t until I point them out. Cost me total about $175. Professional job I was quoted $600. All in all I would do this again. One more thingI had trouble with the drain and taking the tape off after the second coat and waiting 45 minutes. I think if this product fails it will fail by the drain.
M**Y
Fantastic product - read for tips
Update:I do have to deduct a star for one thing that we found. This stuff stains surprisingly easy and is really hard to clean. My daughters primarily use this shower and they have a lot of colorful bath and body products such as gel sugar scrubs and shampoos. If they leave a small amount on the tub after they get out. It will stain the white tub. It is possible to get it out, but it requires a lot of scrubbing. A regular bleach spray wouldn't work. I used a toilet bowel cleaner gel with bleach and soaked the area for about 15 minutes and then used a magic eraser. Even then it took a while, but that's the only thing that worked for me. Instructed the kids to rinse out the tub after every use. Still no chips though and product is holding strong.I don't tend to write lengthy reviews. However, I was so impressed with this product that I felt like I had to give anybody thinking about utilizing this, some tricks to make it go smooth. I am not a professional by any means, but I am pretty good at completing most small non complicated projects around the house. I looked at quite a few options for similar products and this stood out for me after watching several professional remodelers test different products. This seemed the most durable while still being user friendly.Tip #1 The prep work is the key. This product comes with detailed instructions on what to use to prep the surface you are using it for. In my case it was a bathtub. Put the majority of your time into the prep. I actually did a few extra steps as well to make sure that the application looked good. After cleaning the tub I scrubbed the surface with steel wool throughout the whole tub to really get off any stuck on soap scum. Make sure you sand the tub really well too. I used a rotary drill sand paper attachment and with 240 the paper wears out really fast. I had to use about 4 sheets of it.Tip #2 - Have small metal tweezers available or a metal putty knife. Even though I put several hours into the prep, your initial coat will still have some small imperfections. They kind of look like the coat will avoid certain areas like grease and water mixed. You can take the putty knife and scrape the area a bit and reapply with the roller. This typically will help remove those spots. DONT dab it with a paper towel. This stuff is sticky and you will leave paper residue and it is very hard to get out. The tweezers are useful for hair. Inevitably as I was applying this stuff a small arm hair or something would fall into the tub. Huge pain in the butt to get out. Tweezers are a good option to remove this and only disrupt a small area. You could wear a hair net and long sleeves too. Not a bad option.Tip #3 - Don't do the second coat after 3 hours. I put a light coat on for the first coat it still wasn't dry after 3 hours. Part of that reason is I checked on it every 20 minutes after the first coat to clean up any drips or fix small problem areas. I would plan on doing that for at least the first 2 hours if you want the coat to look really good.Tip #4 - Remove the drain for the tub and just replace it. I tried to tape it off and it came out pretty decent, but this stuff is crazy strong. After it cured and I was removing tape there were some sections I had to scrape out with a razor blade and even that took a while. Much easier to just remove the drain, roll out the area, and then replace it with a shiny new one.Once I did the first coat. The second coat was much easier. I did a thicker coat and didn't have to worry about imperfections as much. I can say the tub came out fantastic. I can't speak to the durability yet, but based off my drain issue I can say that it is really strong stuff. One thing I forgot to mention. I had some small pits in the tub as well. I used JB Waterweld putty and filled in the holes level to the tub surface. Let it cure completely and this stuff will cover it no problem. You will never even know the defect was there.
Trustpilot
1 week ago
3 days ago