Desert Online General Trading LLC
Dubai, United Arab Emirates
Desert Online General Trading LLC
Dubai, United Arab Emirates


🍇 Elevate your homebrew game with crystal-clear confidence!
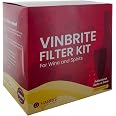
The Harris FiltersBalliihoo Homebrew MkIII Vinbrite Wine Filter Kit is a compact, crystal-material filtration system designed to produce brilliantly clear wines and spirits. Featuring a complete set of components including filter pads, flow control, and transfer accessories, it enables precise, easy filtration for homebrewers seeking professional-quality results.
| Brand | Harris Filters |
| Colour | Blue |
| Product Dimensions | 10.49 x 16.79 x 16.51 cm; 481 g |
| Material | Crystal |
| Item Weight | 481 g |
G**S
Simple and effective
The media could not be loaded. After opening the box and reading through the instructions I wasn't too clear on what effects the different filter pads had and which way round the prime pad filter went. I decided to look on youtube and after searching for "The Vinbrite Filter Kit" I quickly found a video from the manufacturer - it's about 15 minutes long and certainly worth a watch. It explains what the different filters do and how to install them properly. I recommend you watch this video.In a nutshell, you fit the 'prime pad' so that the rougher side faces the unfiltered wine. The prime pad is used to filter out the larger particles that may clog either of the other 2 filters - so you can view the prime pad as a pre-treatment before filtration. The video I have added is of the flow of wine through the prime pad - it took about an hour for the 5 gallon of wine to pass through it.The choice of which of the other two filters you use is up to you - the video suggests that the best filtration will be achieved using the Filtabrite pad but it will take the longer to do. The crystalbrite pad is apparently almost as good filtration but works faster. I decided to use the filtabrite pad and it took about 90 minutes. I haven't yet used the crystalbrite pad so cannot state how long it will take but if you are waiting upwards of a month for your wine kit to finish, I would suggest 90 minutes is not a long time to wait so I intend to carry on using the filtabrite pads.The instructions suggest to wet the pads before you clamp them into the filter body; this seems a good idea as they soften slightly when wet so you should get a better seal around the edge.Take note that if you use the filtabrite pad, because it is much thicker it is able to be used without the support piece inside - this will be obvious when you look at the parts.Once your pad is assembled in the filter body it is recommended you flush the pad out with clean water - the video covers this well and also how to bleed the air out of the top of the filter.If you can see in my video, I have used the inside of my auto syphon and connected it to the tubing that came with the kit in order to get to the bottom of the carboy. Without some sort of rigid tube I would suggest you may struggle with a large carboy.The only slight niggle I have (though not worth removing any stars) is that the filter housing is not that secure a fit onto the carboy (though this may differ with yours). So I could go and do something else without fear of it getting knocked off, I added a few pieces of duct tape to hold the filter body in place securely. There'd be nothing worse to coming back half an hour later and finding your precious wine all over the kitchen floor with the dog smiling at you!The wine that was produced after being filtered was perfectly clear and bright. I would recommend this product and will certainly be using it again for futures batches.I hope you found this review useful.
B**N
Wow! What a difference.
Oh ye of little faith! I am a traditionalist winemaker come into the modern world of winemaking after many years away from this great hobby. To start with, I have made several batches of seasonal wines, sloe, blackberry and apple and pumpkin and cinnamon. I have used a very high yield yeast and got some amazing results! The pumpkin and cinnamon cleared out very quickly and I decided to try a Vinbrite Mk3 Filter Kit. I have never used one before, but was very surprised at how easy it was to set up and use. I did use all three pads plus the paper filter with the Crystalbrite filter. It did take quite a while to filter all 8 gallons of the wine, but the results were AMAZING. All 8 galls turned out brilliant and polished. The total cost being 43p per gallon. Not bad. If I decide to re-filter when bottling, then the cost will go up to 63p per gall. I am a very happy bunny. There is however one thing that I will be doing next time I use the filter and that is try and find a plastic tube to fit the bottom of the funnel extending down to the bottom of the demijohn, as I don't like the wine splashing down to the wine below and becoming aerated. That is my only moan! I hope this help you make the same decision as I have done and come up to date with modern practices. Happy winemaking.
F**E
Nice.
(In conjunction with a clarifier, clearing a cane sugar wash) When you buy something expecting it to clog up and be useless as with everthing else you've tried but it exceeds expectation... Swift enough run through time and you don't need to baby sit it, and a crystal clarity not using the super fine pad, even the course pad does a decent job comparitively to manual seperating. Why I didn't just get this from the beginning I do not know because this is excellent.
K**N
Good for what I need it to do, but future kits could do with an additional piping
At first used super fine filter to filter a merlot wine from a Sadlers Reserve kit. With all the care and attention I had taken to not mix tbe wine with oxygen, the filtering jut set up kinda ruins that as it trickles slowly into the vessel you are filtering into.Perhaps some tubing fitted into bottom of funnel filter would help resolve this. Was not overly impressed by this as this filtering idea was new to me as I really needed it for my next wine batch which was cloudy still after 4 weeks post fining!Nonetheless the Merlot came out crystal clear, deep dark red like a professional wine but disappointingly I could taste it had mixed with air too much!Ok lesson learnt! But ok it was only a 12 bottle kit! Onwards and upwards!My next test for this kit, I used the coarse filter for my cloudy Cabernet Sauvignon again from a sadlers reserve 12 bott kit.I added oak chips and freeze dried blueberries to this kit to enrich the flavours and tannins but changing a recipe I guess has its side effects so it was quite cloudy. Anyway, I used the coarse filter which allowed a faster more constant trickle into the recipient vessel and the filters cleaned the wine quite nicely to the point that when bottling I could see through the dark wine, however later that night I opened a half bottle of the dark liquid just to sample the wine and I held it up against the light! I still could not see through the wine as it was not crystal clear. So definitely not using the coarse filter again!!!!! Tiny particles still got through the filter medium and I am annoyed but I won't filter it again as I bottled the wine already! Lucky the wine sample tasted real good so I can cellar it for 6 months and let the sediment settle and I just have to be careful when I pop the cork the other end.I have yet to try the medium grade filter which came with the kit but I have two more batches going to fining stage this week so soon I will know.Basically the kit does its job, just not seemingly as fast in my opinion as some ppl are stating, and just be careful which filters you select.Easy to put together and easy to notice if the internals are not aligned properly when you put it together. (If the internals are not aligned it doesn't filter! But you will understand when you see and inspect kit better!)Otherwise I will just get an additional piping tube fitted to exit funnel so to minimise wine with air oxidation and I will use fine grade to filter my reds
G**S
Wine filter kit
Full kit with filter papers funnel and pipes .
Trustpilot
2 months ago
2 weeks ago