

🔥 Reflect your comfort, not your energy bills! 🛡️
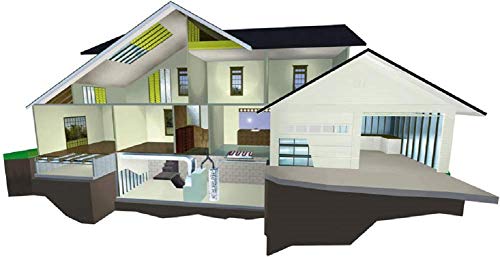
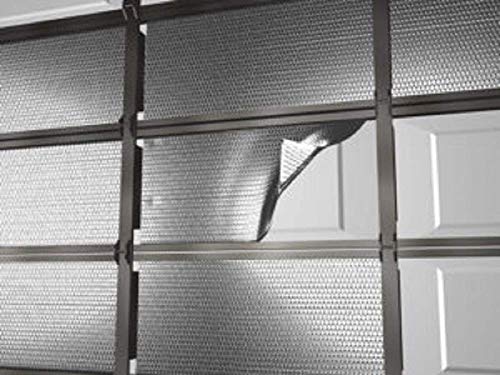
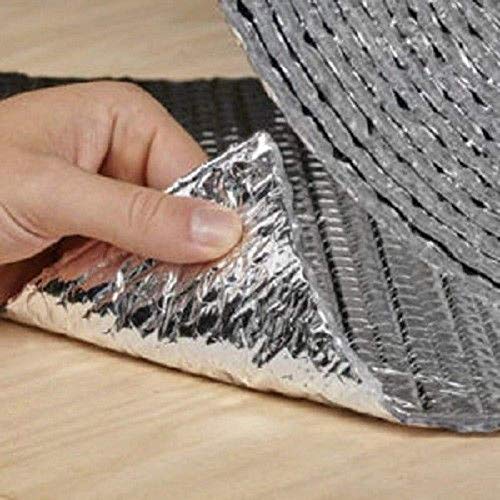
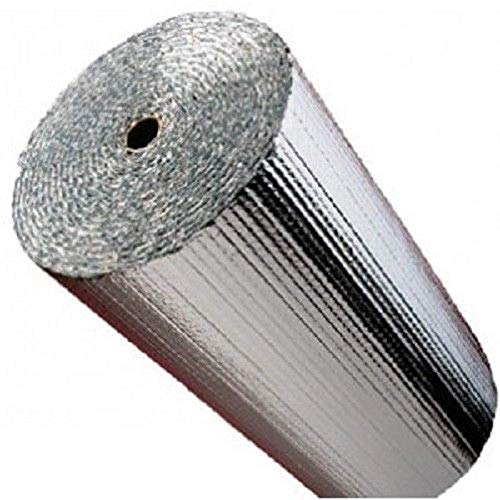
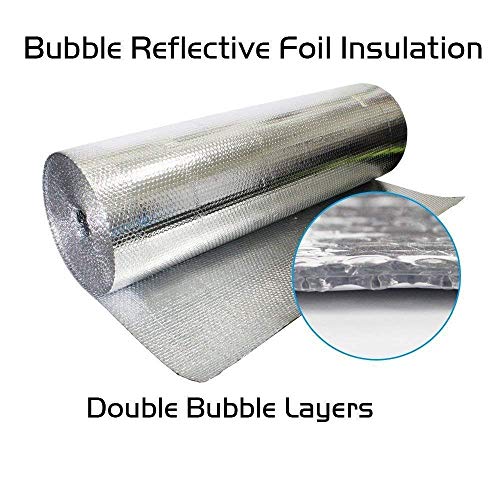
Reflectix ST16025 is a 16-inch by 25-foot roll of 5/16-inch thick, seven-layer reflective insulation featuring perforated staple tabs for easy installation. Its dual aluminum foil layers reflect 97% of radiant heat, while bubble insulation resists conductive heat transfer. Lightweight, fiber-free, and non-toxic, it’s designed for versatile use in walls, ceilings, floors, attics, crawl spaces, and metal buildings, effectively reducing condensation and enhancing energy efficiency.
| ASIN | B000BQSYRO |
| Batteries Included? | No |
| Batteries Required? | No |
| Best Sellers Rank | #321,999 in Tools & Home Improvement ( See Top 100 in Tools & Home Improvement ) #1,241 in Weather Stripping |
| Color | no color |
| Coverage | 33 square feet |
| Customer Reviews | 4.7 4.7 out of 5 stars (667) |
| Date First Available | January 16, 2007 |
| Global Trade Identification Number | 00716511516014 |
| Included Components | Insulation Resistance Meters |
| Is Discontinued By Manufacturer | No |
| Item Package Quantity | 1 |
| Item Weight | 14.4 ounces |
| Item model number | ST16025 |
| Manufacturer | Reflectix |
| Measurement System | Metric |
| Part Number | ST16025 |
| Product Dimensions | 10 x 16 x 10 inches |
| Size | 16 in. x 25 ft. |
| UPC | 629136004135 716511516014 071651151601 735090194642 |
| Warranty Description | Warranty |
H**R
Feral Cat Shelter Approved! PURRFECT!
This worked out just perfect for our feral cat shelters. We were able to double insulate 3 shelters with some insulation left over using just one roll. -We used 1 Rubbermaid tote for each shelter (used to have to use 2 totes lined with styrofoam, one inside of the other before using the foil insulate). *DIY Instructions: -Cut 1 hole out of the front of the tote for an entrance and one out of the side-towards the rear (for an escape should anyone try to enter and a cat need to quickly exit). -Make sure the circular cut out for the doors can swing through like doggie-doors (circular, not square, as it is ideal for a cat's shape and not as inviting to other predators), then adhere them using gray/dark duct tape to the inside and outside of the tote so they can swing open and closed (the hole should be slightly larger than the cut-out) **silver electrical tape is fine for the inside, but it will reflect any light and draw attention to the shelter, so be sure to use a dark, sturdy tape for the outside of the tote** -Then start to insulate! This Reflictix insulation is thick, but is lined with bubble pockets, so it is a dream to cut! -First, flip the tote over and cut a piece that is almost as big as the outside bottom of the tote. Then, cut 2 more piece slightly smaller than that piece. These will be the floor of the shelter (I like to add one more layer for some extra protection and cushion, but 2 will do...you never know when/if a mama cat is going to have kittens in there). Now set those aside. -Next, stand the whole roll of insulation up inside the tote, press it firmly to the 4 sides to see how much you need for your first wall/layer of insulation. Then using your finger press down and make a crease/line where you want to cut (its so easy to use you can actually make your measurement marks with your finger because of the bubbles). -Take the roll out of the tote and using a box cutter (or scissors), cut it to length. -Line the inside bottom of the box with double-sided tape or super glue. I reccomend the tape because its forgiving if you need to maneuver the insulation. Put the larger of the 3 bottom pieces down and firmly press it into place. Set the other 2 bottom pieces aside. -Next, line the rest of the inside 4 walls with the double-sided tape or glue (skipping the area where the doors are). -Roll the insulation up that you measured for the walls, stand it straight up and center it in the tote. - Starting from the front corners carefully and tightly press the insulation against the walls of the tote. Press it firmly, all the way around until you get to the end (if it overlaps or is a little short, that's okay, you're going to be making another layer anyways). -You'll notice that the doors have been covered...lay the tote on its side(s) and then with a kitchen knife, carefully cut around each hole until the opening is once again visible. Any loose pieces can be taped down around the hole of the door opening or simply torn off. -Save those circular cut outs and tape them to the back of the doors for extra insulation. -Now take the large roll of left over insulation and again measure how much you'll need for the inside. This time, measuring in 2 sections. You'll measure from one side of one door to one side of the other and cut out that piece. Then you'll measure from the other side of the door to the other side of the other door, then cut. -Now, if you have hot glue (or super glue) this works best here). You're going to glue the insulation pieces down firmly, leaving spaces where the doors are without extra insulation for the moment. -Any extra insulation than is sticking over at the top of the tote that would cause the lid not to close, you can either fold and glue over or cut around the tote until it is level (we fold and glue). -Next go ahead and glue the 2 bottom pieces of insulation down. -Now, Cut a couple square pieces out to cover the spots above and below the doors that did not get covered with the 2nd layer of insulation-it doesn't need to be perfect. -Finally, close the tote, making sure your lid fits on tightly and ensure that the doors swing through. -Now your shelter us complete! -Set the shelter up on wood planks/2x4's-flat or stone/cement pavers and cover the top with something that will allow the rain to run off (sheet of plywood, old rubber floormat, etc) to keep it as dry as possible, and fill the inside with straw (not hay). If possible, hide the shelter behind some bushes where it is accessible, yet not easily visible to other wildlife. Check it regularly and change out the filler (straw). This shelter will not only keep the ferals safe for this season but is very sturdy and should last for many seasons to come. Good luck and thank you to all who are able to help repay these community cats that do more for us than so many understand. Our pockets are often empty, but our hearts are always full. Adopt don't shop! Rescue until there's no longer a need!
C**E
Effective Insulation
Better than no insulation in the attic, until I can get it done. It helps this winter, and it is perfect for my travel trailer.
R**A
So Easy to use for any DIY-er project
Used this to insulate kitchen cabinets on outer walls in our old house.Very easy to cut to sizes needed. Thin, but quality insulating properties, so doesn't take up valuable cabinet space. Easily and securely stapled to cabinet walls. Great product and well packaged.
B**.
does the job
I used this product to insulate the ducting in the furnace cubard making sure to be well enough up from the furnace 6" I was losing a lot of heat into the cubard now the ducting is insulated the cubard is a lot cooler, now the heat is going where it is supposed to into the ducting. A good product easy to instal,
J**R
Love the double bubble ....
Insulation worked great !
H**K
Line coolers with it.
Excellent product. Use it to line coolers & ice lasts a lot longer.
B**P
Works great!
I read a lot of "expert reviews" who say this doesn't work. Well, I disagree. First off, I didn't go put this all over the attic, and I already have thick insulation I put in a year ago. That being said, I live in South Texas, and it's hot, and I have 3 specific hotspots in my house. One is over the stove where my pipe is vented to the roof. I cut 2 sheets approximately 4 foot long, and placed them in the attic, next to the vent pipe, and the sun reflects out thru my roof vents. Then I went to my air handler which is in a hall closet. The heat from the attic comes down here. So, I cut sections and placed it all around the air handler on the inside of my ceiling (not attic). Then I went where I have a pull down ladder for my attic, and I cut a long sheet and slid it under the steps. Well, my hot spots are gone, at least for the house. Maybe it will help my electric bill....have to wait and see.
K**Y
Affordable insulation
Saw this in a video and it’s as good as she said it is! Affordable easy to install and made a difference on the heat bill. Thank you!
Trustpilot
1 month ago
2 months ago


